Overview
This article explains how to view labs based on their status—active, decommissioned, and expired—on the lab management page. By default, only active labs will be displayed, but these features enhance lab oversight by allowing users to filter and access information about labs according to their requirements, including those that were previously inaccessible after expiration or decommissioning.
By the end of this documentation, you should be able to:
View decommissioned labs and understand their status.
Access expired labs and review their configurations.
Steps to View Decommissioned Labs
Follow the steps below to view decommissioned labs:
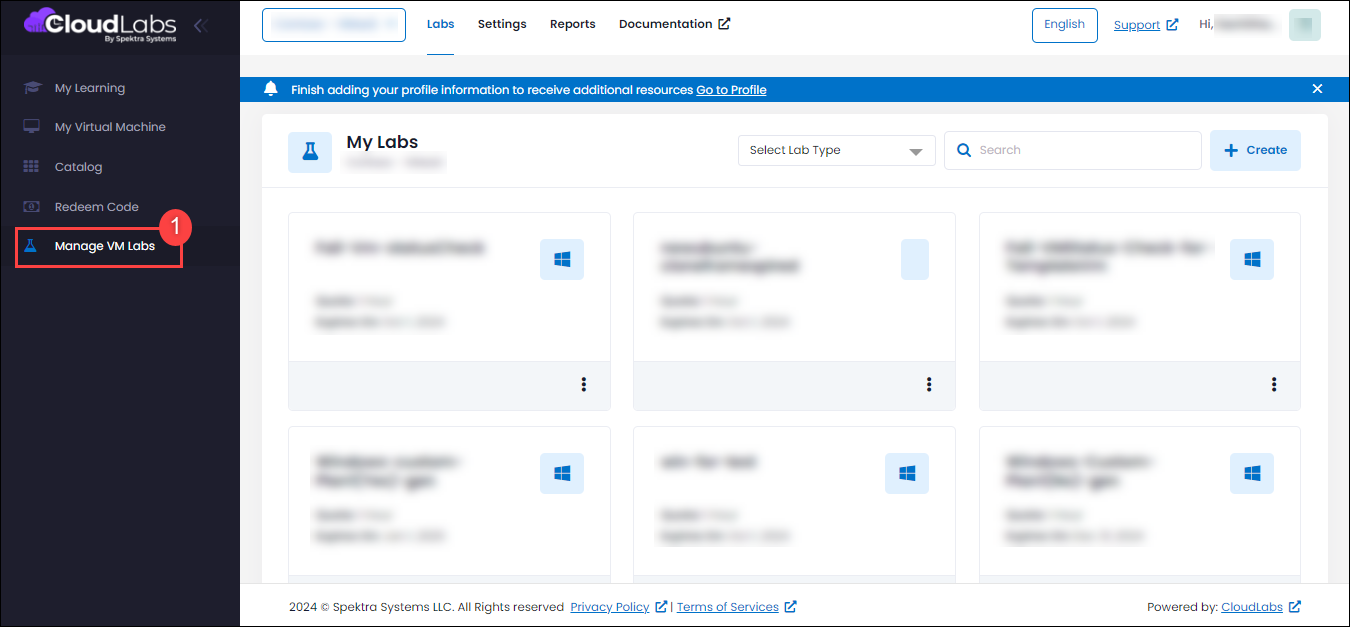
Log in to https://portal.cloudlabs.ai/ and select Manage VM Labs.

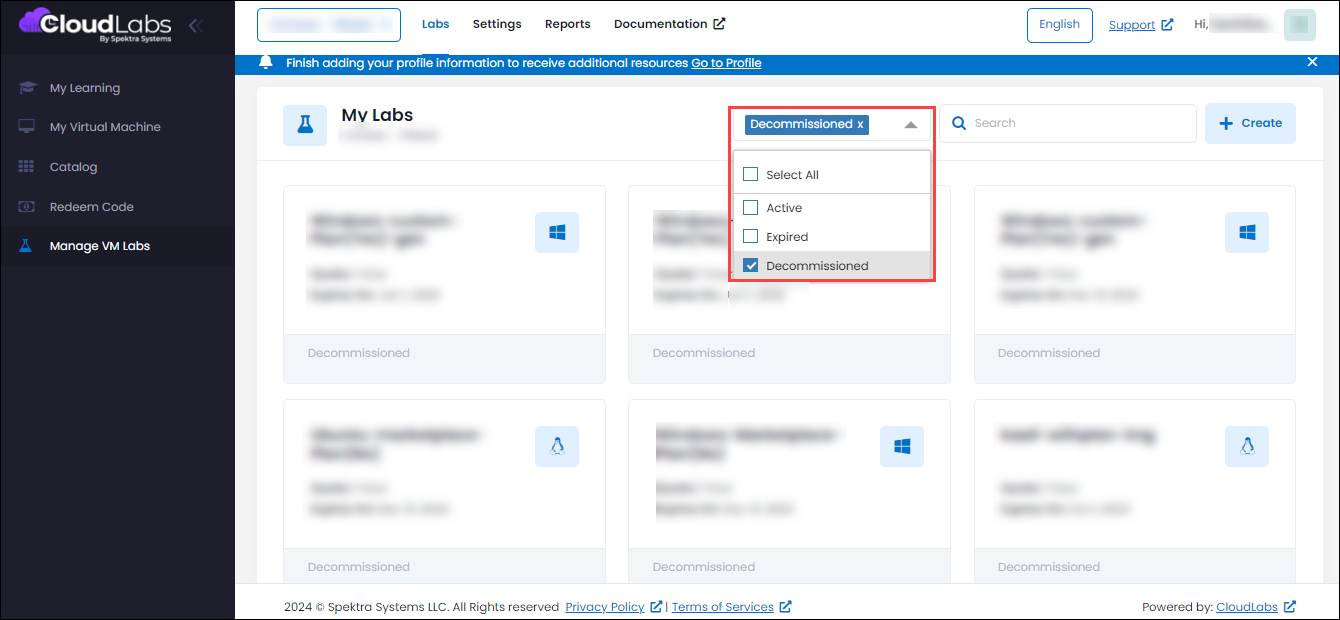
On the Manage VM Labs page, look for the Filters section beside “Search bar”. Here, you can select the Lab type from the drop-down menu to include Decommissioned Labs.

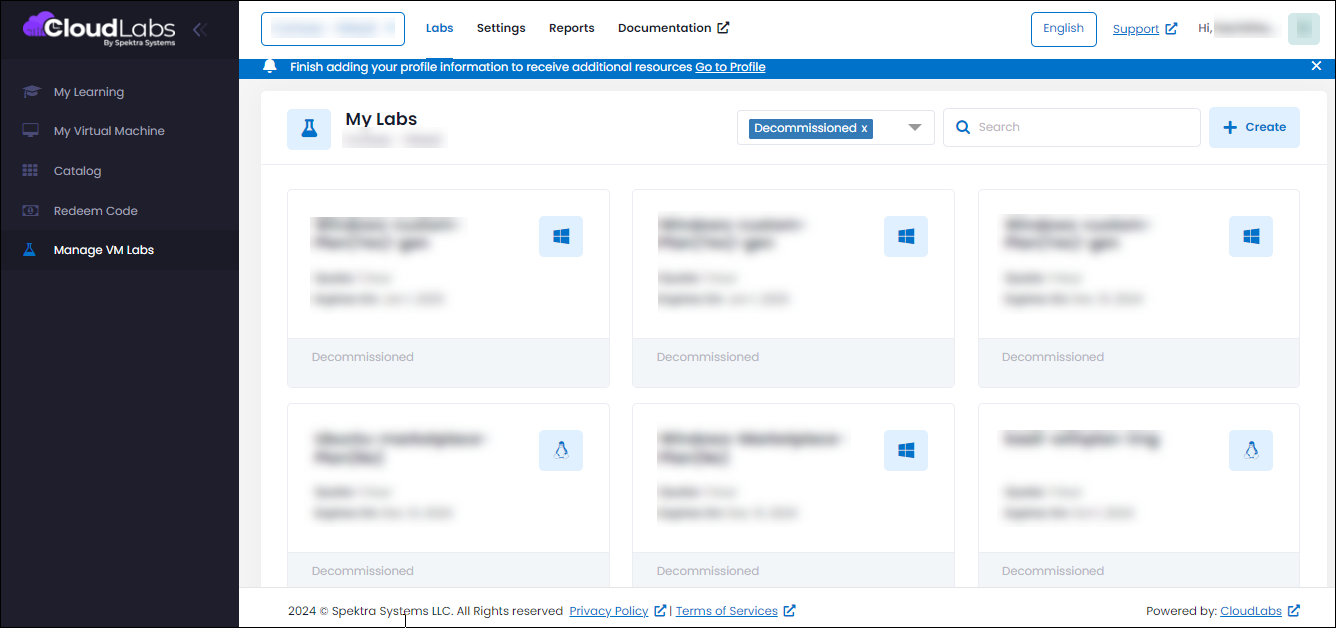
Once the filter is applied, the list will update to show only the decommissioned labs. Note that while you can track these labs, their configurations cannot be interacted with.

Steps to View Expired Labs
Follow the steps below to view expired labs:
Log in to https://portal.cloudlabs.ai/ and select Manage VM Labs.
.png)
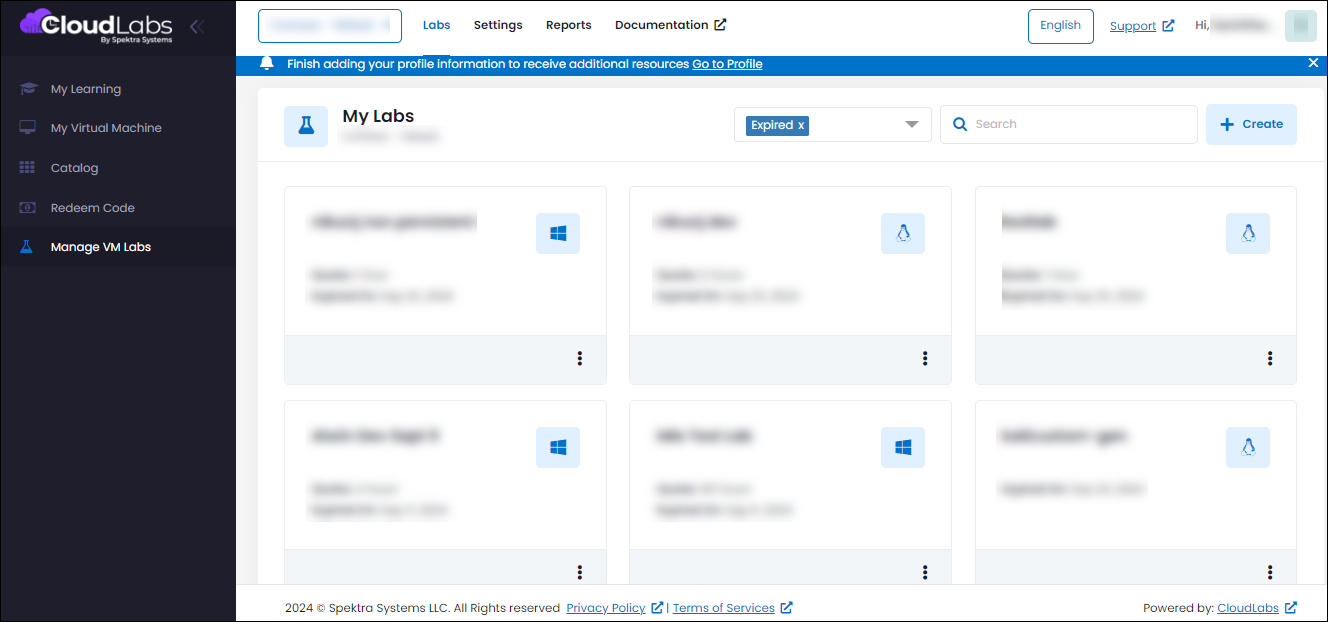
On the Manage VM Labs page, navigate to the Filters section. Here, you can select the Lab type from the drop-down menu to View Expired Labs.
.png)
After applying the filter, the list will display all expired labs. You can review their configurations and choose to extend their expiration dates if required, allowing you to provision instances again.

NOTE
In the filter, it is possible to choose both Expired Labs and Decommissioned Labs together, allowing you to view both types of labs simultaneously.
Next Steps
Now you know how to efficiently view decommissioned and expired labs, enhancing your lab management capabilities. For viewing your created lab, their configurations or managing lab instances, kindly refer to the links below: