Overview
CloudLabs VM Labs allows you to oversee and control all lab instances for a given lab. Lab instances are the distributable units within CloudLabs VM Labs, created for users based on predefined lab configurations. To learn more, refer to Lab Instances.
By the end of this documentation, you should be able to:
Deploy new lab instances.
Start, stop, and delete lab instances.
Manage access to the lab.
Connect to any VM within a lab.
Manage the lab instances in bulk.
To manage lab instances, log in to https://portal.cloudlabs.ai/, navigate to the Manage VM Labs (1) tab present in the side pane, and click on your lab (2).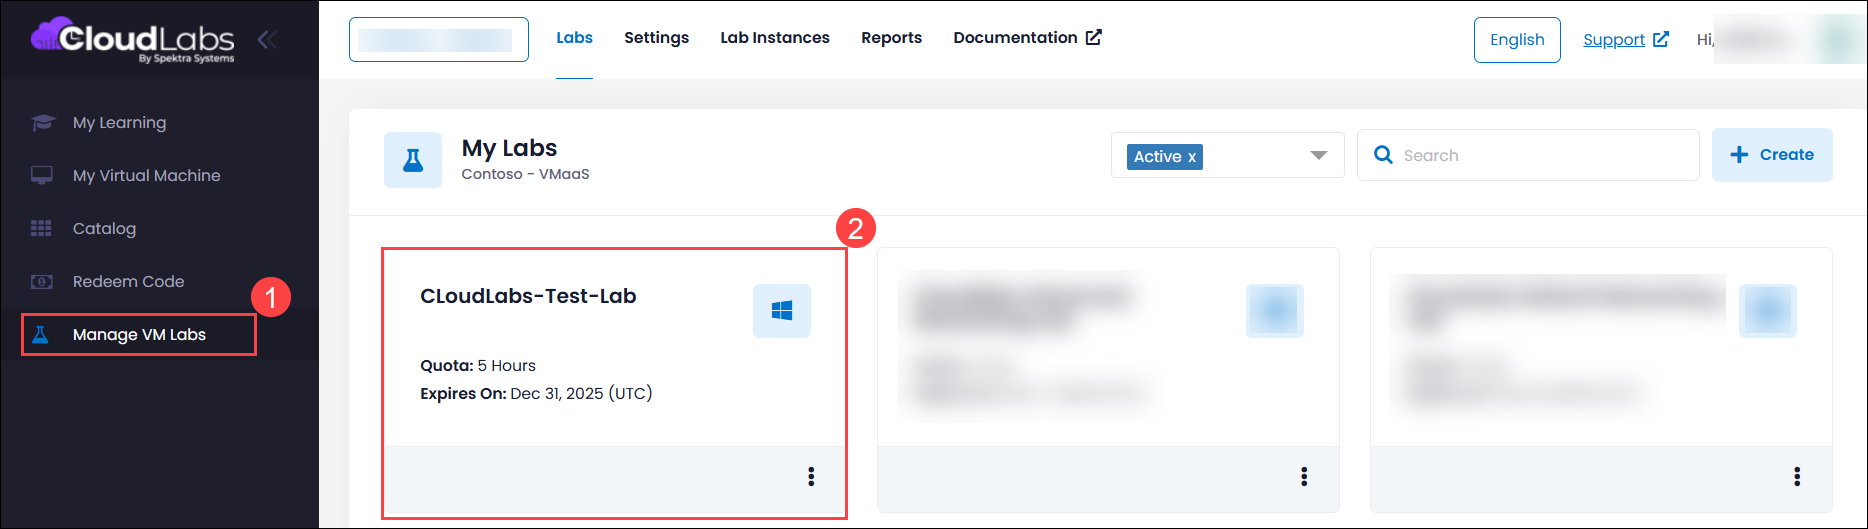
An alternative way to navigate to VM lab instances is by clicking on the More Options (1) icon on the lab and select the VM Lab Instances (2).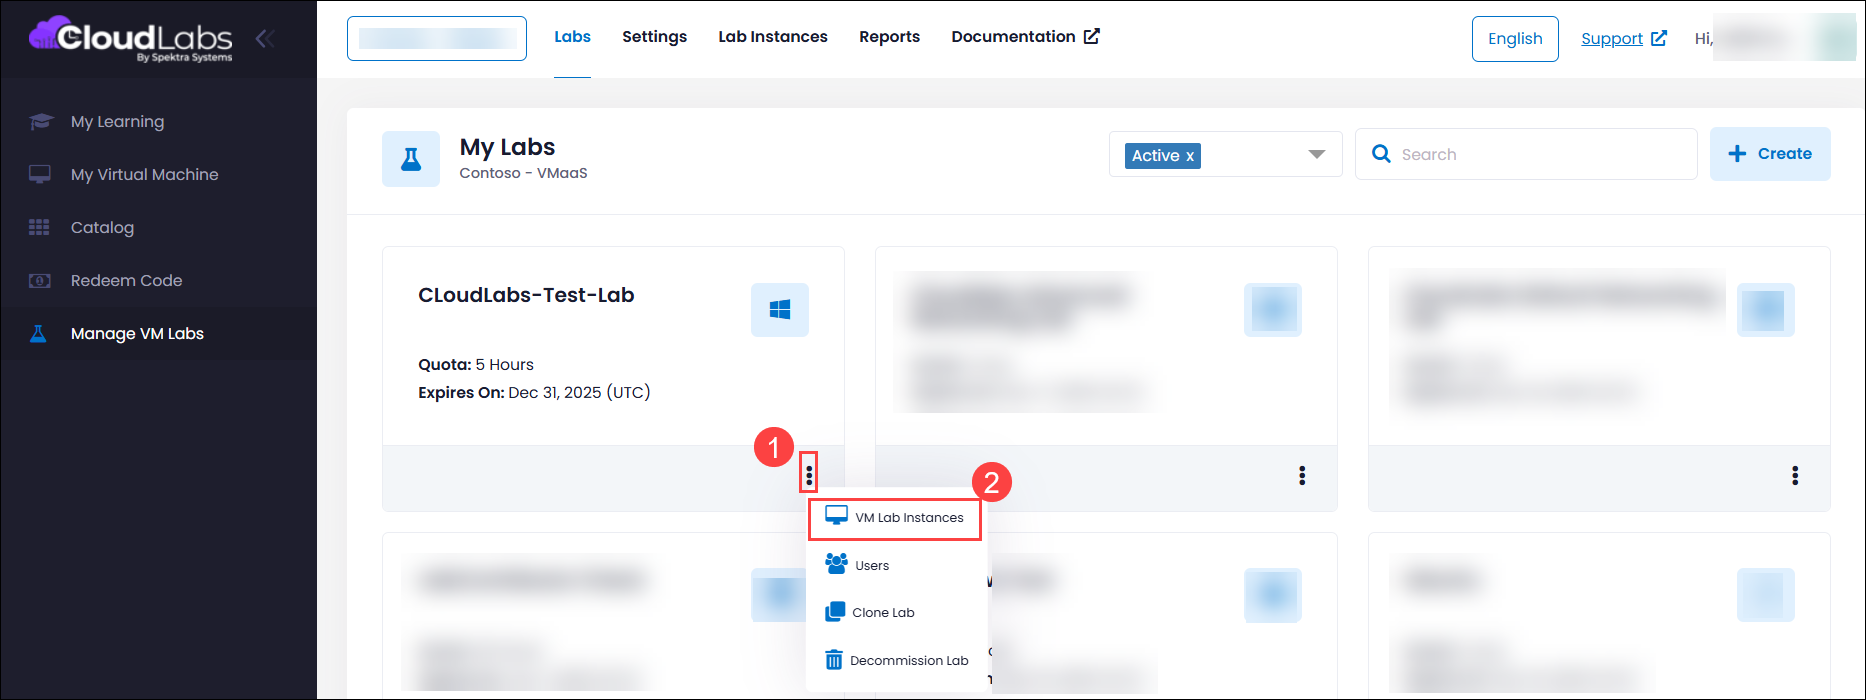
VM Lab Instances
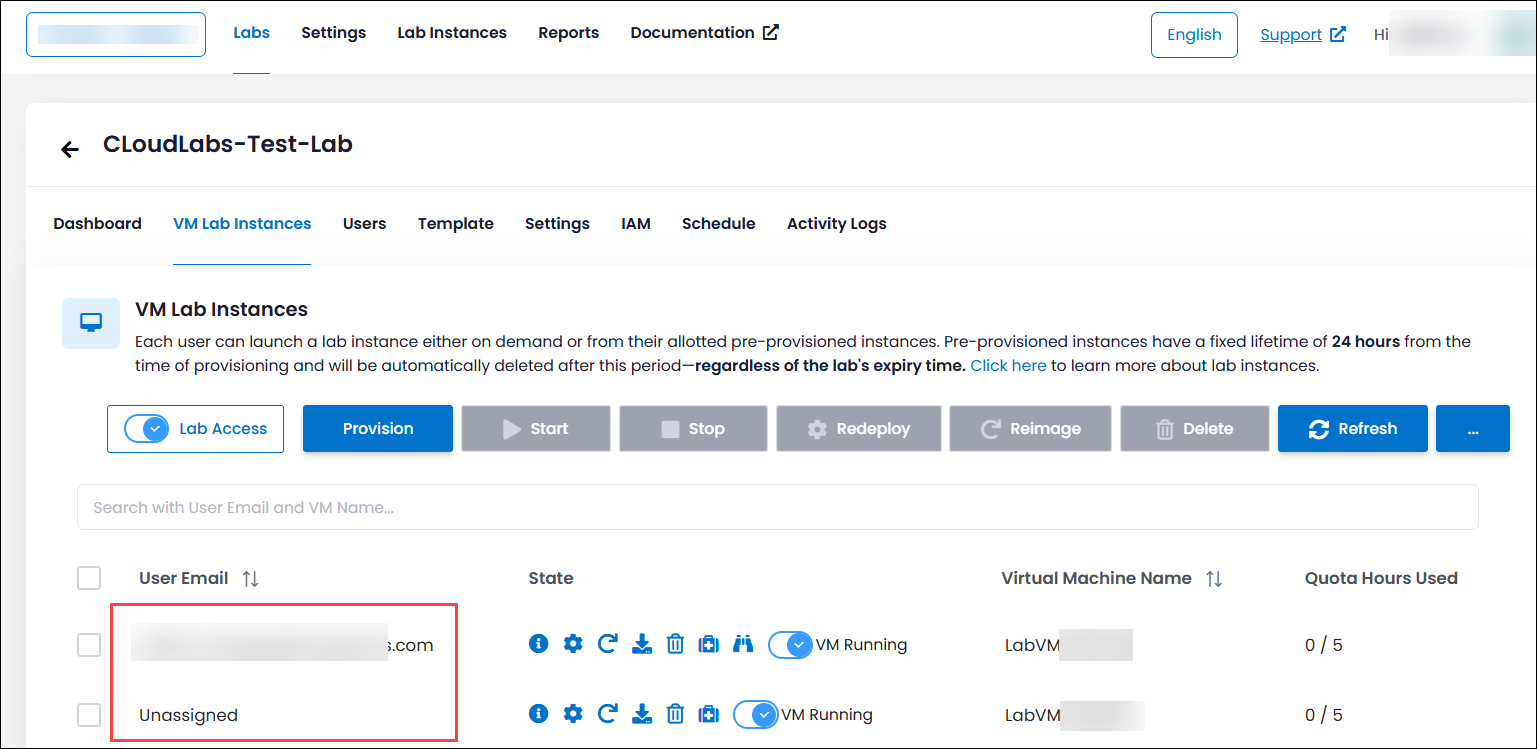
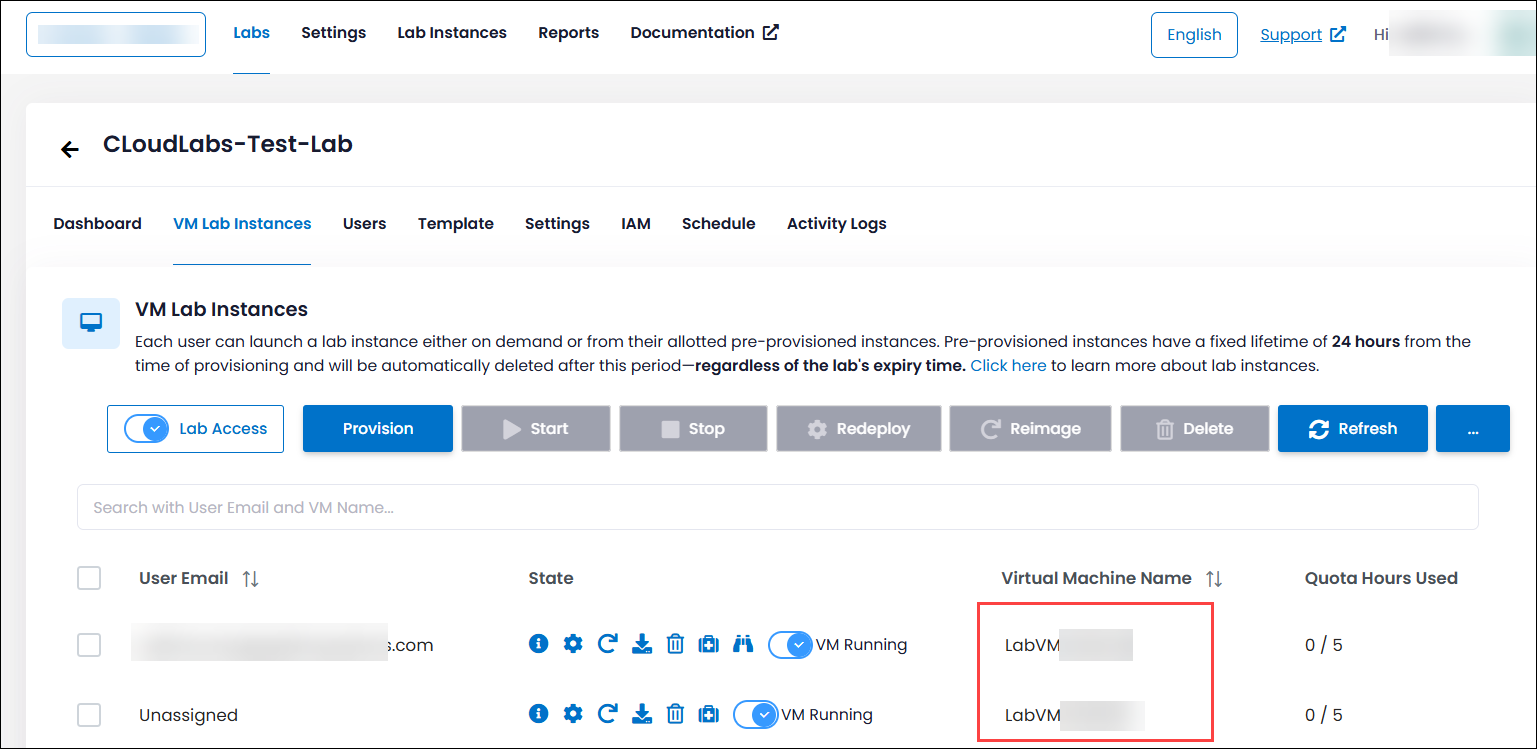
The VM lab instances section provides a detailed view of all active lab instances in the lab. Each entry in this table represents a distinct instance.
User Email
Displays the name of the user assigned to each lab instance. If the instance is not associated with any user, it will show as Unassigned.
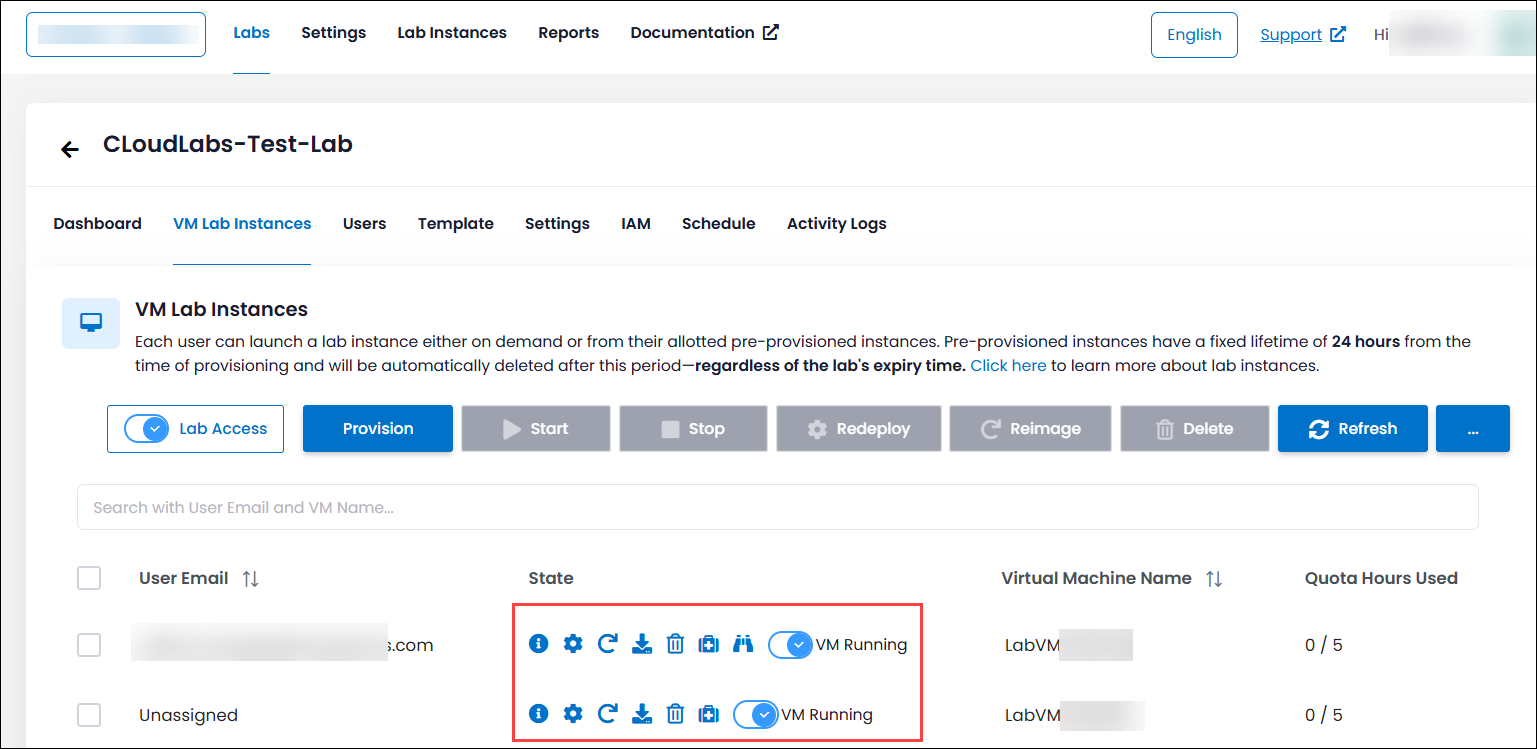
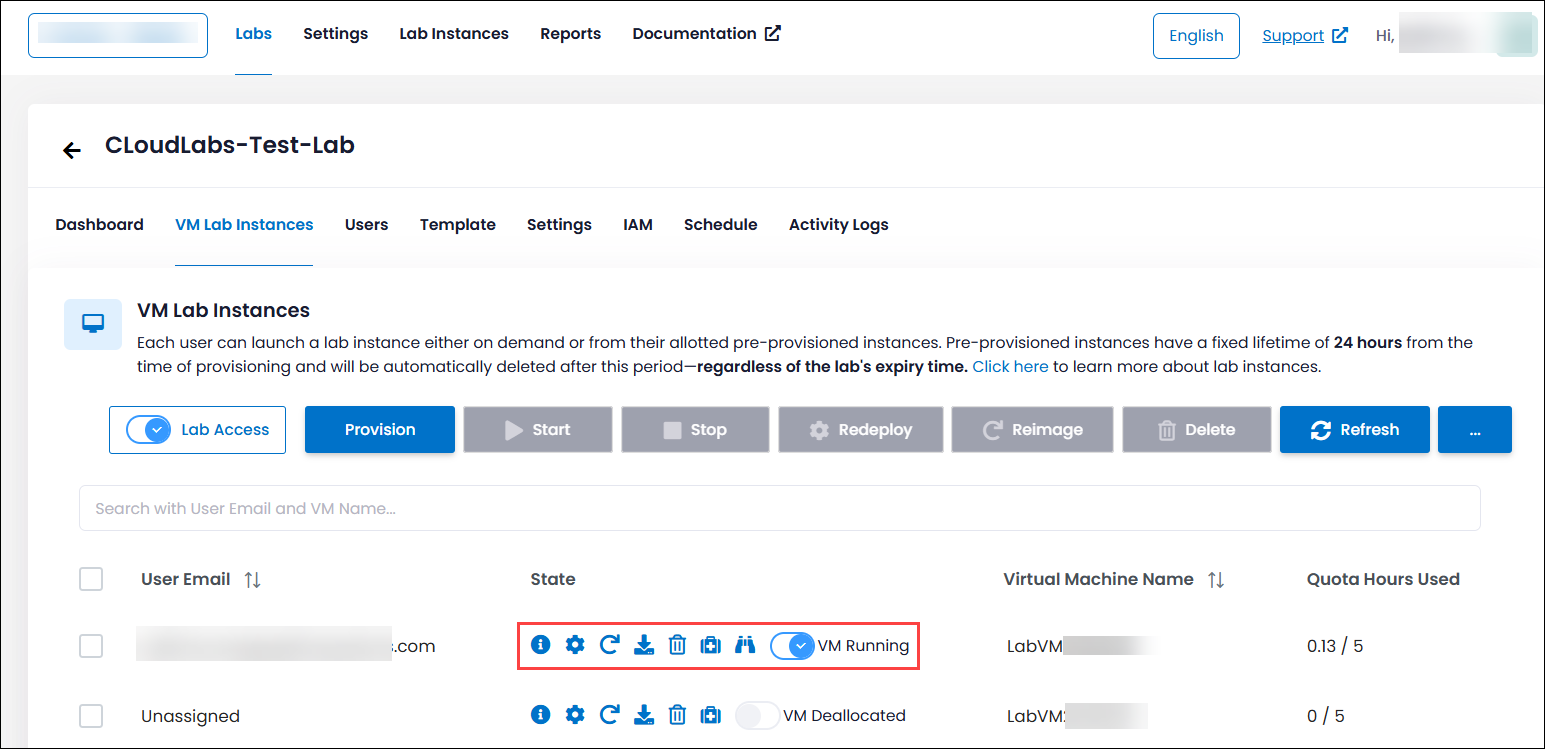
State
Indicates the current power state of the virtual machine associated with each lab instance. Using the toggle button, you can either start or stop the VM.
The following table describes each instance state and indicates whether that state is billed for VM usage.
Power State
Description
Billing
Creating
Virtual machine resources are allocated.
Not Billed
Starting
The virtual machine is powering up.
Billed
Running
The virtual machine is fully up. This state is the standard working state.
Billed
Stopping
This state is transitional between currently running and is stopped.
Billed
Stopped
The virtual machine is allocated on a host but not running. Also called PoweredOff state or Stopped (Allocated). This state can be a result of invoking the PowerOff API operation or invoking shutdown from within the guest OS. The stopped state might also be observed briefly during VM creation or while starting a VM from the stopped (deallocated) state.
Billed
Deallocating
This state is transitional between Running and Deallocated.
Not Billed
Stopped (Deallocated)
This state is similar to the Stopped State. Here, the VM is stopped from Azure rather than through the OS. The key difference here is that the non-static public IPs will be released, but you’ll also stop paying for the VM’s computing costs. This is a great way to optimize VM cost.
Not Billed
Also, there are other options, which are discussed in the later part of this page.
VM Name
Shows the VM Name name of individual lab instances.
Quota Hours Used
It shows the total duration allotted to each lab instance and the user’s active quota usage.

Update VM Instance
CloudLabs VM Labs makes it super easy to control and manage individual VM instances.
Start or Stop Lab Instance
Using the start or stop toggle button, you can start or stop the VM for the lab instance.
Redeploy a Lab Instance
Redeploying a lab instance assigns the VM to a new Azure node. Redeploying a VM instance wipes the user data stored on the temporary disk and retains the data stored on the OS disk (C: drive).
Reimage a Lab Instance
Reimaging a lab instance resets the VM and creates a new VM instance for the user. All the data on the temporary disk and OS disk will be lost, and it is irreversible.
Delete a Lab Instance
Click on the delete action button to delete the lab instance. It permanently deletes the lab instance and all associated cloud resources.
This action is irreversible, and any user data on the VM will be permanently lost.
Connect to a Lab Instance
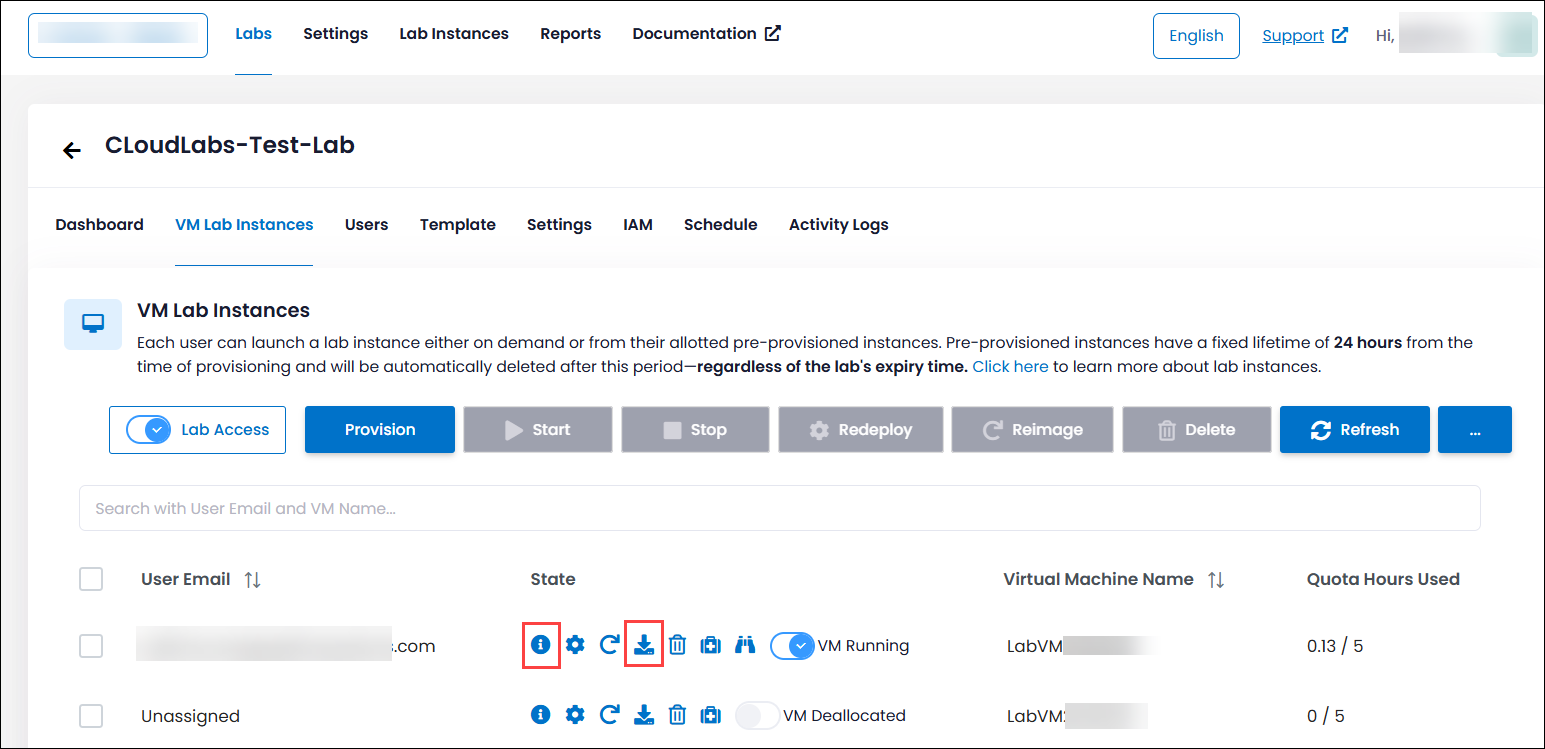
There are a couple of ways to connect to any VM as an instructor/admin.Using RDP Connection Information: You can get access to the connection information of any VM by using the show connection information option. Additionally, you can also download the RDP file, use the connection information, and connect to the VM instance.
Shadow VM: If Direct Web Connect was enabled while creating the lab, you can use the shadow VM feature to connect with any VM directly via the web. Just click on the Connect button and you will be navigated to a new browser tab with VM access. Refer to Direct Web Connect and Shadow VM to learn more about VM shadowing.

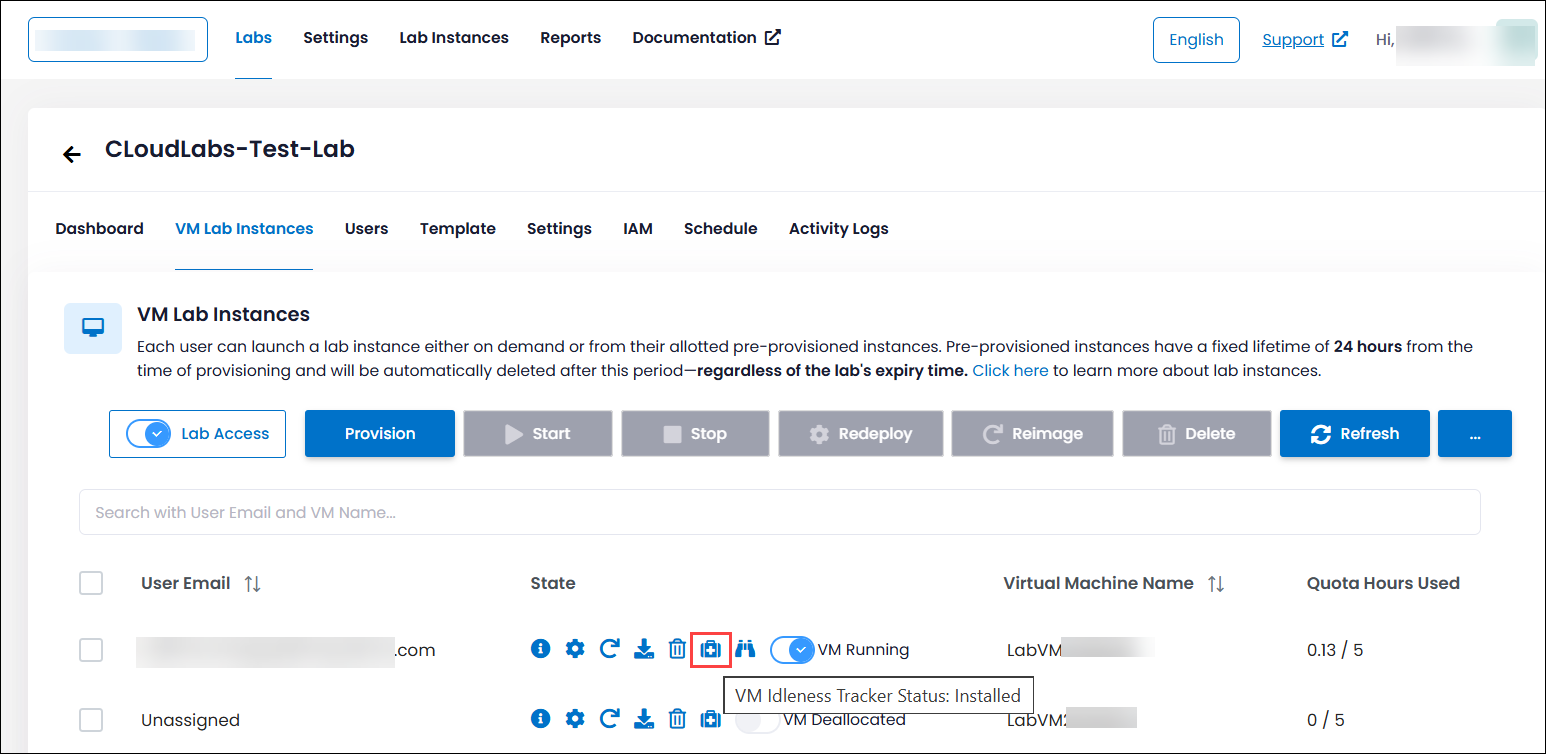
VM Idleness Tracker Status
The VM Idleness Tracker Status provides real-time updates on the health of the idle tracker installed on the virtual machine to monitor VM activity. During the deployment of the VM, the status will initially display as "Installation In-progress." Once the deployment is completed, typically within 2-3 minutes, the status will be updated to "Installed."
Note:
The VM Idleness Tracker is not applicable to all virtual machines. To determine the images that support the installation of the tracker, please refer to Supported images. If an unsupported image is utilized for the lab, the tracker installation status will be marked as "Failed." This ensures that only compatible virtual machine images are used for tracking idleness
Bulk Lab Management Options
With CloudLabs VM Labs, handling multiple VM instances simultaneously becomes effortless. You can simply select several VM instances at once and carry out your desired actions smoothly.
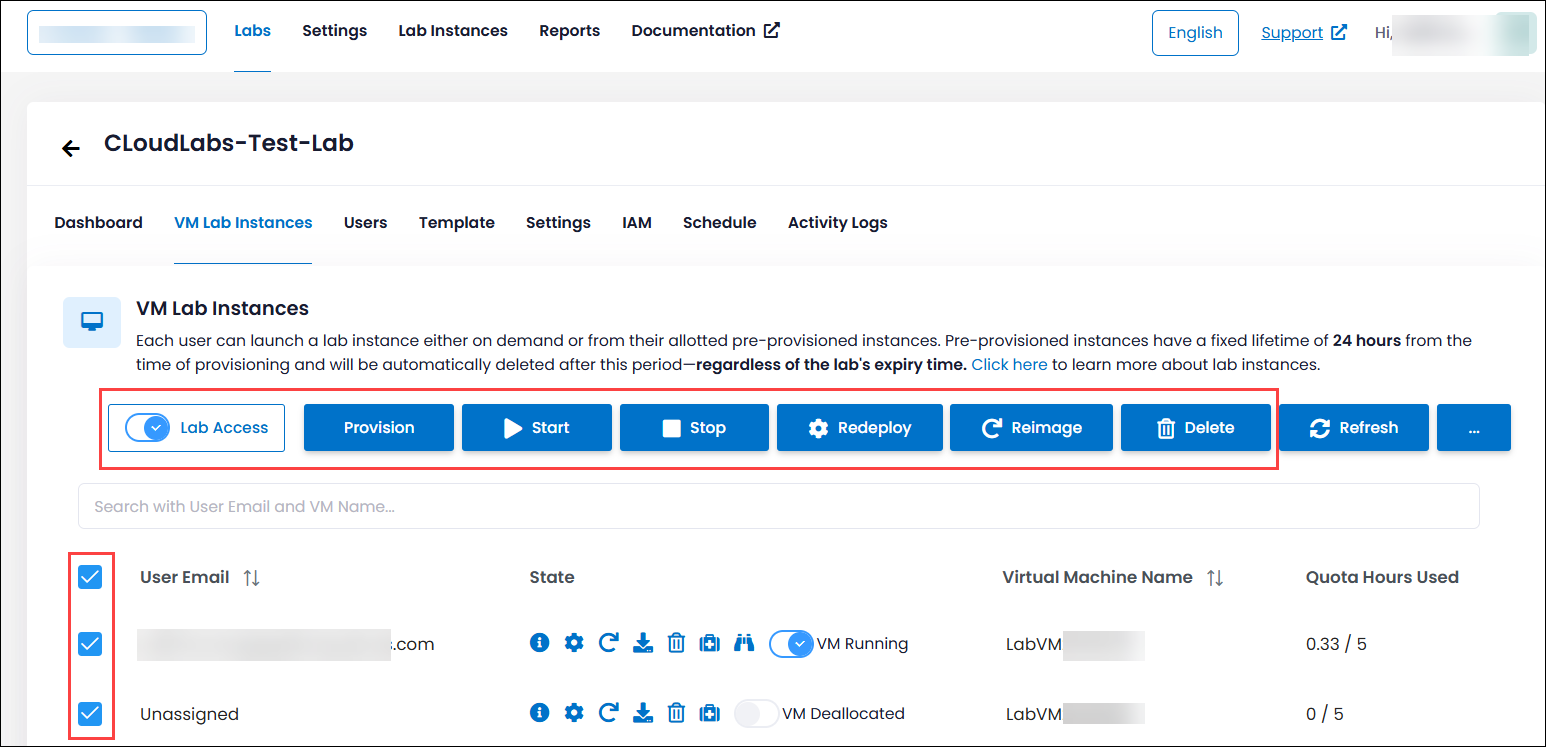
Manage Lab Access
The Lab Access button allows you to control the user access over the VM instances. With the Lab Access button toggled off, users won’t be able to connect to the VM or start/stop the VM, and vice versa. Admin will have to start/stop the VM in this case.
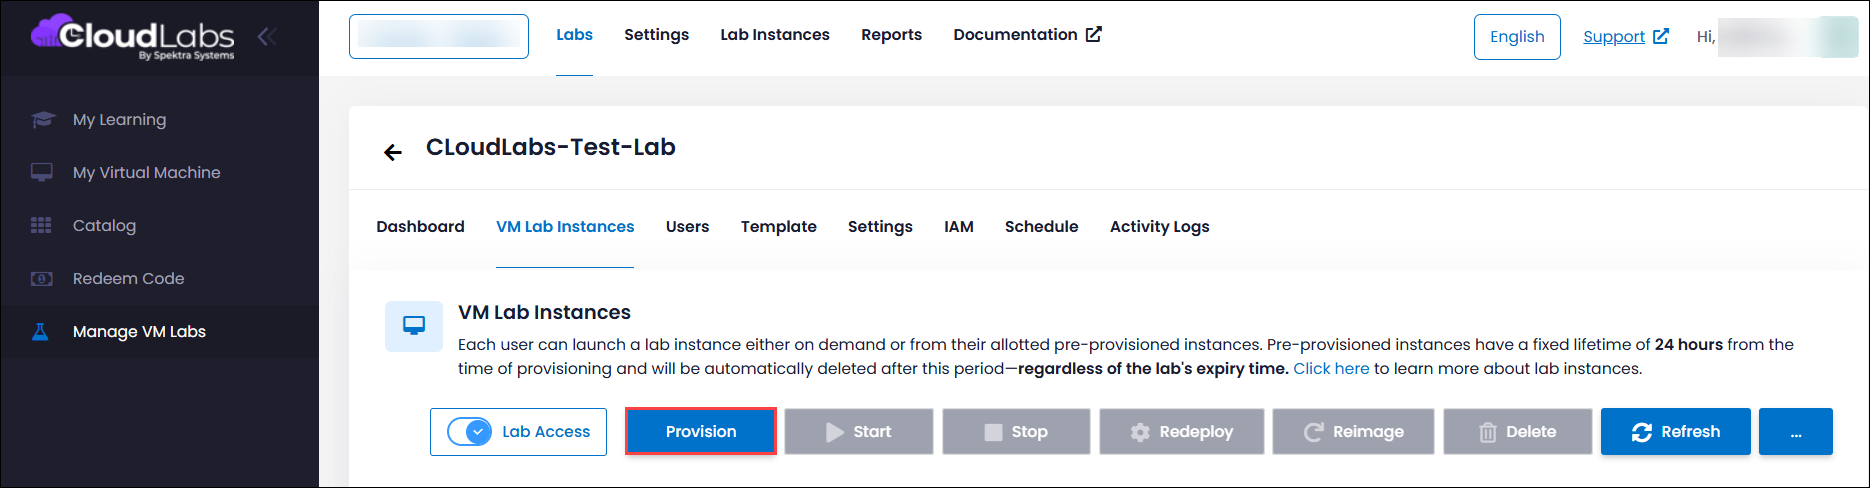
Deploy Lab Instances
Lab instances are typically deployed on-demand, which means they are set up to deploy when a user launches their VM instance, which can take a few minutes. To reduce this wait time, you can pre-deploy lab instances. This proactive step ensures that instances are ready for immediate use, eliminating the initial deployment delay.
Steps:-Click the Provision button on the VM Lab Instances page.
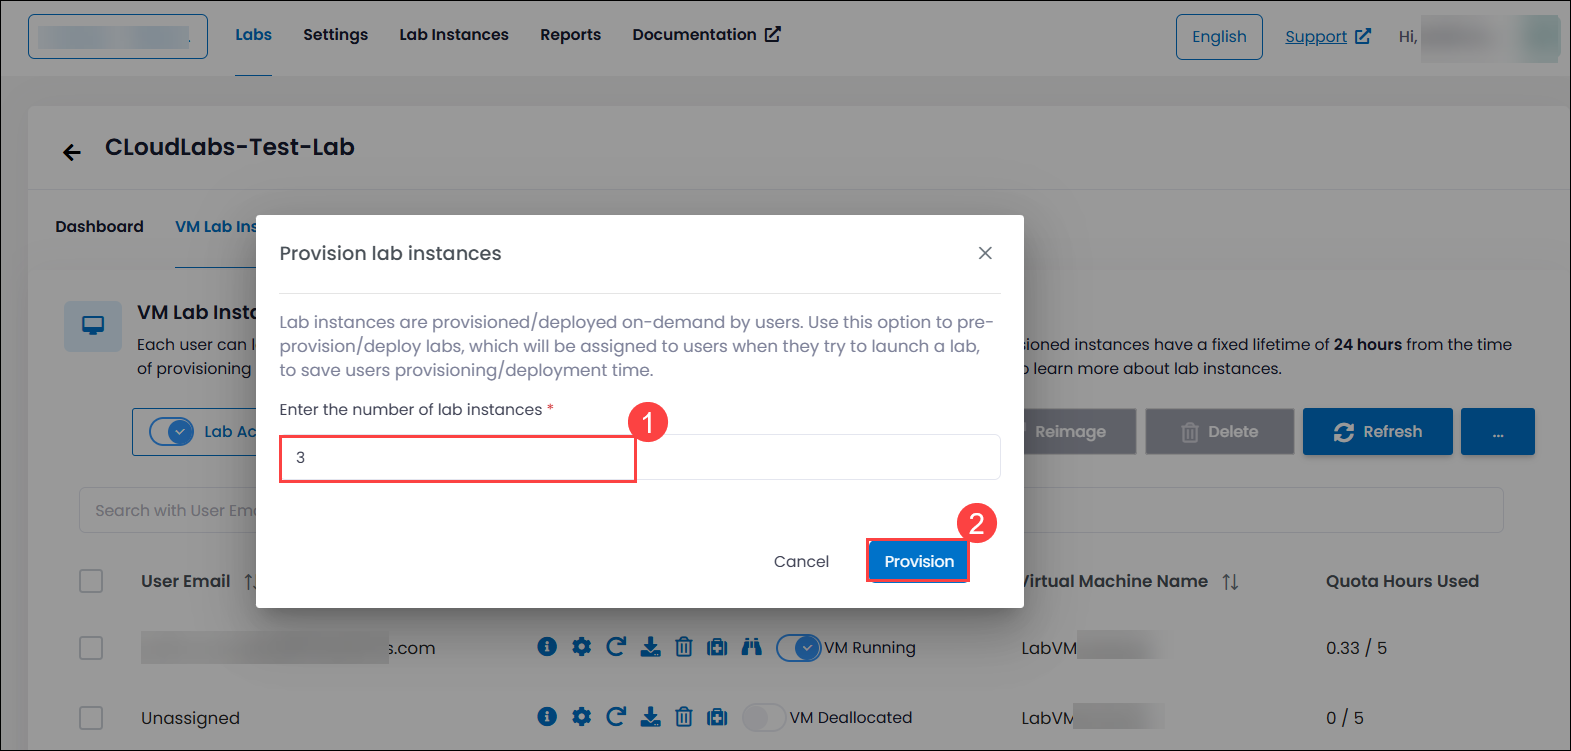
In the pop-up window, enter the desired number of lab instances (1) to deploy.
Click on Provision (2) to initiate the lab VM deployment.
To learn more, refer to Hot Instances.
NOTE:
The lifetime of an unassigned VM instance is 24 hours. After this period, any unassigned instances will be automatically deleted.
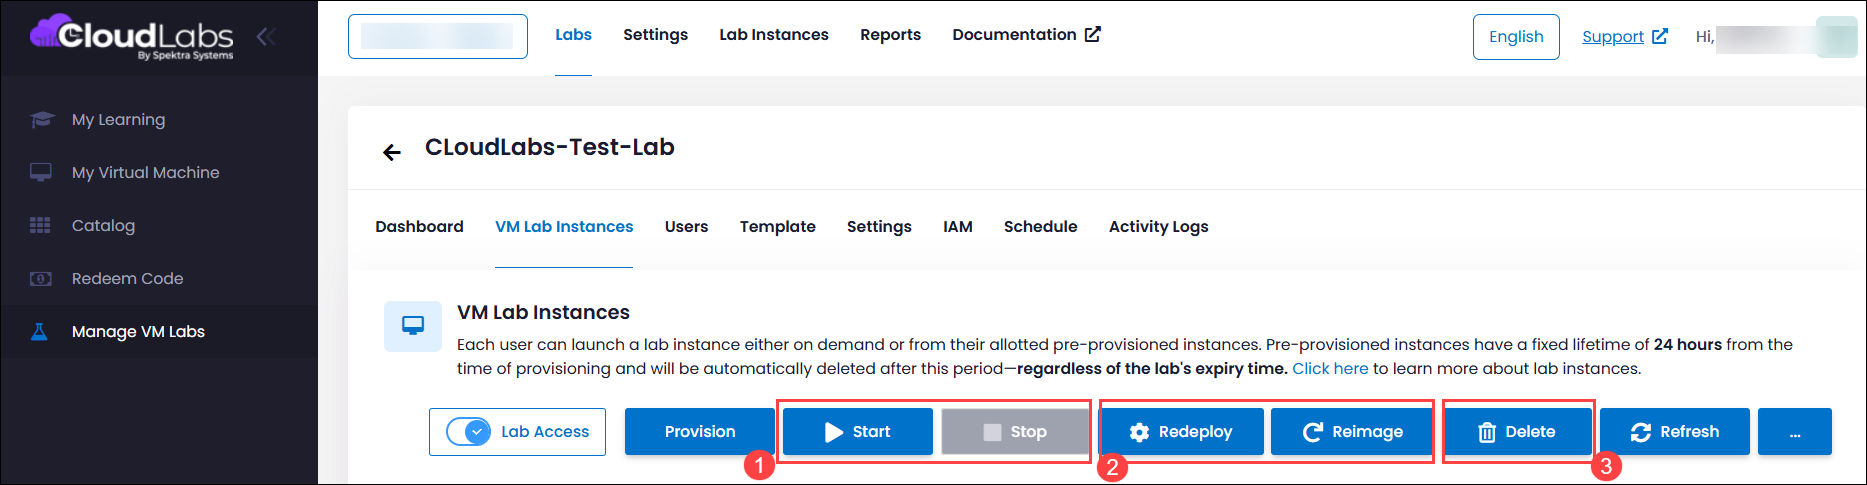
Manage actions on Lab VMs
These options allow simultaneously controlling the operational state of all VMs within the lab.Use the Start/Stop VM (1) action button located on the VM Lab Instances page. Click on the Start button to activate all VMs or the Stop button to deactivate them.
Use the Reimage/Redeploy VM (2) action button to reimage and redeploy multiple VM instances at once.
NOTE:
When reimaging/redeploying a deployment, the quota will not be reset. For example, if the quota is set to 1 hour and you reimage/redeploy after 30 minutes (0.5/1), the quota will continue from the 30-minute (0.5/1) mark, not reset to 1 hour.
Use the Delete (3) button to bulk delete the selected lab instances.
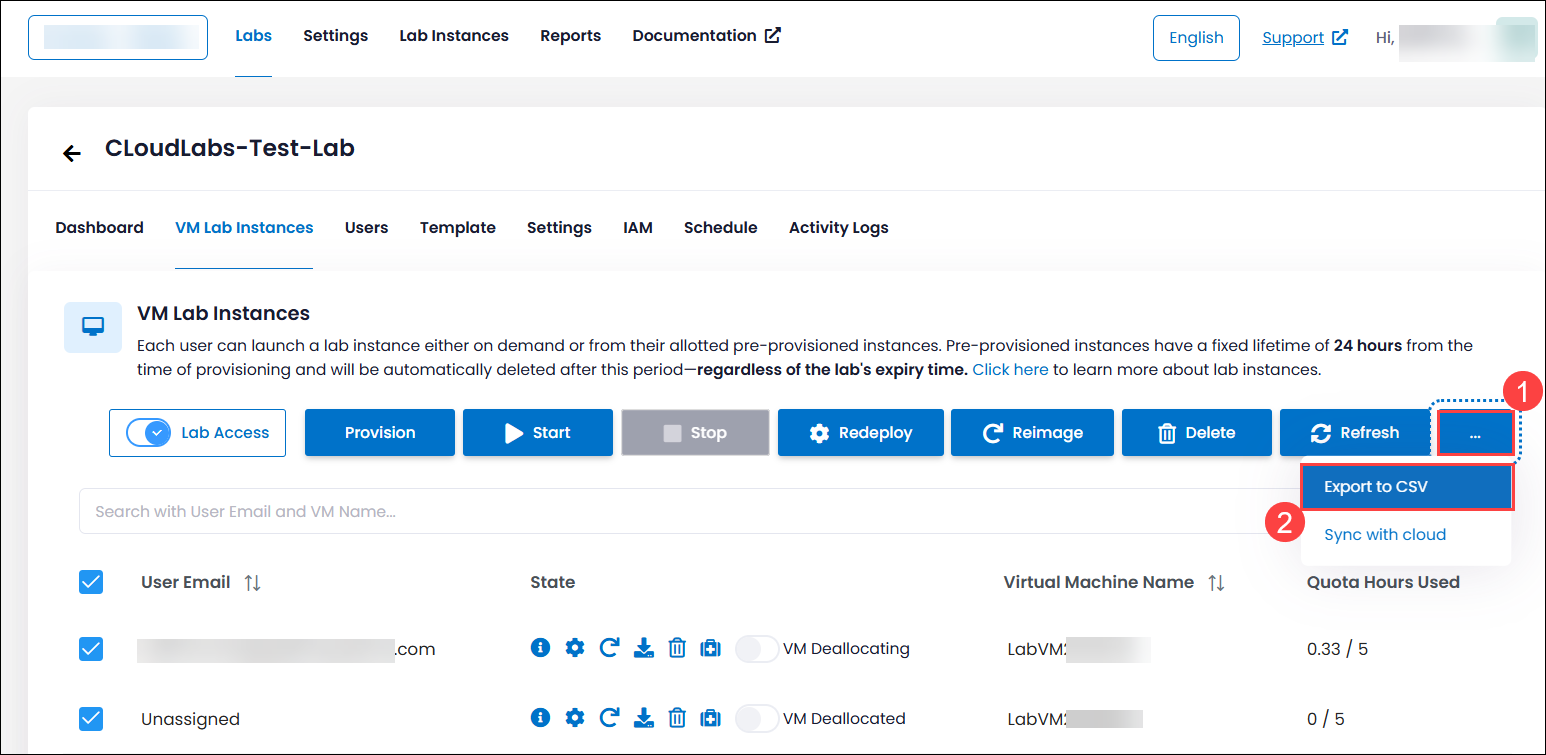
Export lab instance data
You can also export the data under the lab instance by clicking the More Options (1) tab on the VM Lab Instances page and then selecting Export to CSV (2).
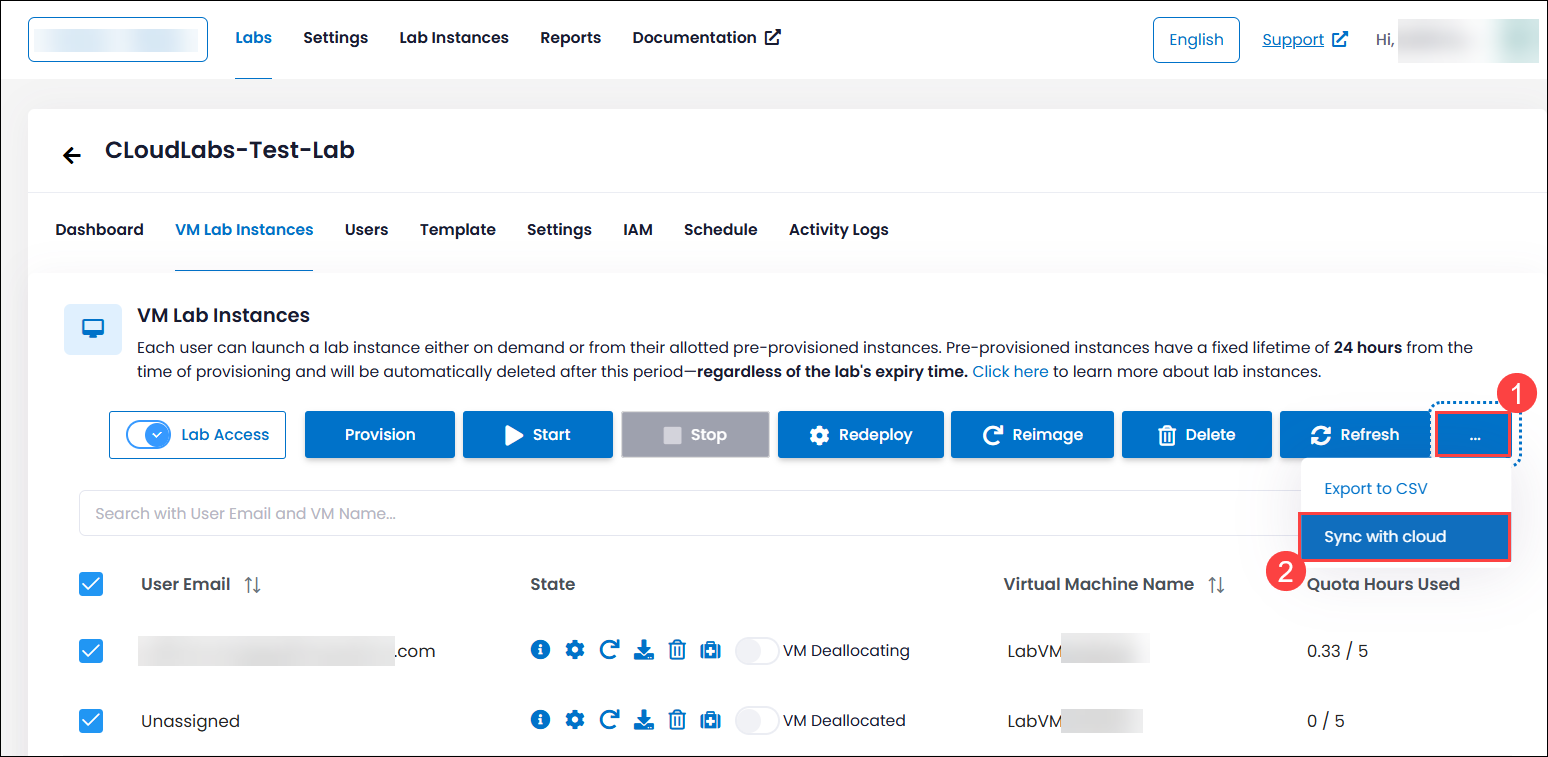
Sync with cloud
When there are deployments in the lab, you can click on the More Options (1) tab on the VM Lab Instances page and then select the Sync with cloud (2) option to get the current state of the VMs. This action ensures that the lab data is updated and stays in sync with the cloud environment, reflecting the accurate status of the VMs as they are deployed in Azure.
Enhanced VM Status Tracking
We’ve enhanced VM status tracking across the portal to deliver more accurate and consistent visibility into virtual machine activity. VM statuses on the Users page now stay reliably in sync when machines are started or stopped, eliminating confusion during lifecycle transitions. Issues between the Creating and Starting states have been resolved, so a deallocated VM now correctly moves from VM Starting to VM Running, while stop actions transition cleanly from VM Deallocating to VM Deallocated.
These updates also improve real-time accuracy by closely aligning portal status updates with Azure-triggered events. With more frequent synchronization, VM state changes are reflected faster and more reliably across the portal, giving users a clearer, real-time understanding of their virtual machines and greater confidence in managing them.
Next Steps
In this article, you learned how to manage VM lab instances using different available actions.