Overview:
This document provides a comprehensive guide to the end-to-end process of onboarding a VM + Azure based lab scenario using the CloudLabs Admin Portal. For instance, if you need the users to create resources in Azure by following a certain lab guide or document and want a pre-deploy VM in which the users will perform the tasks, then this is the scenario you want to proceed with. Follow the steps outlined below for a successful lab setup.
In this document you will be going through with the below topics:
Prerequisites
Before you begin onboarding a VM + Azure based lab through CloudLabs, ensure you have the following prerequisites:
Admin access to CloudLabs Admin Portal (If access is unavailable, kindly reach out to your point of content or CloudLabs Support).
Active subscription(s) in CloudLabs. Refer Onboard the Subscriptions to CloudLabs document if you would like to use you own subscriptions. If you would like the subscriptions to be already onboarded in CloudLabs then you can contact CloudLabs Support for the same.
Lab Guide/Reference documents containing necessary instructions, often provided through GitHub which are in GitMarkdown format.
Information used for VM with Azure based lab onboarding
To onboard a VM + Azure based lab to CloudLabs, use the below details:
Subscription Types: To onboard a VM + Azure based lab, you should firstly determine what type of access the participants would require and post that you need to select the Subscription type from one of the three types below that CloudLabs offers. It is highly recommended that you apply access and policy constraints for the chosen subscription type.
Shared Subscription : Here, a single subscription can be shared by multiple users giving them access at the Resource Group level, therefore, users will only be able to see and work on the Resource Group provided to them. Depending on the lab's needs and access constraints, you can use shared subscriptions and the users will be having the permission to access the Azure Portal.
Dedicated Subscription : In this type, a subscription can only be used by one user giving them access at the Subscription scope, therefore, attendees can view and manage all the Resource Groups under that subscription if they are assigned with the necessary privileges. Depending on the lab's requirements and access limitations, this subscription type can be suitable in cases where you would like to give access to multiple Resoruce Groups or when some services like Azure Synapse Analytics worksapce require a user to have permissions at subscription scope.
Dedicated Tenant : This deployment type assigns one tenant containing one subscription to the user, where a user can have privileges at tenant(Azure Entra ID) and Subscription scope which allows users to view and manage all the Resource Groups under that subscription if they are assigned with the necessary privileges. This subscription type can be specifically suitable in cases where you would like to provide users with Azure Entra ID based privilieges, such as Global Administrator access so that users can perform actions at the tenant level whilst also at the subscription level to manage multiple Resoruce Groups. Dedicated tenant isolates the user so that their actions will only be effective in one of the tenants assigned to them.
Once you are ready to Onboard the labs on CloudLabs Admin Portal, you need to follow the instructions mentioned below:
Let’s begin with the Onboarding Process:
Setup Template on CloudLabs for Azure
The first step in the onboarding process is to create an ARM template through CloudLabs
You can follow the detailed guide mentioned here to login to the CloudLabs Admin Portal
Follow the below mentioned guide to Add Template in CloudLabs.
You have successfully onboarded the template into CloudLabs.
Use VM Images in ARM template
There are two ways that you can use Azure Images to deploy a VM, either by utilizing Azure Marketplace Images or by creating custom VM Images through Azure Compute Gallery.
Azure Marketplace Images
To deploy a VM using any Azure Marketplace Image, you need to provide the image reference for the Virtual Machine in the resources section of the ARM template. You can get the image reference details from the Usage Information + Support tab.
   "imageReference": {
      "publisher": "<Publisher_ID>",
      "offer": "<Product_ID>",
      "sku": "<Plan_ID>",
      "version": "latest"
},.png)
Azure Compute Gallery
You can follow the detailed guide mentioned below on how to use Azure Compute Gallery service to create a custom VM Image Definition and utilize it.
You can create custom VM images for both Windows and Linux VMs based on the lab requirements. The below mentioned guide will navigate you to the ARM Template section of Adding Template in CloudLabs.
Note: You can also manage these Azure custom VM Images by making changes to the existing VM Image and add the latest Image to the Shared Image Gallery. Follow the below detailed guide.
Add MS Cloud Licenses
You can provide Microsoft licenses to users based on your lab's requirements. The selection of licenses depends on the software services and hosted applications needed for your lab participants. For instance, if the lab requires the users to create Azure Entra ID resources, then you can assign Microsoft Entra ID P1/P2 based on the requirements. However, the addition of licenses is not mandatory and should align with your lab's specific needs.
You can grant a variety of Microsoft licences which includes Power BI Pro, Microsoft 365, Dynamics 365, Enterprise Security, Azure Entra ID (Formerly Azure Active Directory) and much more.
.png)
To add a License in CloudLabs Template, the below mentioned guide will navigate you to the MS CLOUD LICENSES section of Adding Template in CloudLabs.
Setup ODL on CloudLabs
You'll need to create the On-Demand Lab (ODL) and map the template you've created in the previous step. The creation of ODL is only for Admins and not users.
The onboarding process can vary depending on the requirements of your lab scenario.
To create ODL in CloudLabs Admin Portal follow instructions mentioned in the below guide:
You have successfully onboarded the On-Demand Lab (ODL) into CloudLabs.
Note: Once you have successfully onboarded and tested the ODL (lab) during the development process, you can now proceed with creating a new ODL as a production lab for the users to register.
Note: To find more information on ODL and Manging the lab click on the below link to access the guide. You can find information on how to invite users, manage users, extend lab duration and much more.
Launch the lab
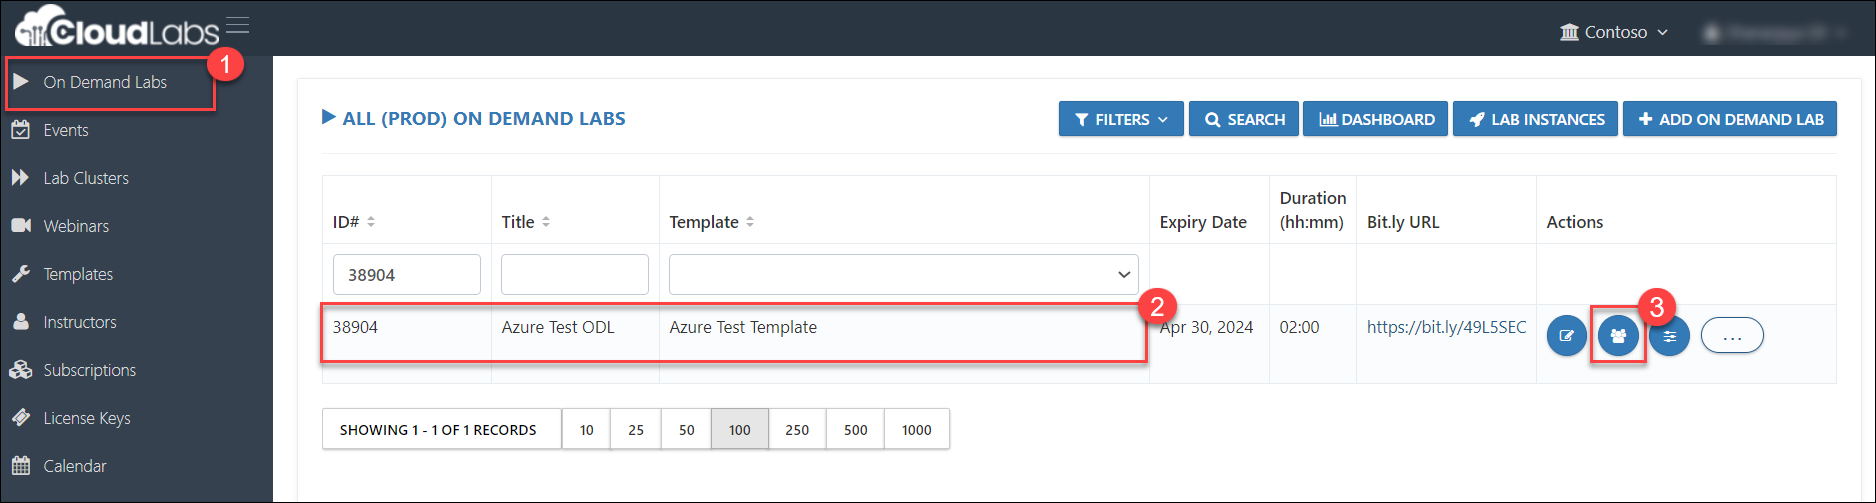
From the On Demand Labs Page (1), choose your ODL (2) and click on the Users icon (3) to register into the environment.
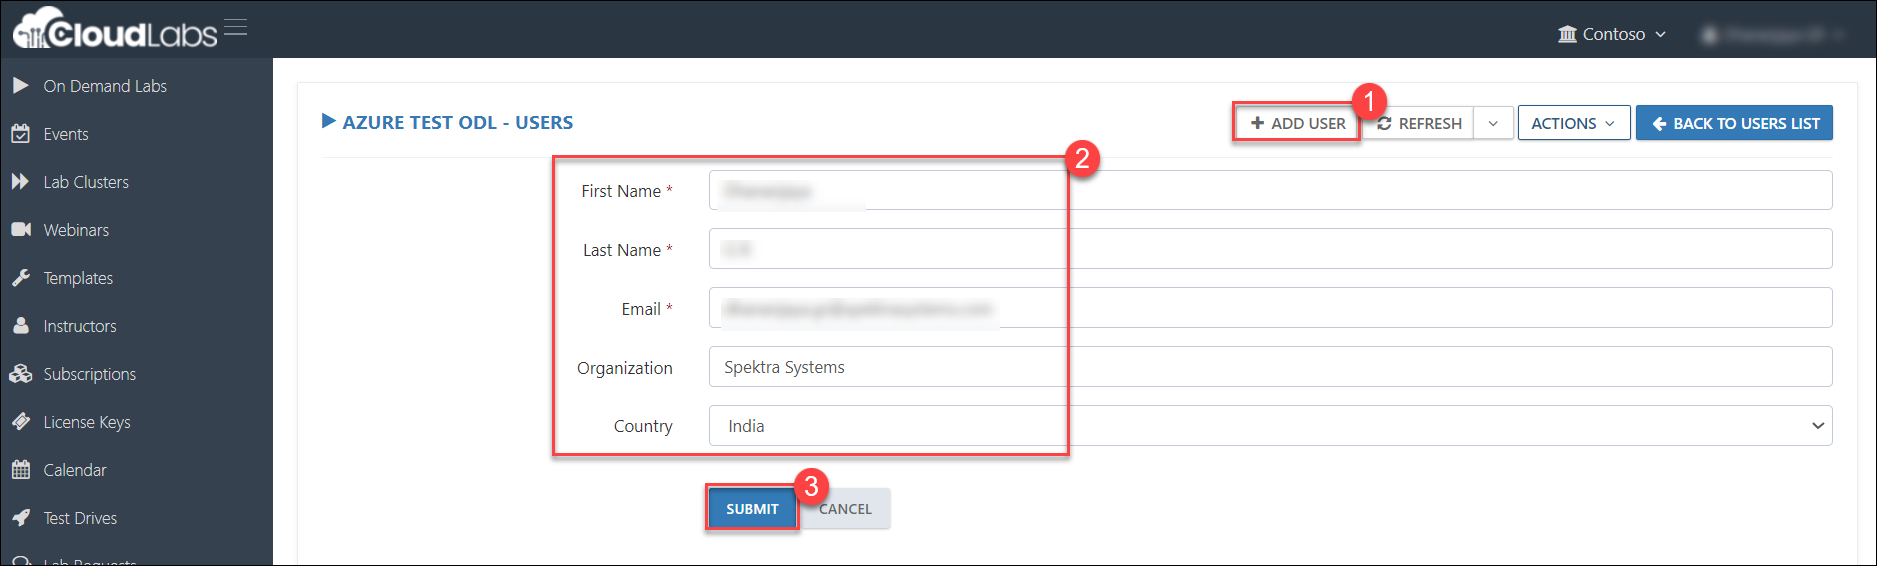
Click on + Add User and enter your details, then click on Submit.
Now you have successfully registered yourself as a user.
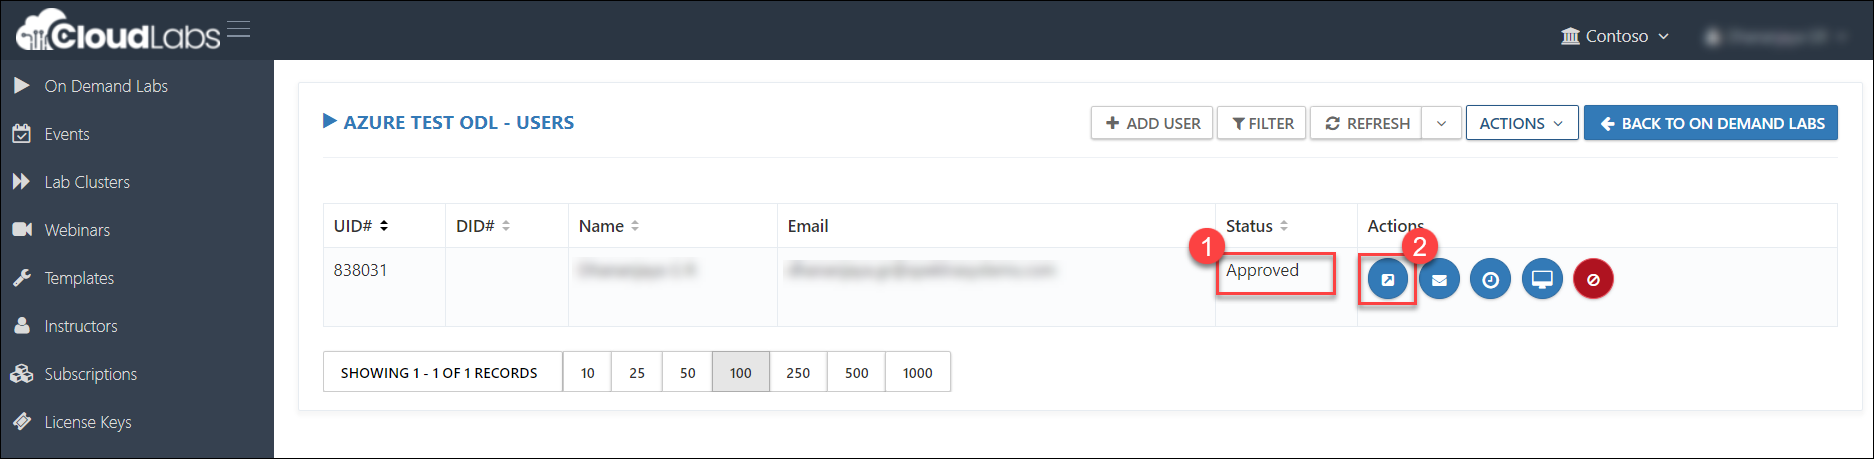
Within the Users page, you will find an instance registered under your name, indicated by its status being in the Approved state (1). Proceed by clicking the Launch (2) button.
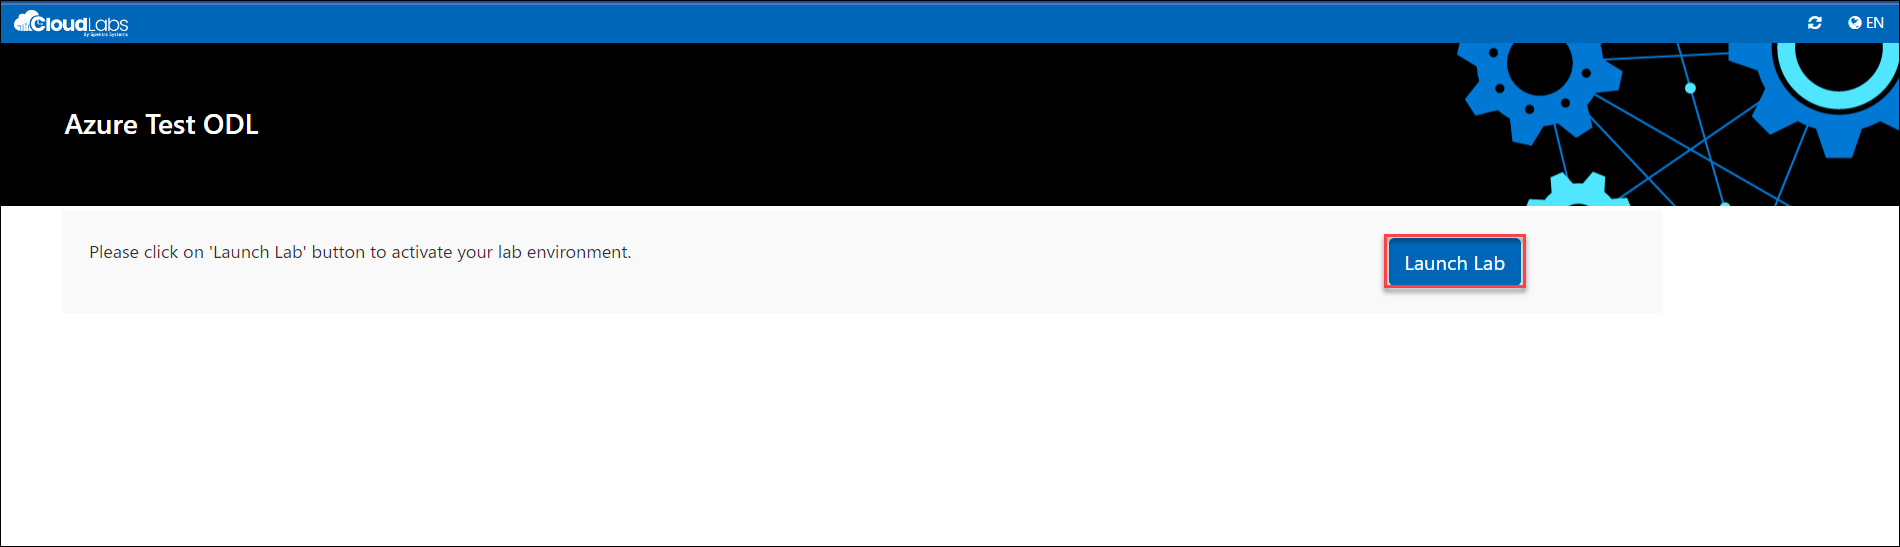
Now you will be navigated to a different browser tab where you will be able to view the page as shown in the screenshot below. On this page, click on the Launch Lab button.
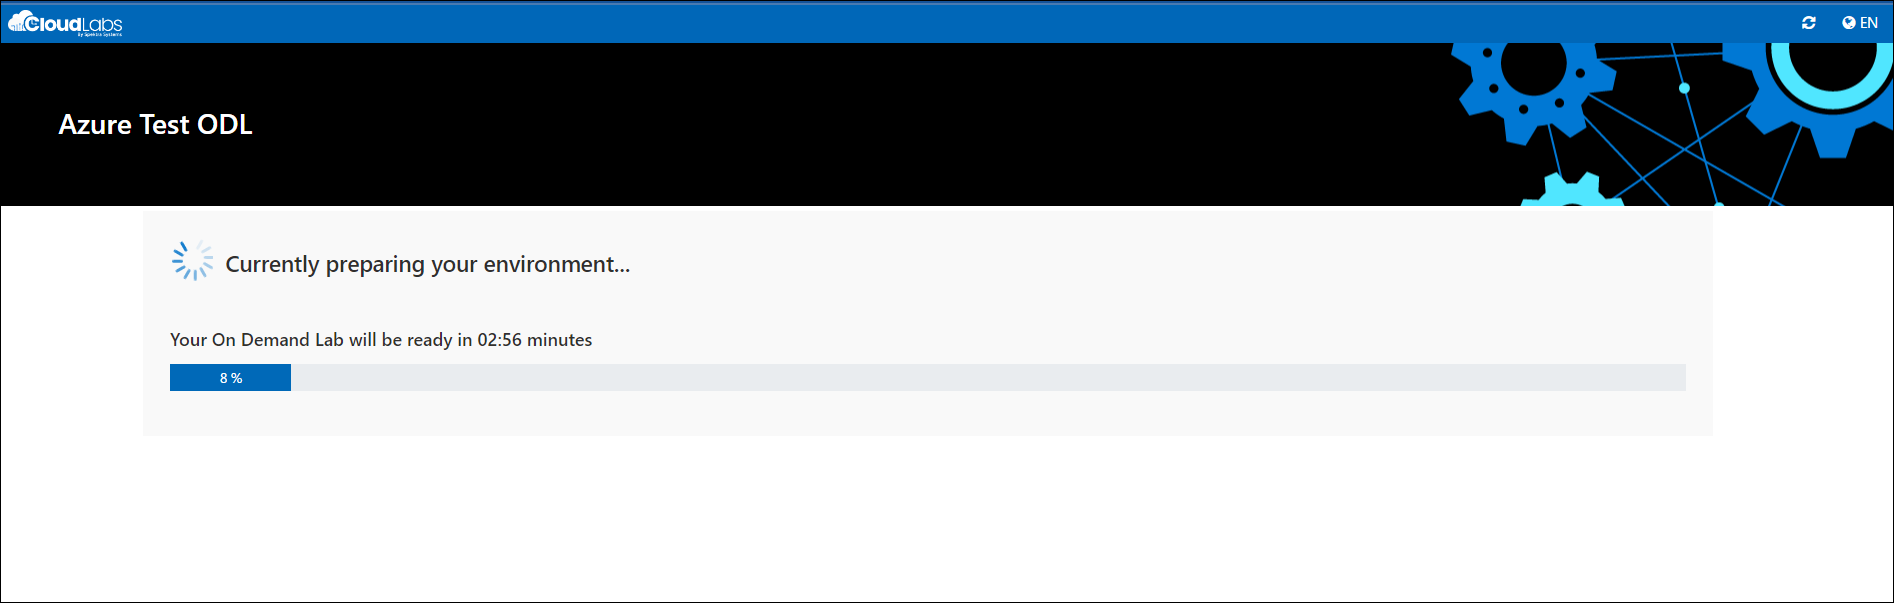
Upon clicking the Launch Lab button, the deployment process will initiate, leading you to the screen illustrated in the provided screenshot below:
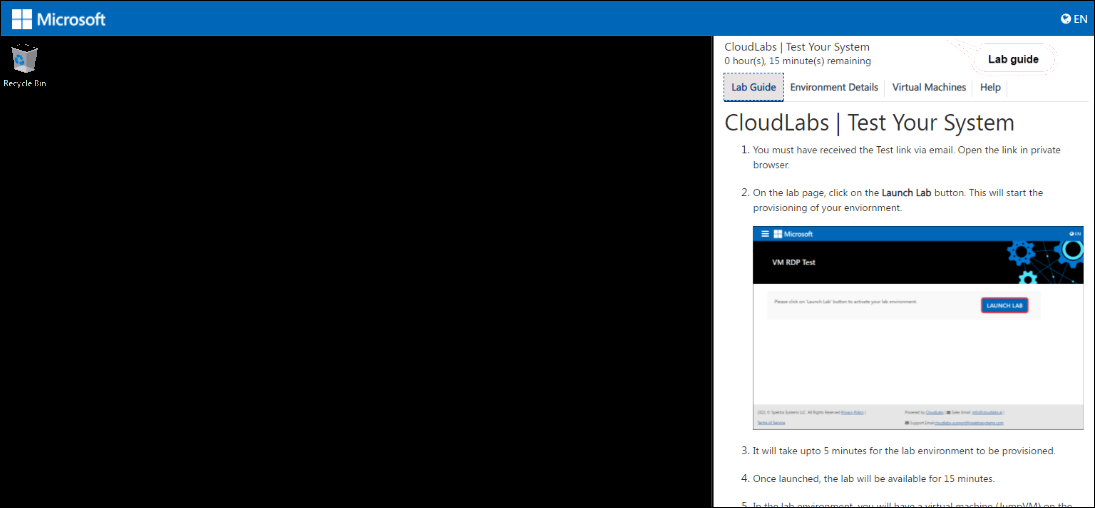
After the instance is successfully deployed, you will encounter the screen depicted in the below provided screenshot:
You can also activate the lab at bulk using Bit.ly URL by following the below steps.
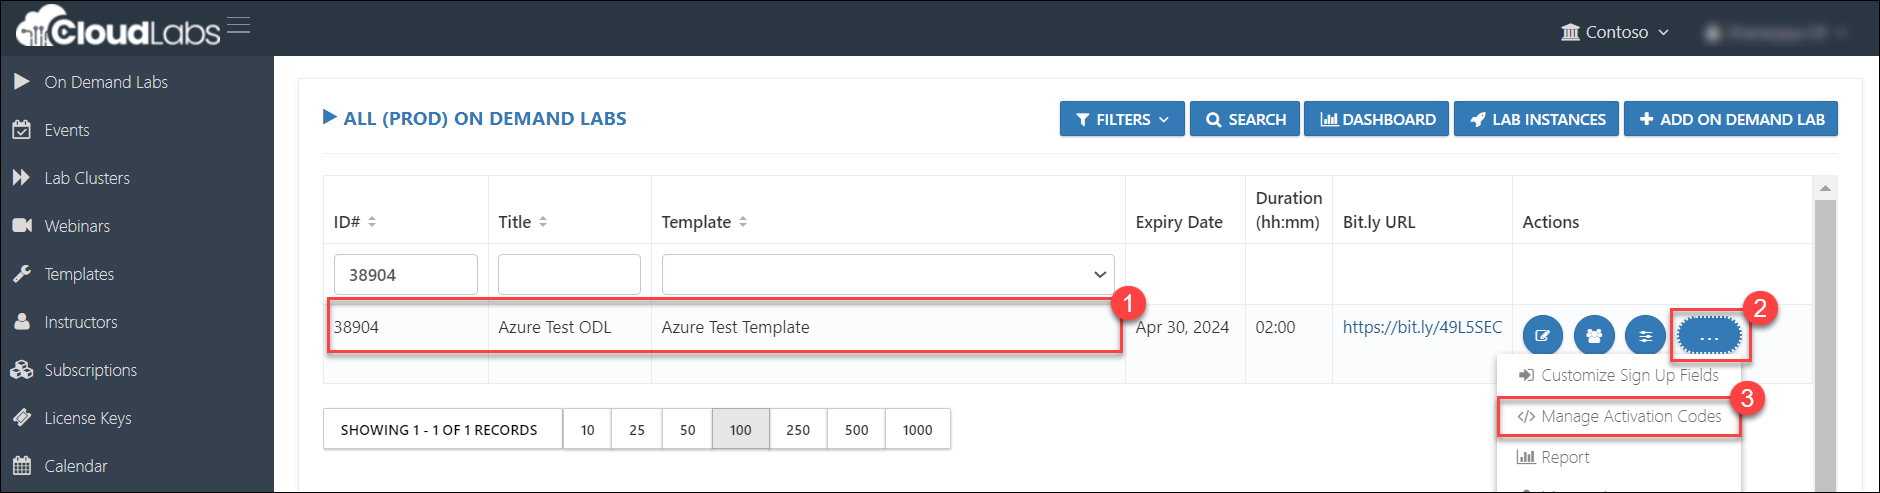
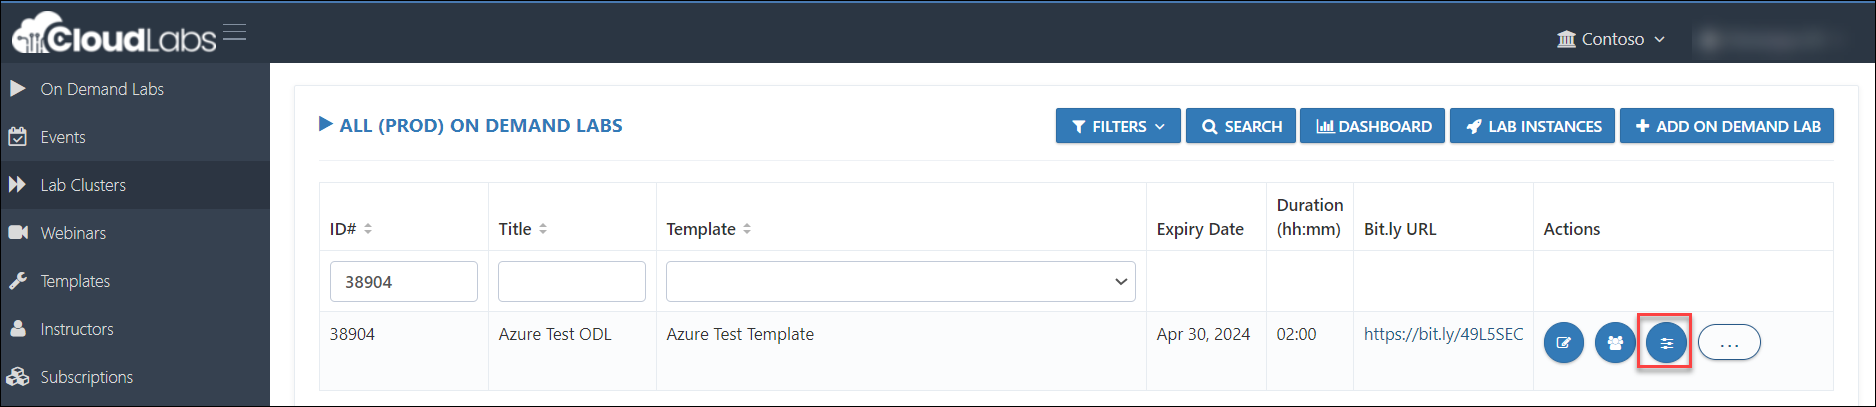
From the On Demand Labs Page, choose your ODL (1) and note down the ODL ID. Click on the Elipses icon (2) and select Manage Activation Codes (3) to create an activation code.
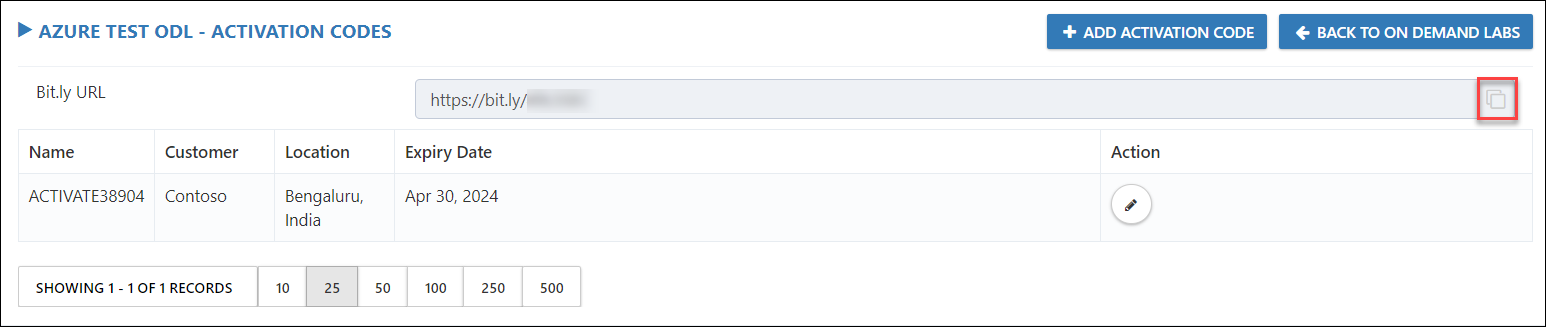
Click on + ADD ACTIVATION CODE

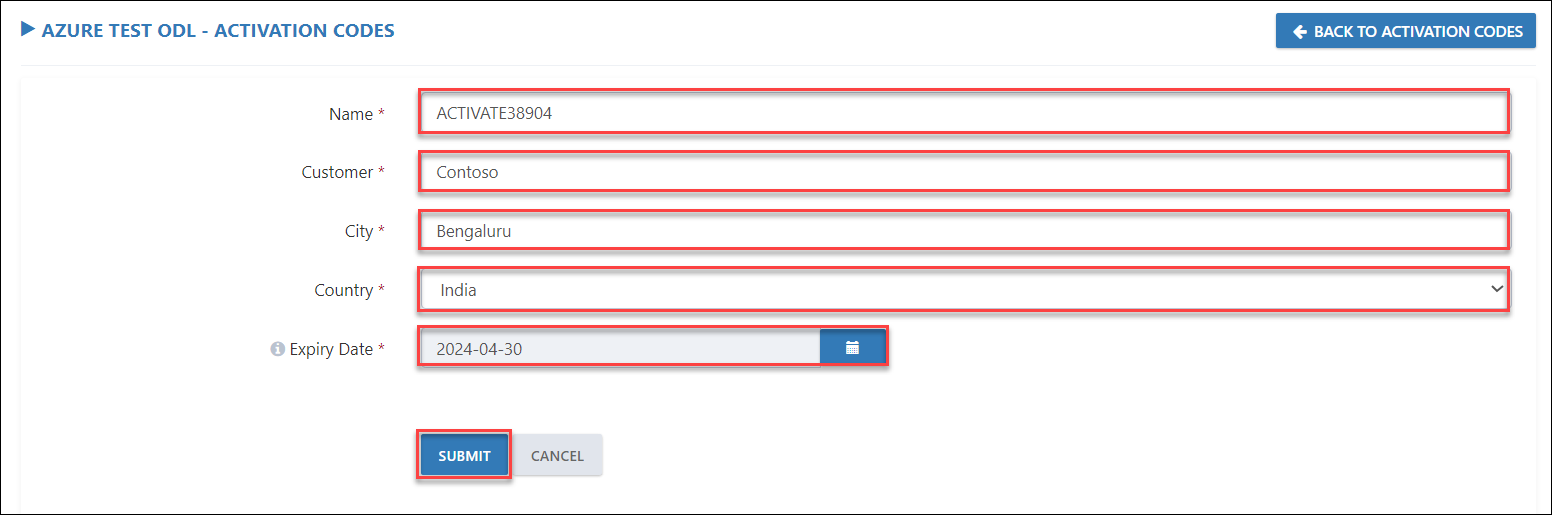
Provide the below values for the Activation Code properties.
Name: The Activation code should always follow the naming convention ACTIVATE<--ODL-ID-->. For instance, if your ODL ID is 1462, then the Activation Code will be ACTIVATE1462.
Customer: Provide your company/customer name.
City: Provide your city name.
Country: Select your country from the dropdown.
Expiry Date: Select an expiry date for the Activation code, post which the Activation code will be invalid.
Finally, click Submit to save details.
Copy the Bit.ly URL and share it with the users.
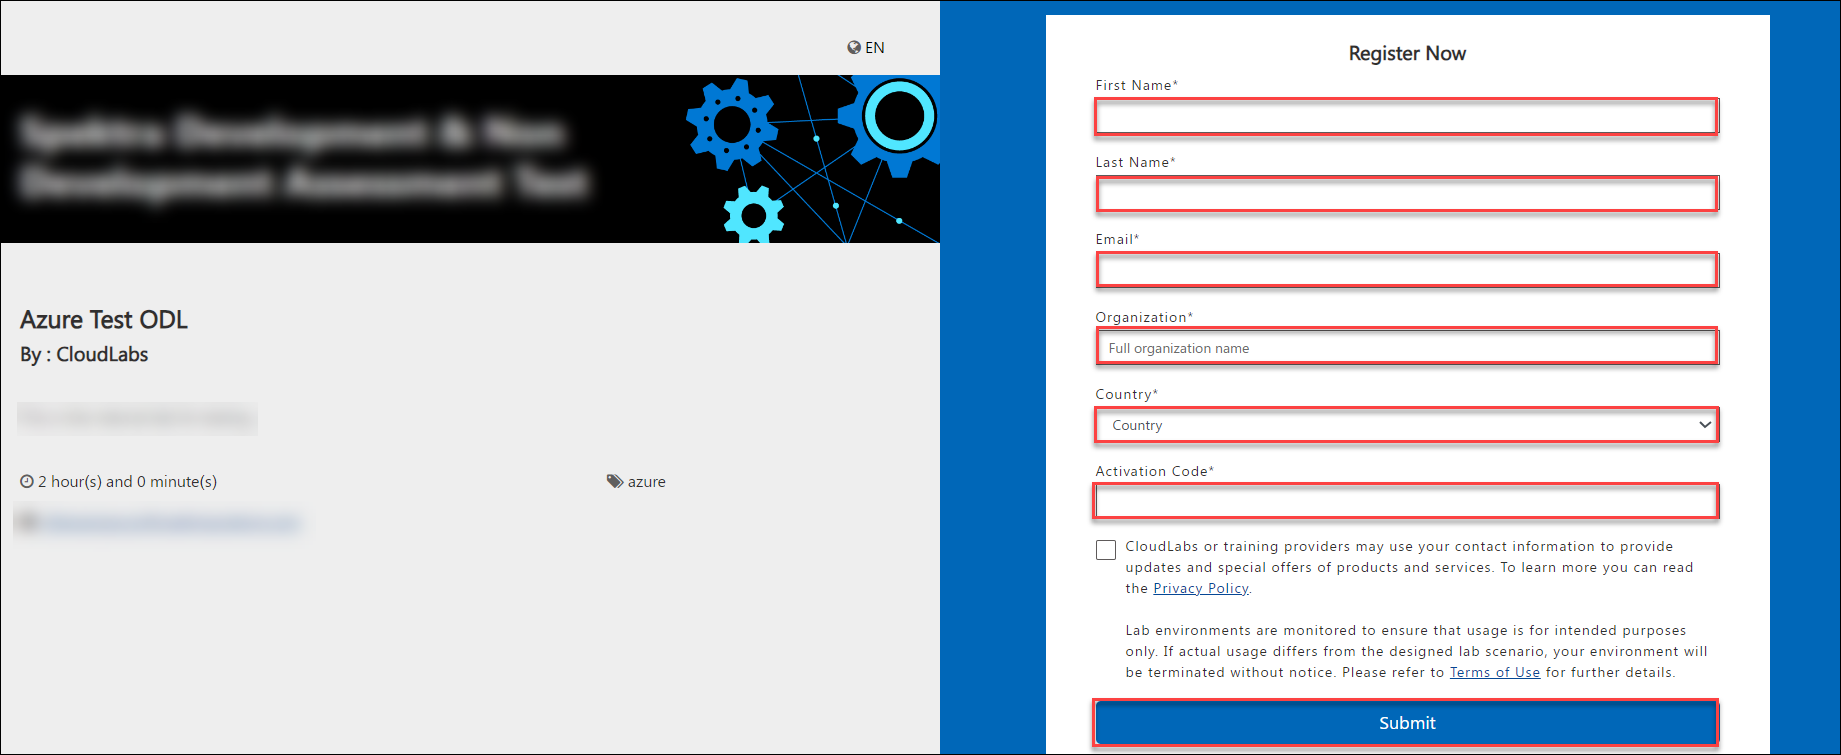
Users can activate their labs by following the below steps:
Navigate to the Bit.ly URL.
Provide the required details.
Click on Submit.
Common Issues and Resolutions
If you are creating files for RBAC, Policy and UsagePolicy and adding it in CloudLabs, make sure the URLs of files are publicly accessible.
Make sure you are adding the URLs of RBAC, Policy and UsagePolicy files in its respective fields.
If you are facing issues in deploying resources from Azure due to permission issues, follow the below mentioned steps:
Update the RBAC/Policy according to the requirement in the Storage account.
Navigate to the respected ODL from CloudLabs Portal and click on Control Panel button.
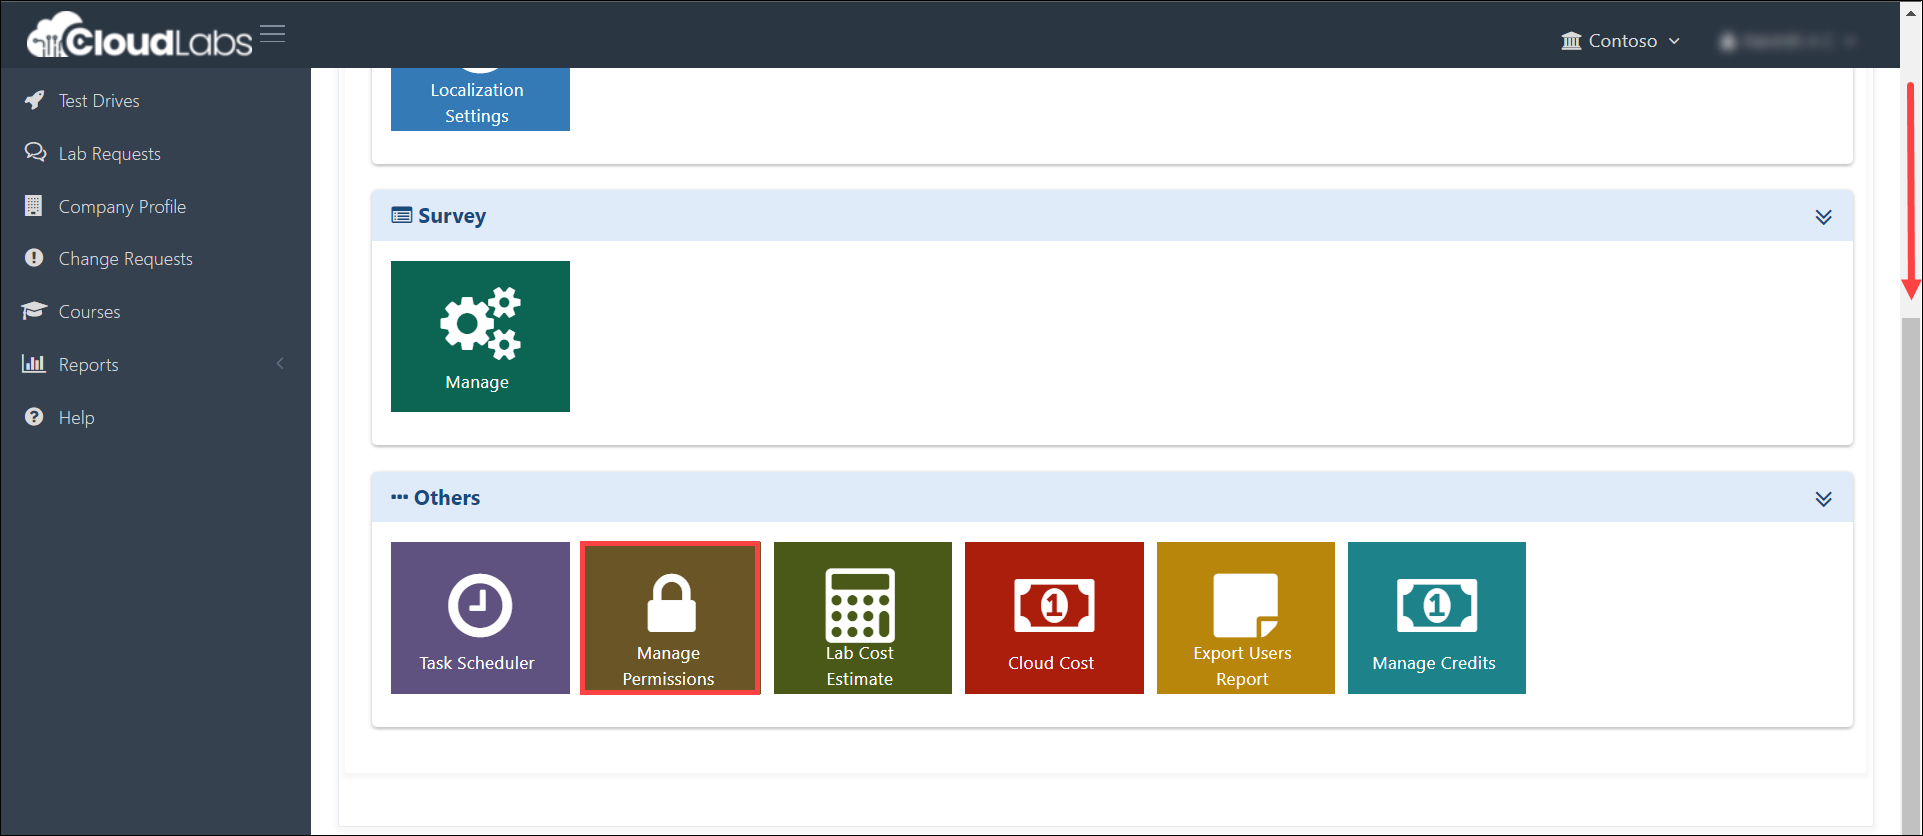
In the CONTROL PANEL page, scroll down to ---Others section and click on Manage Permissions button.
Click on x Remove (1) button next to the RBAC/Policy permission you want remove.
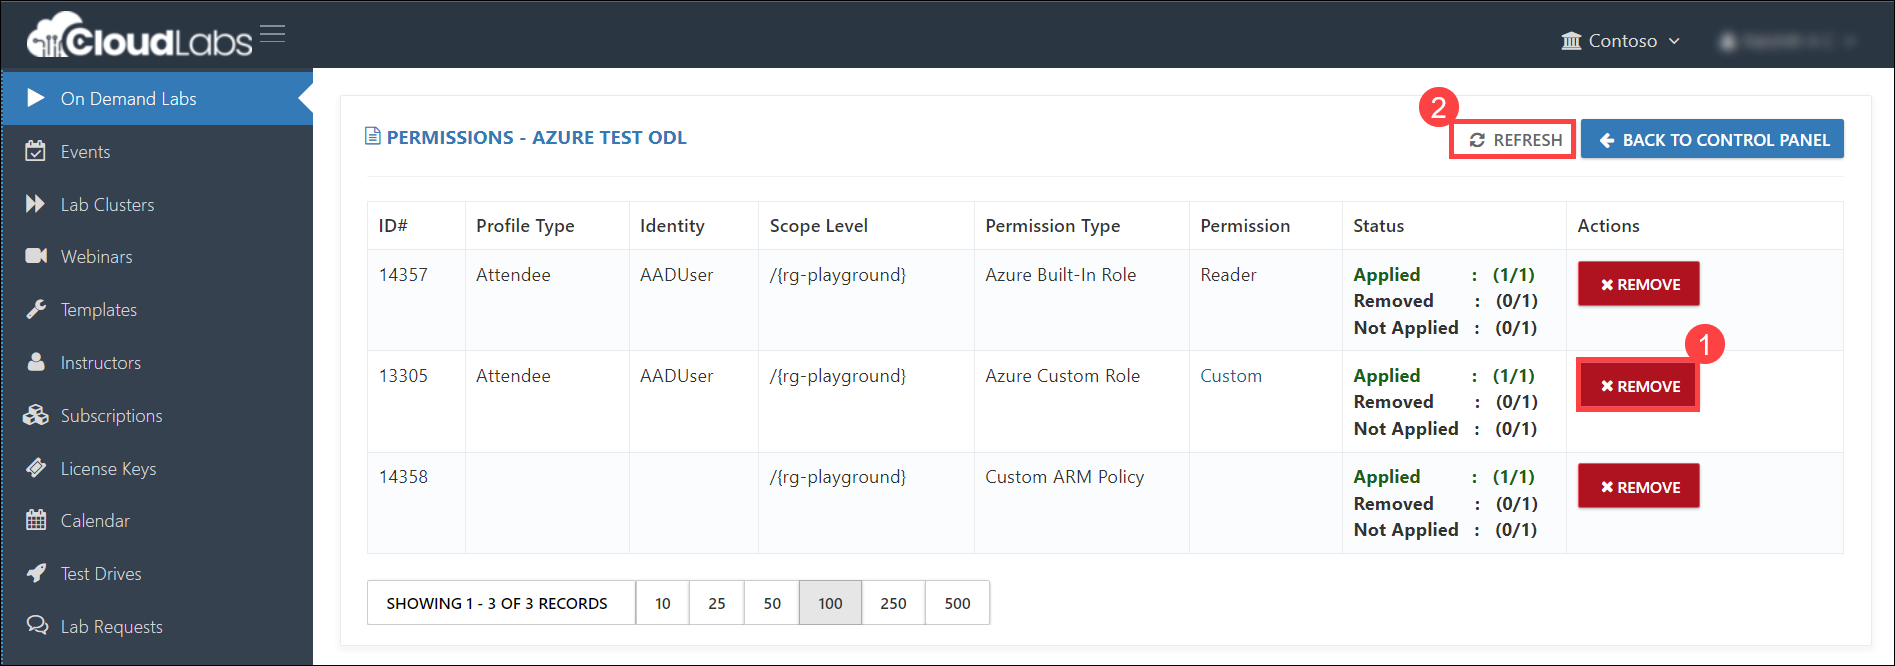
Note: If the Actions of the RBAC/Policy doesn't update to > Apply post clicking on x Remove, then click REFRESH (2) to reload the changes.
Click on > Apply button to re-apply the RBAC/Policy. Once the permission is re-applied, the button will revert to x Remove again.
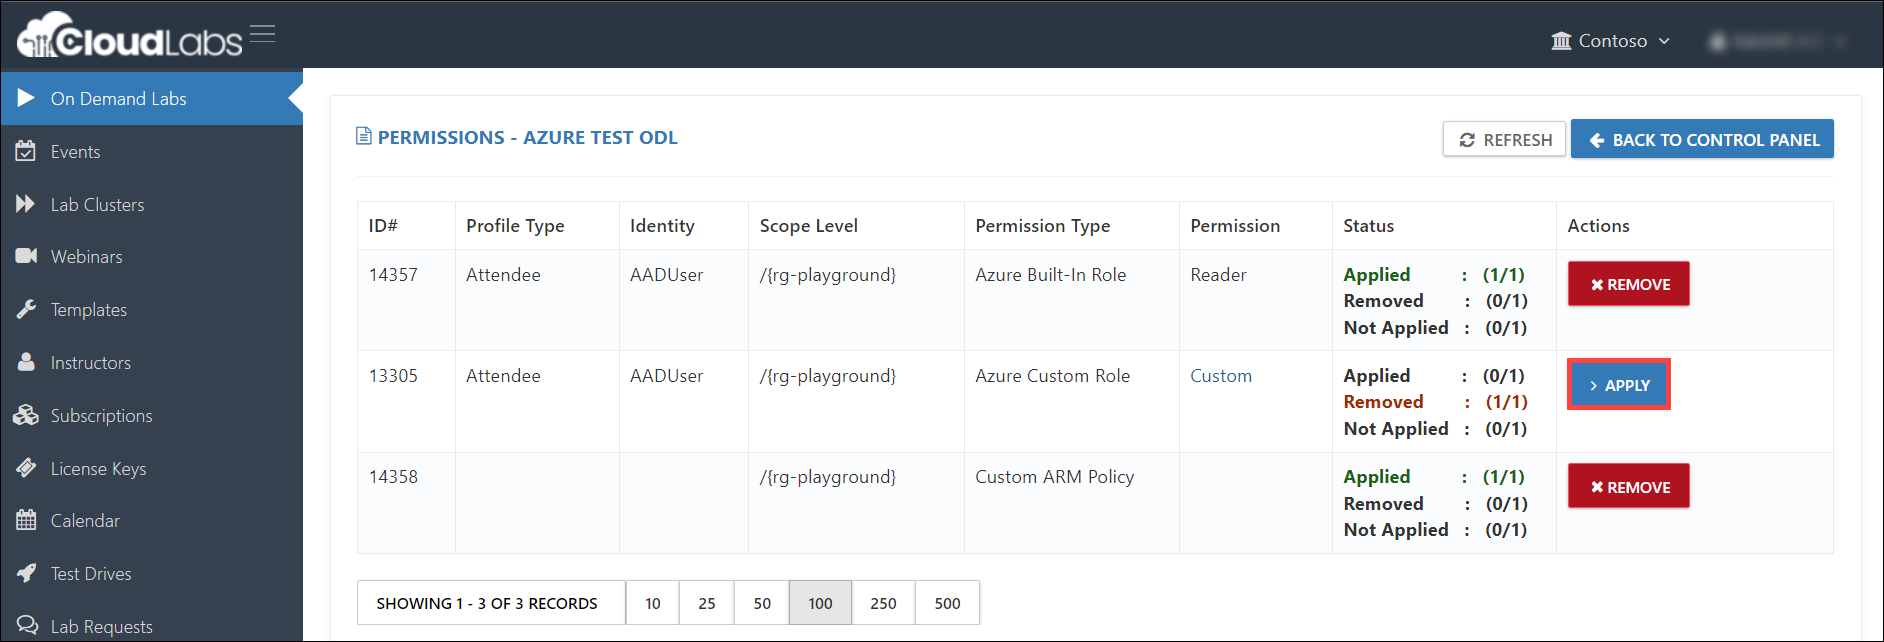
Note: If the Actions of the RBAC/Policy doesn't update to x Remove post clicking on > Apply, then click REFRESH to reload the changes.
Navigate back to the browser where you have logged in to the Azure Portal, Sign-Out and Sign-In to the Azure Portal so that the changes gets reflected.
While creating the ODL, make sure you map the ODL with correct template to avoid conflict in labs.
Ensure you are following the Syntax correctly while creating the RBAC, Policy and UsagePolicy to avoid deployment failures.`