Overview
The objective of this document is to know how we can make changes to the existing VM Image and add the latest Image to the Shared Image Gallery. Follow the below steps to get started:-
Deploy a VM with the current Image on Azure
Navigate to Azure Portal and login with your work account, which CloudLabs has granted Azure access to.
.png)
Once you're logged in to Azure successfully, click on the + Create a Resource button available on the home page, or you can also get it from the menu, which is available on the top left corner.
.png)
Now, type template deployment in the search bar and select Template deployment (Deploy using Custom Templates) option from the list.
.png)
Click on the Create button to get started with the ARM template deployment (we are using ARM template to deploy a VM based on current Image)
.png)
Choose Build your own template in the editor option from the custom template page.
.png)
Insert the ARM template JSON code that was shared to deploy the resources.
Click on Save.
.png)
Now click on the Edit Parameters option and replace the existing code, which comes by default, with your parameter file code or content.
.png)
Click on the Save button.
Subscription:- : Choose the Subscription accordingly.
Resource Group:- Click on Create new and create a new resource group. You can use any name for the Reosurce Group name, such as Image-Update-RG. Then click on Review + create.
.png)
Wait for a few seconds to get the validation passed, then click on the Create button. It may take up to 5 minutes to complete the VM deployment.
.png)
Once the deployment is successful, you will get a notification on the same Azure page, and then you can click on Go to resource group to access the deployed VM.
.png)
Click on the labvm-12345 VM to get the VM DNS Name or Public IP.
.png)
You can either click on the Connect button or directly copy the VM's DNS and public IP address and use the RDP tool to connect to this VM.
.png)
Note:- Please use the VM login credentials that you have provided in the ARM template while connecting.
Once you're connected to the VM, you can make the required changes and then shutdown the VM.
After making the changes, we need to shut down the VM and make sure there is no window left open inside it. At the time of shutting down the VM, we have to click Other[Planned] (1) and then click Continue (2).
Now go back to the Azure portal and check the status of the VM. You might need to wait for a couple of minutes to get the VM stopped (deallocated state).
.png)
Now that the changes are done, we can capture the new image using the capture button available on the VM overview page.
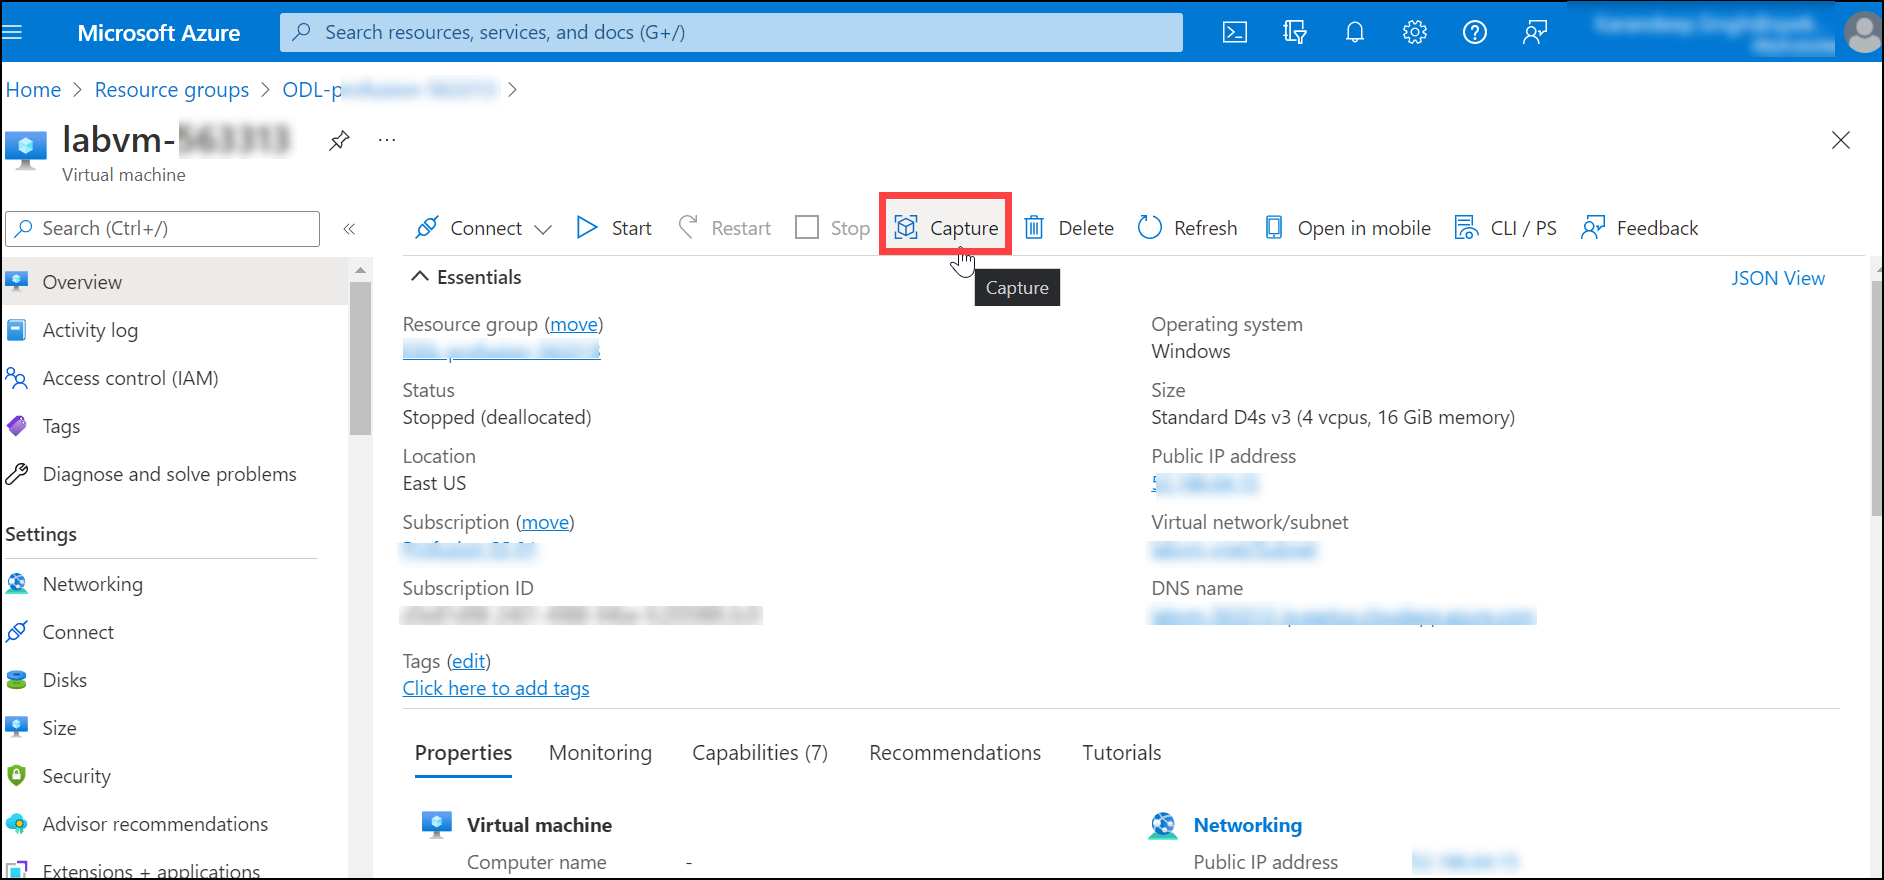
We already have the Shared Image Gallery and now we're just adding a new Image version to that Shared Image Gallery.
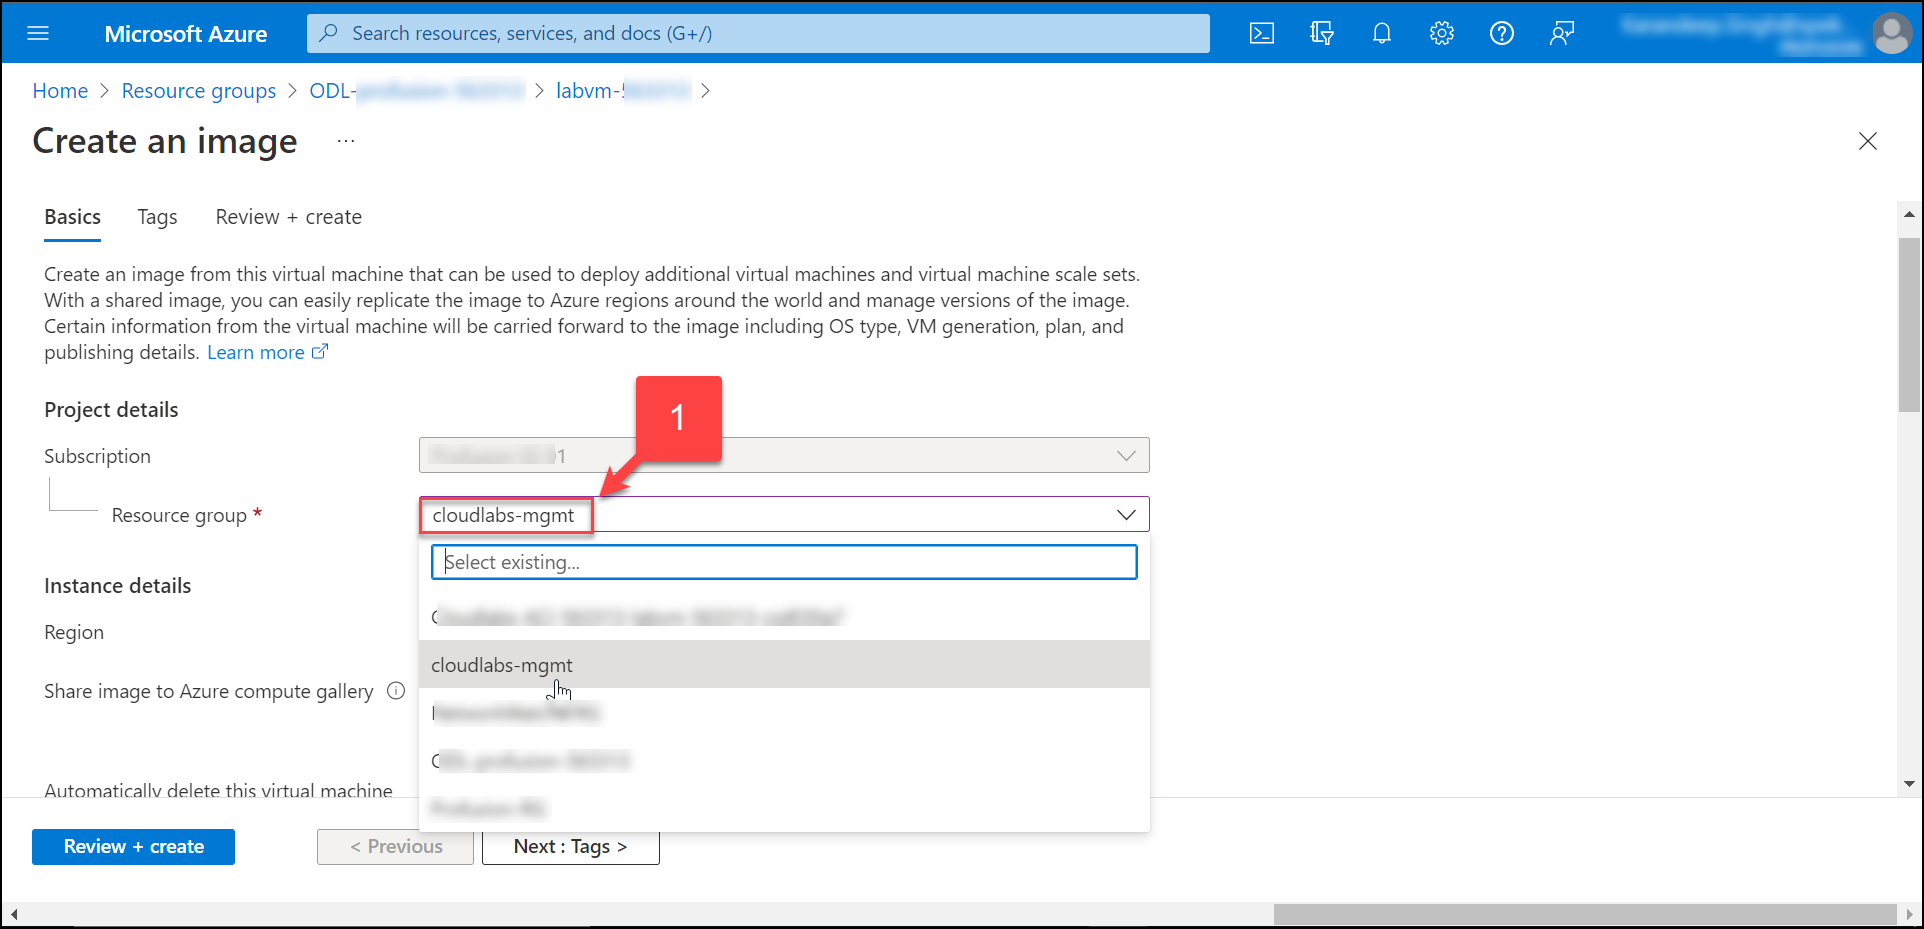
After clicking the above capture button, we need to associate it with Resource Group name cloudlabs-mgmt (1) as we've got the Image Gallery in this RG.
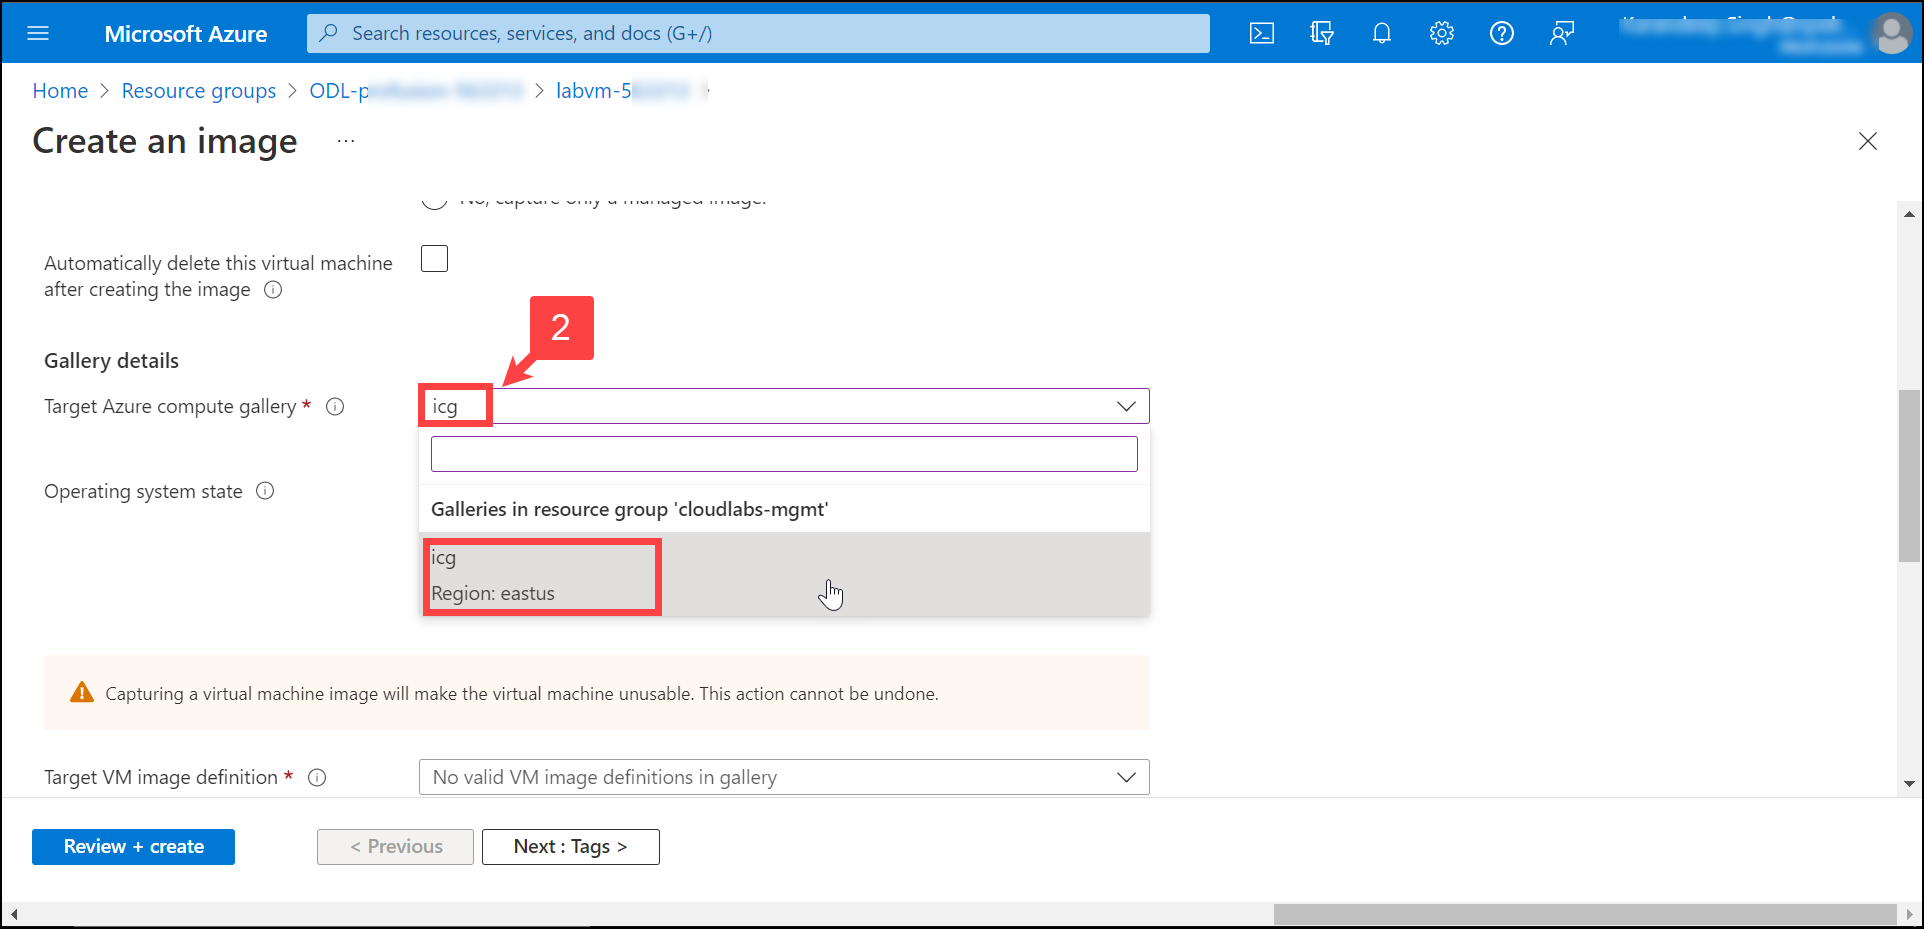
Furthermore, we need to put the image target as icg (2), as mentioned below in the image, and the Operating System state as specialized.
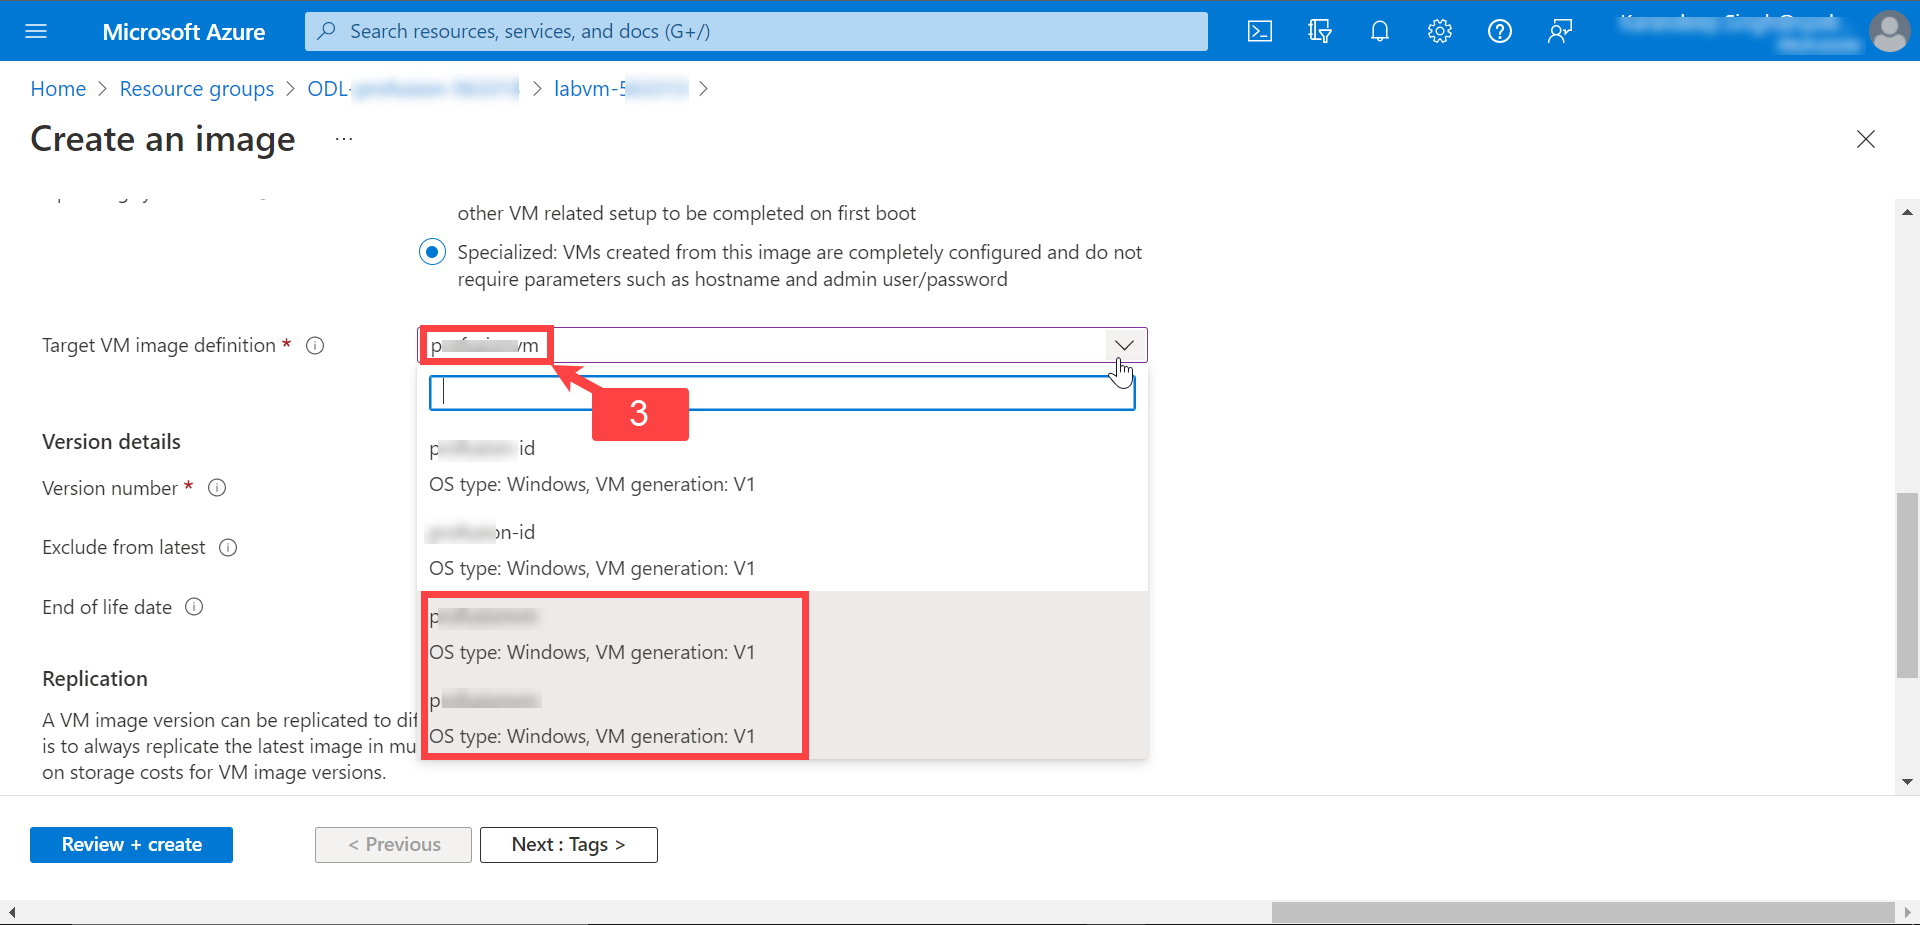
In Target VM selection (3), we need to give labvm-12345 and add the latest Version number, which we can check from the templates that are present in the cloudlabs-mgmt Resource Group.
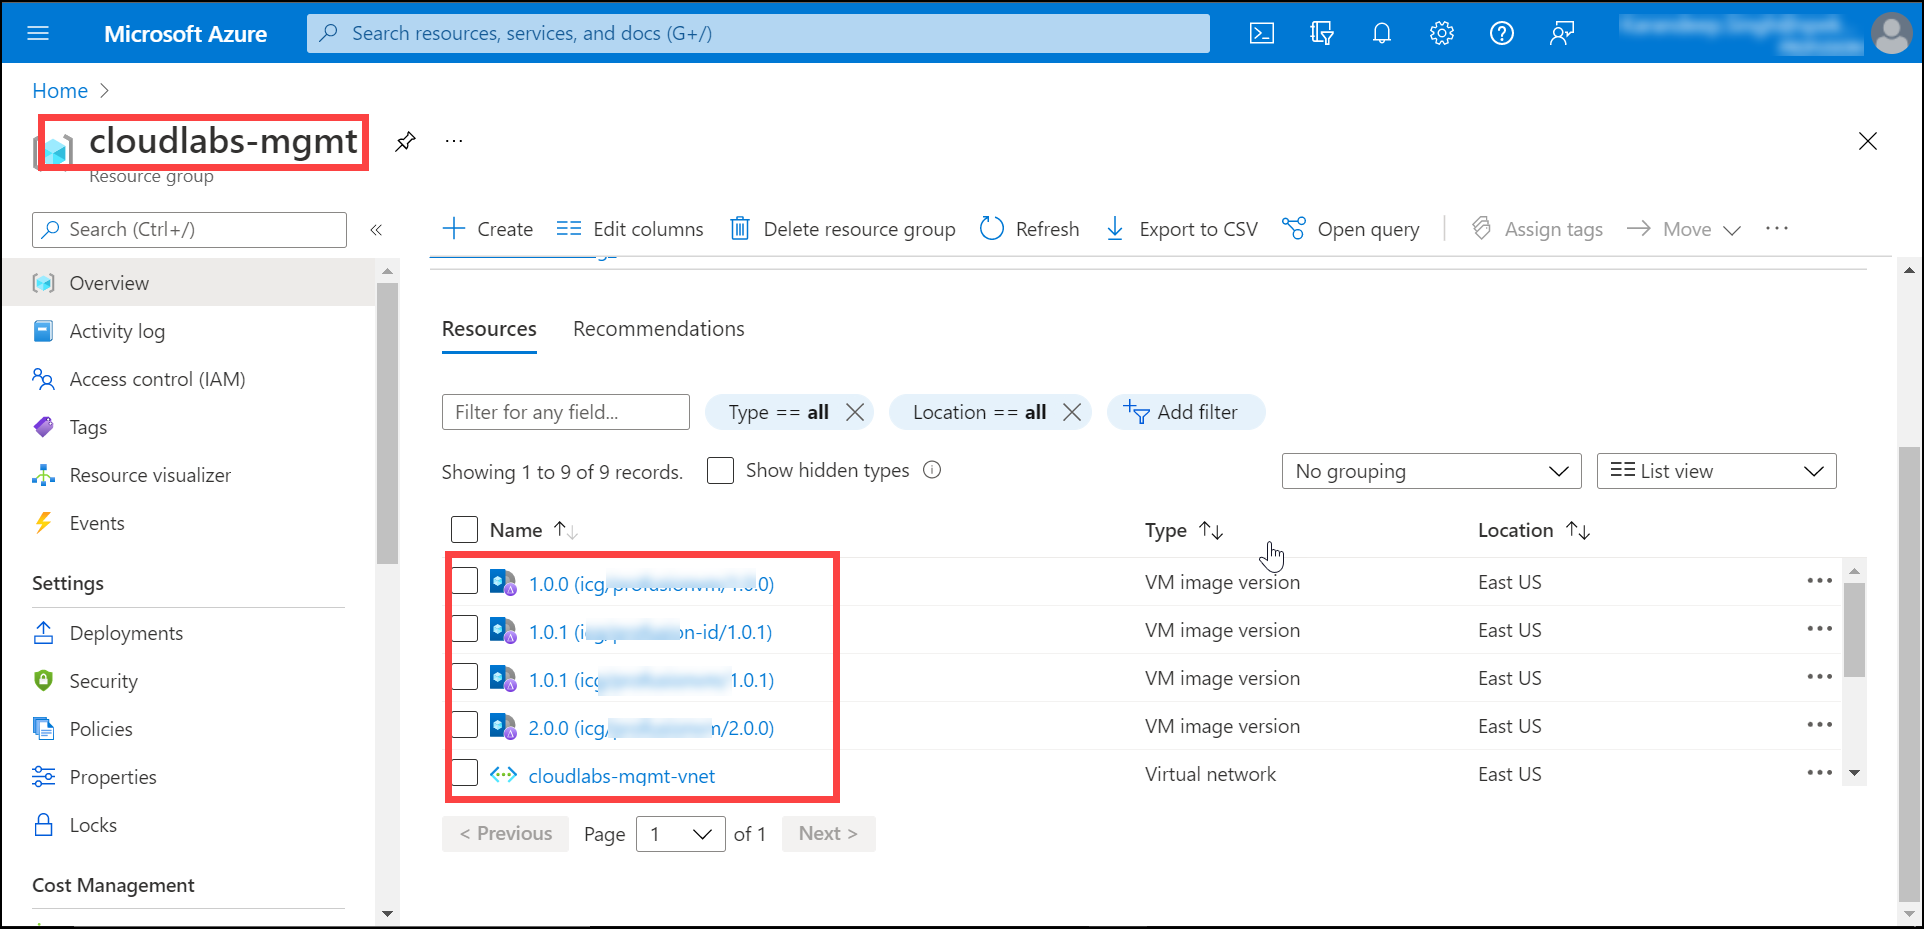
As shown below in the cloudlabs-mgmt RG, the latest image is 2.0.0, which is why we have used 2.0.1 (4) for the new image creation.
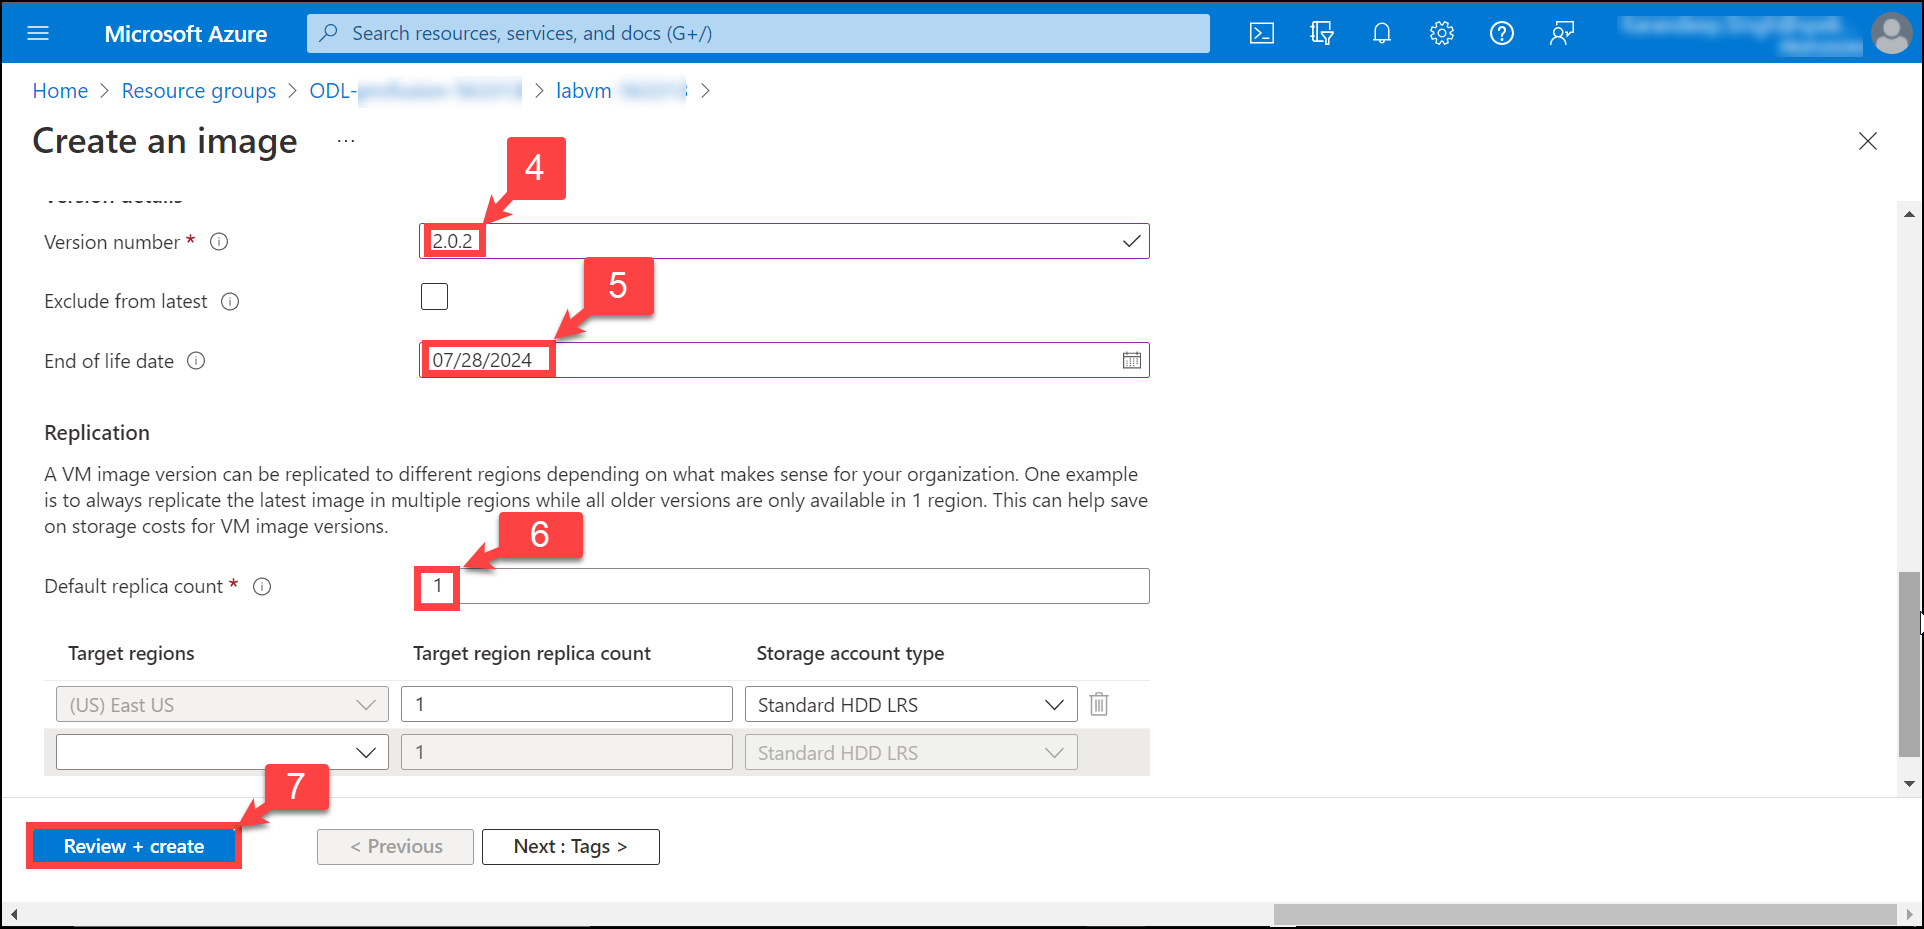
Moving back to creating an image, here we need to put an End of life date (5) for the image as well; say we can put after 2 years. Rest of the settings we can put it as default (6) and then Review and create (7). Make sure to add East US 2 under target regions.
Then, within a few minutes we can access our new shared image in the cloudlabs-mgmt resource group which can be used further.
Verification of the changes incurred
Now that all of the configurations and changes have been completed, we can verify the results. Add a new user deployment from any existing On Demand Lab via the CloudLabs Portal.
You can connect to the VM and verify the changes once the deployment is completed.
Please delete the Resource Group that was created to deploy a VM after the changes have been confirmed (manually on Azure portal).
If you require any support, please contact the CloudLabs team.