Overview
In this quick start guide, you will learn how to create a lab within CloudLabs and establish a Remote Desktop Protocol (RDP) connection to it. CloudLabs empowers you to build lab environments managed by Azure Cloud, facilitating the creation of labs for various purposes such as classroom training, hackathons, or experimentation.
To begin, you will start by creating a lab within the CloudLabs portal. Through this portal, you will create a lab utilizing an Azure Marketplace VM image. Once the VM is published, you will proceed to register for the lab and establish an RDP connection to access it remotely.
Once you finish creating the lab, you will have access to a lab ready for you. Alternatively, you can invite other users to utilize the lab environment.
Prerequisites
Access to the CloudLabs portal with admin permissions. Refer the CloudLabs Roles provided here for more details.
Steps to Create a Lab
Navigate to the CloudLabs portal using a browser.
Navigate to the Manage VM Labs tab present in the side pane.
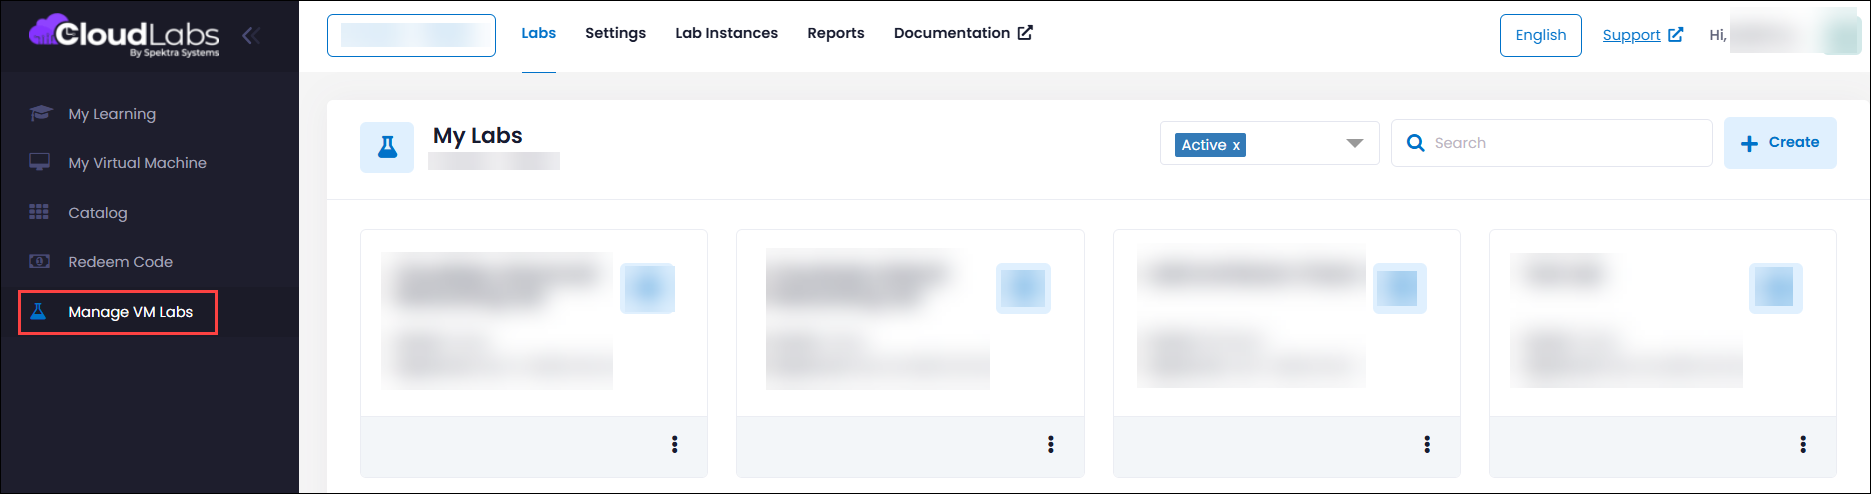
In the Labs tab, Click on the + Create button to create a lab.

There are 3 steps involved in creating a new lab. Follow the steps mentioned below.
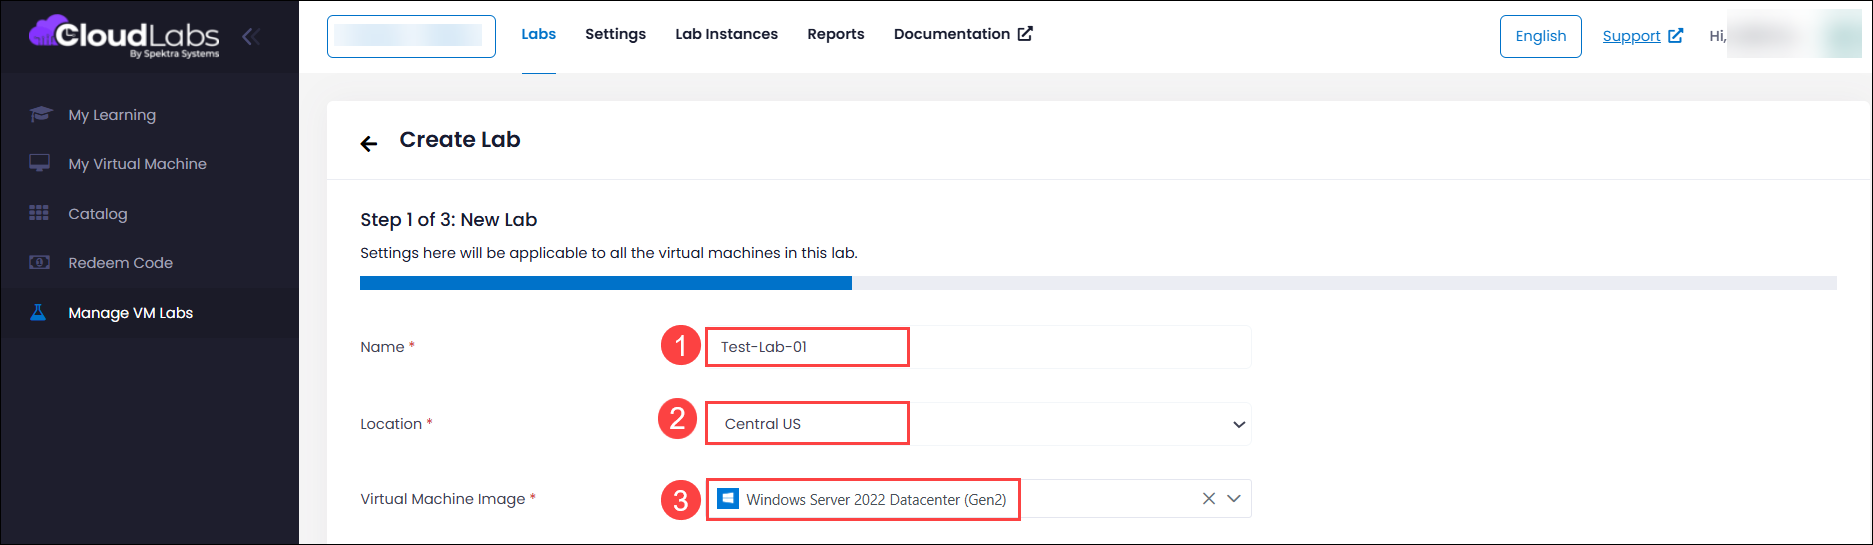
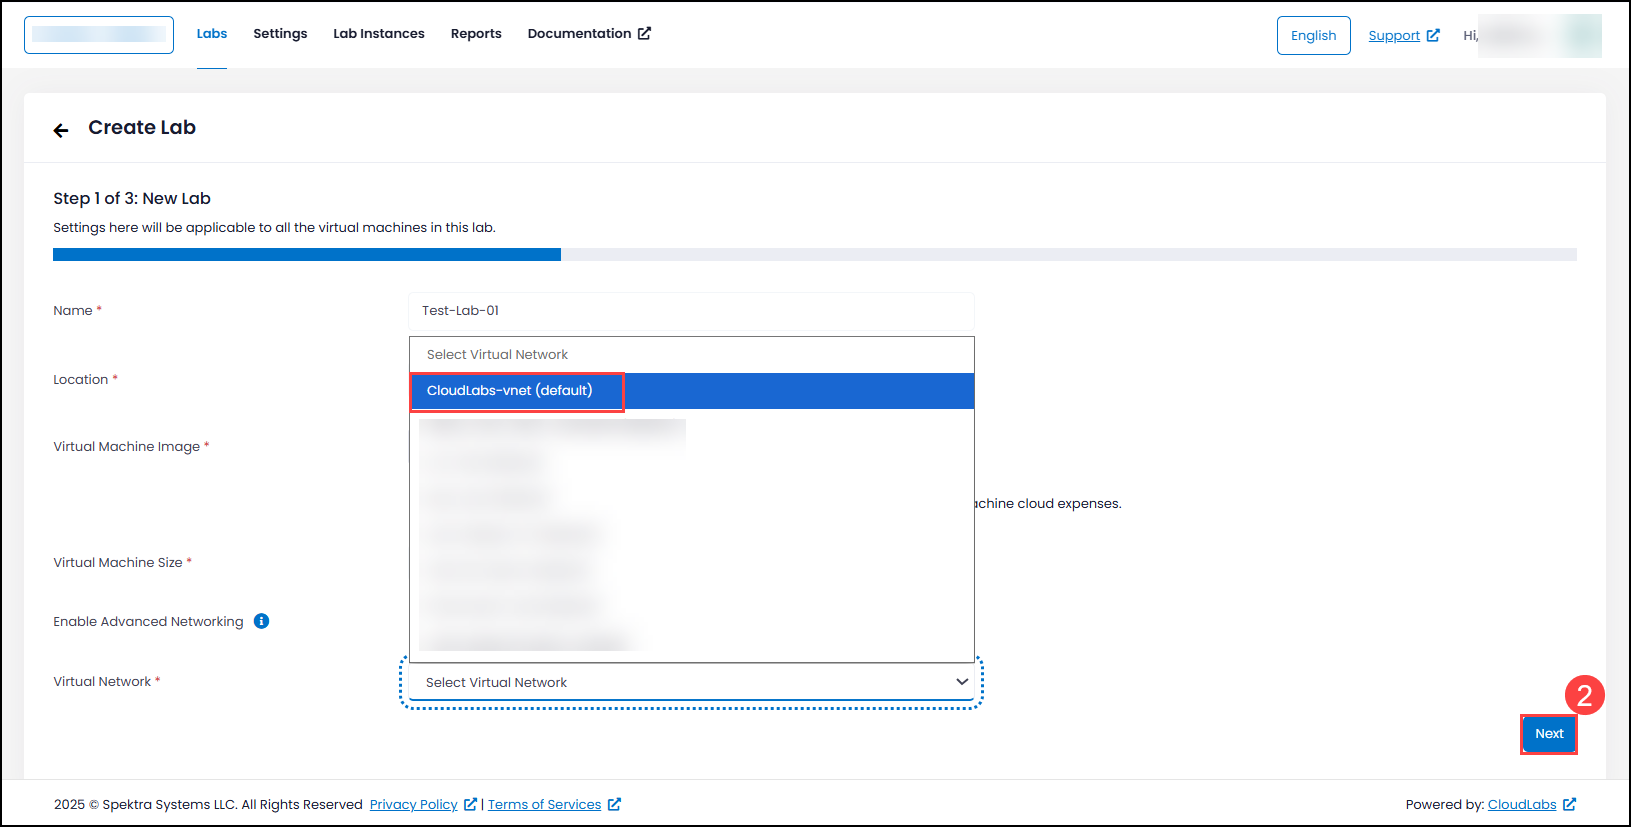
Step 1 of 3: New Lab
Name (1): Provide a name for the lab.
Location (2): Provide the region where you want the lab instances to be deployed.
Virtual machine Image (3): Select an Image from the list as per your requirement. If you choose Windows image then please ensure to check the box for terms and conditions before proceeding.
Note:
Just like selecting Marketplace images, you can also select custom images for your virtual machine deployment. When choosing a custom image, you will also see the associated version displayed alongside the image name. This helps you easily identify and select the specific version of the custom image that best suits your requirements
Types of VM Images supported
There are 3 types of images supported.
Marketplace Windows Images: Here is the list of available Windows-based images.
Windows Server 2022 Datacenter
Windows 11 Pro
Marketplace Linux Images: Here is the list of available Linux-based images.
Ubuntu 22.06
Kali Linux Gen 2
Custom Images: Images that you have enabled from the Azure compute gallery attached to your lab plan.
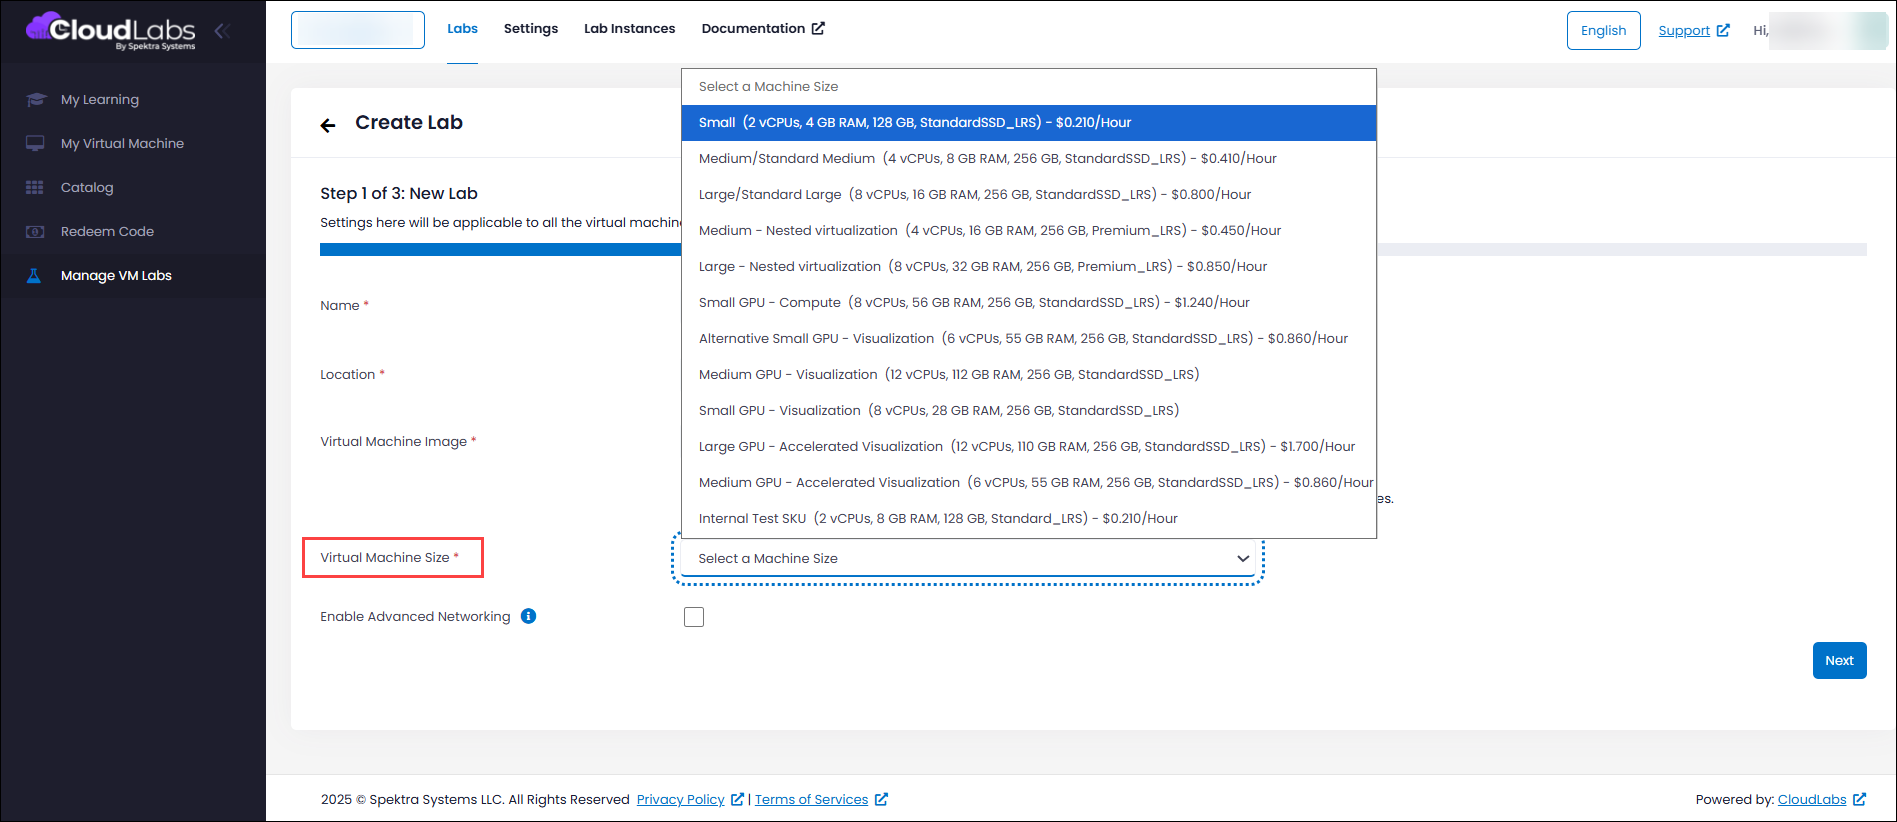
Virtual Machine Size: Select a size for your lab as per your requirements from the list.
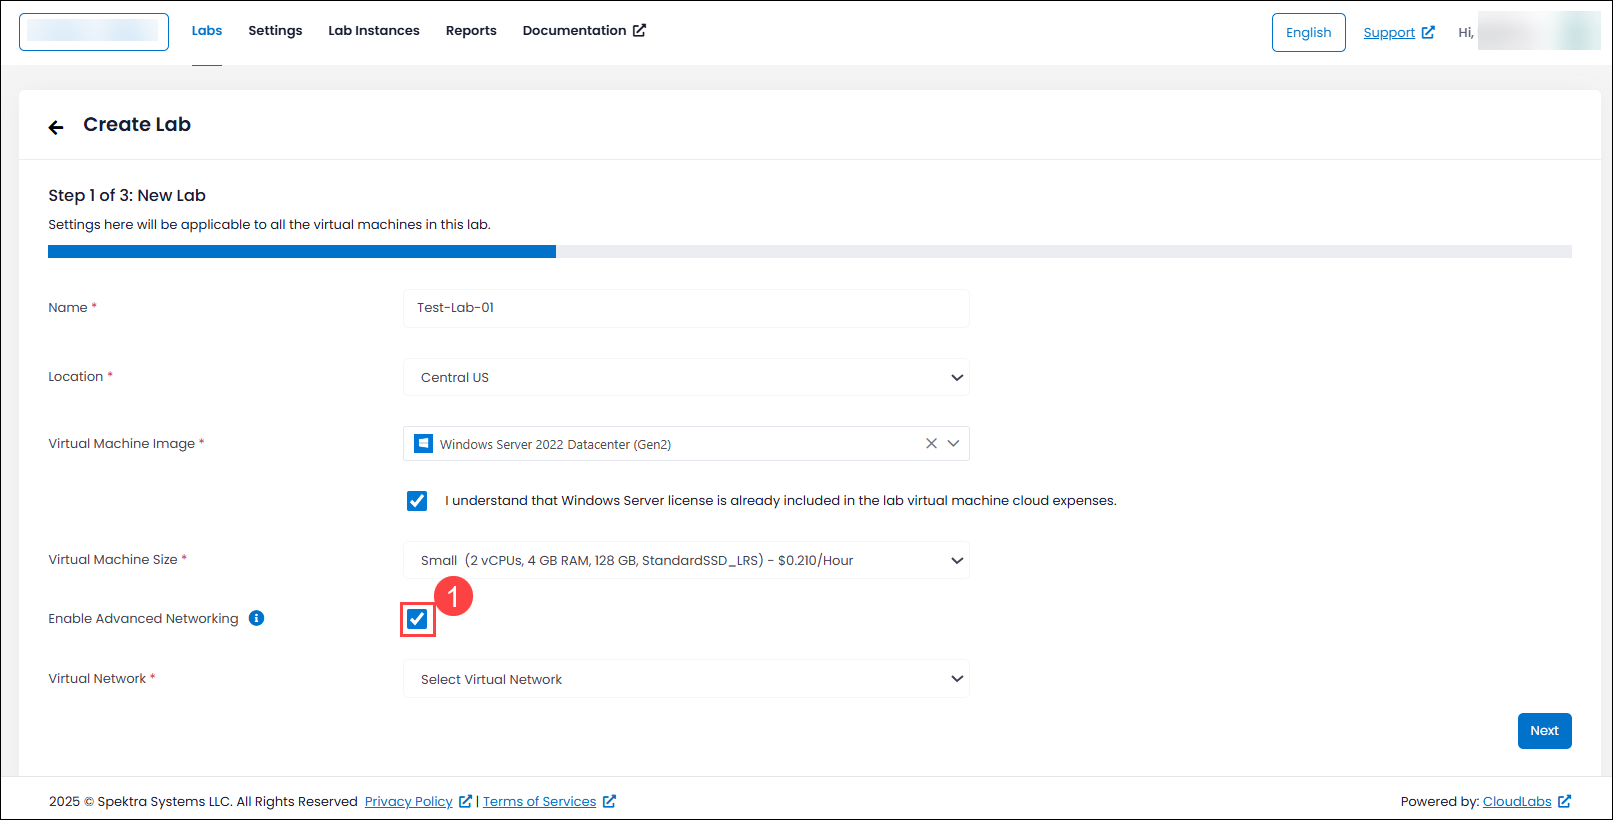
Enable Advanced Networking (Optional) (1): Select the virtual network that you want to connect with your virtual machine. The dropdown displays both the virtual network name and the associated subnet, allowing you to choose the specific subnet where the virtual machine should be deployed.
This setting is optional. If left unchecked, a new virtual network will be automatically created and used for your lab environment.
Verify the provided values and click on the Next (2) button.
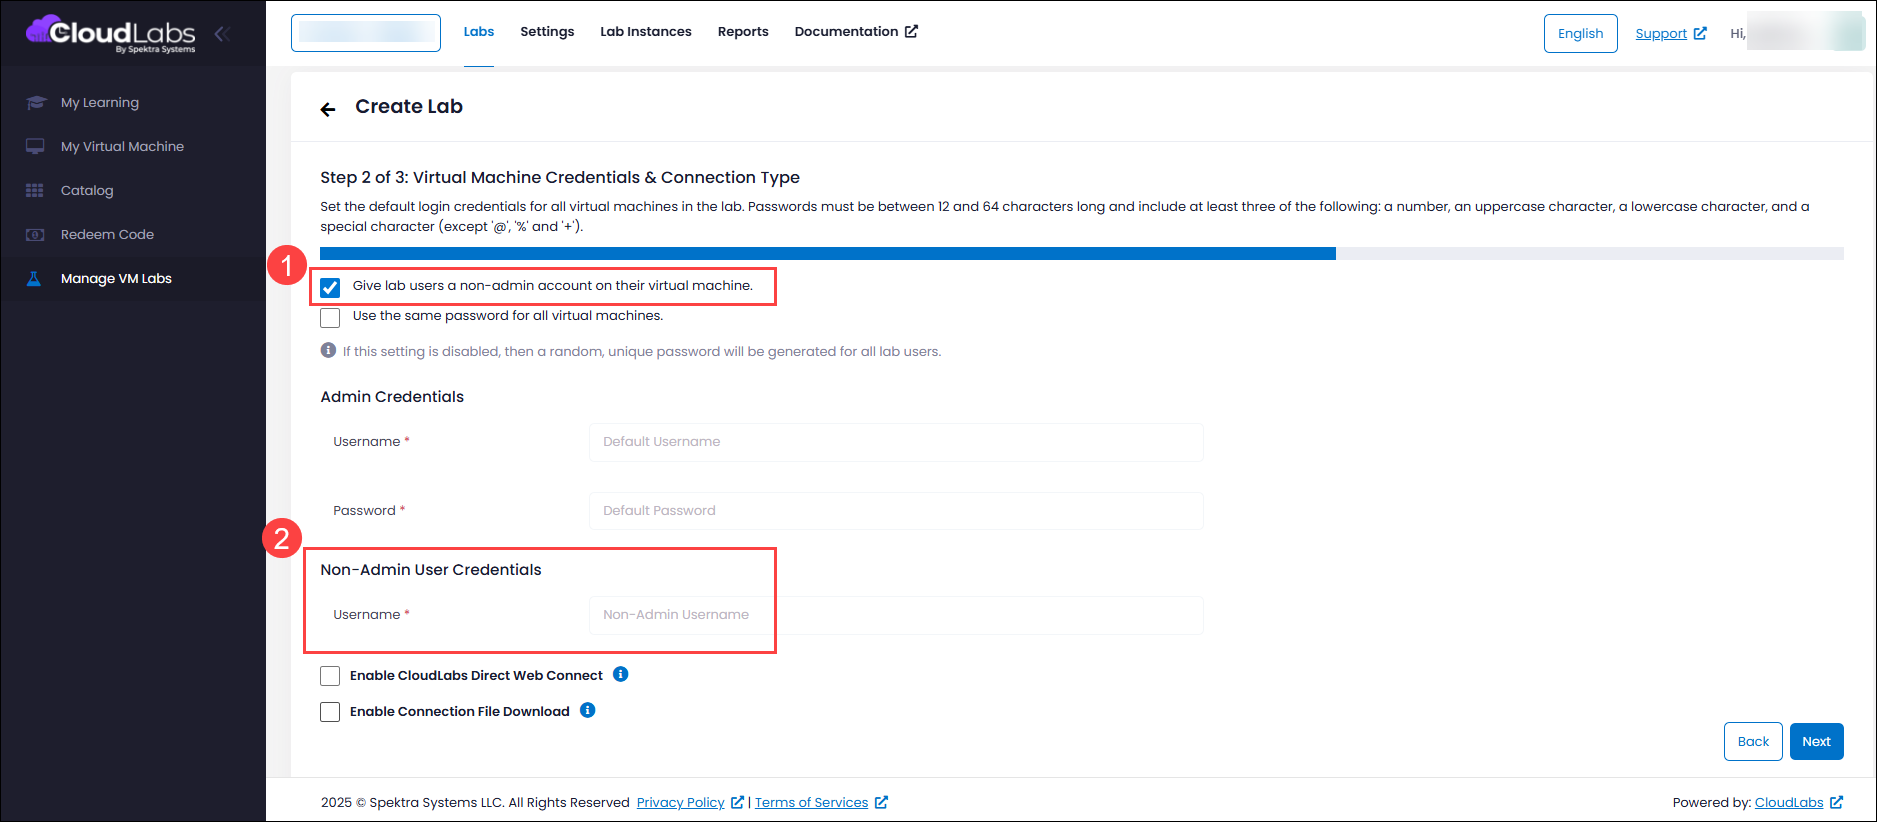
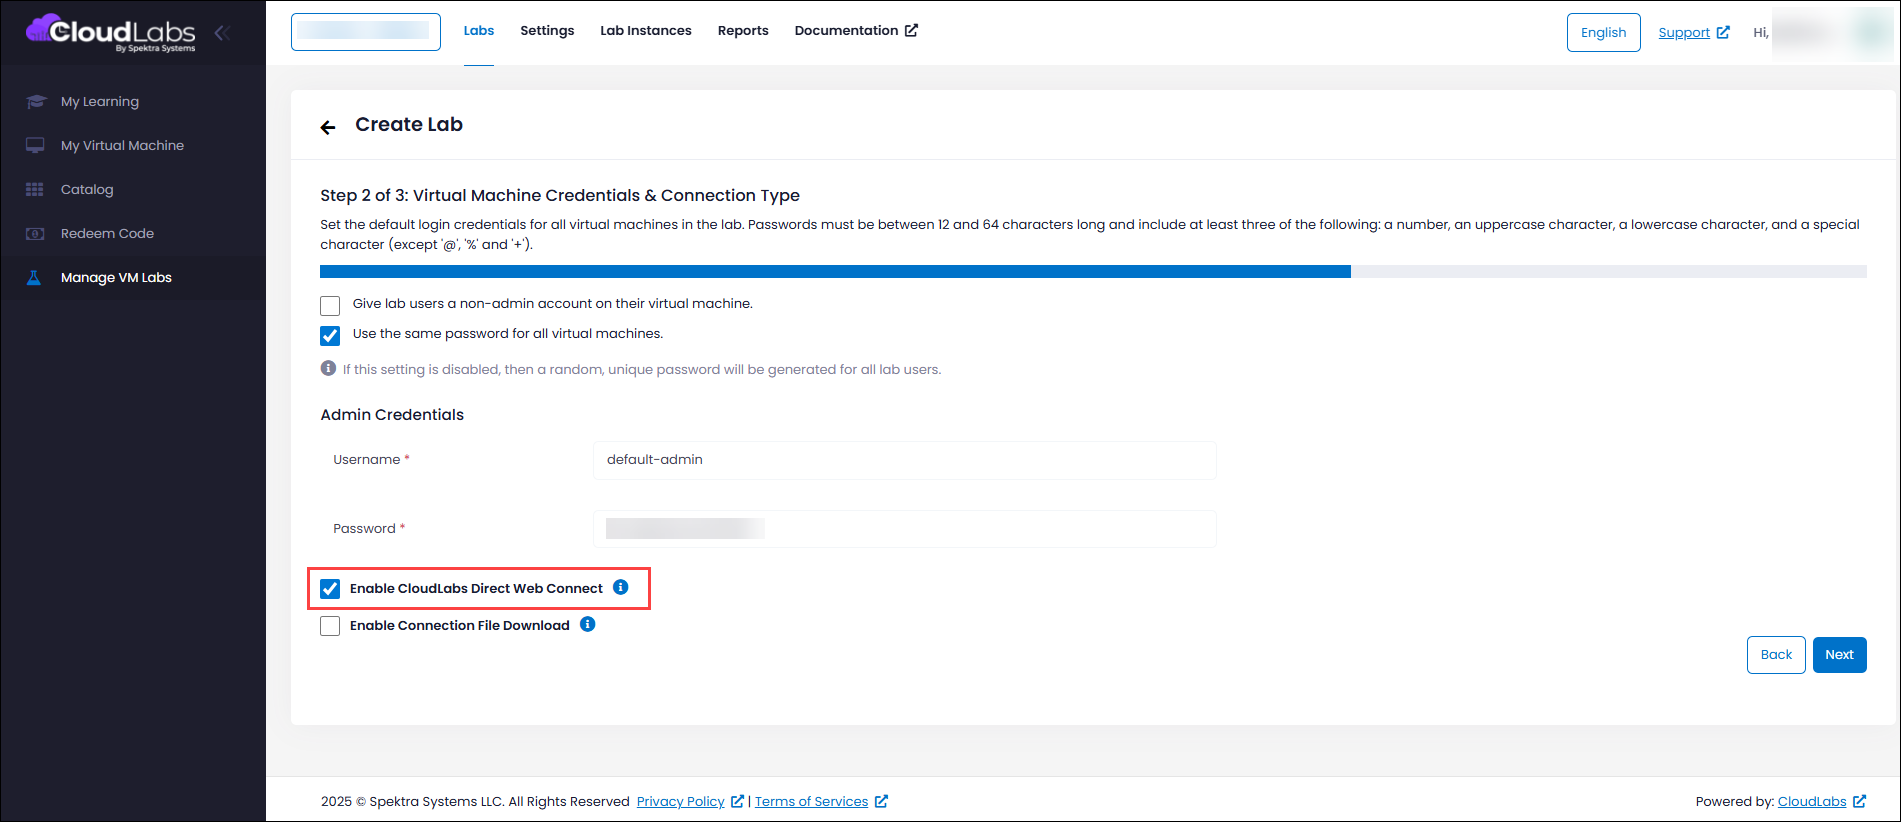
Step 2 of 3: Virtual Machine Credentials & Connection Type
Check the Give lab users a non-admin account on their virtual machine (1) checkbox to provide non-admin user accounts to users. Also, provide the Non-Admin User credentials (2) for non-admin user accounts accordingly
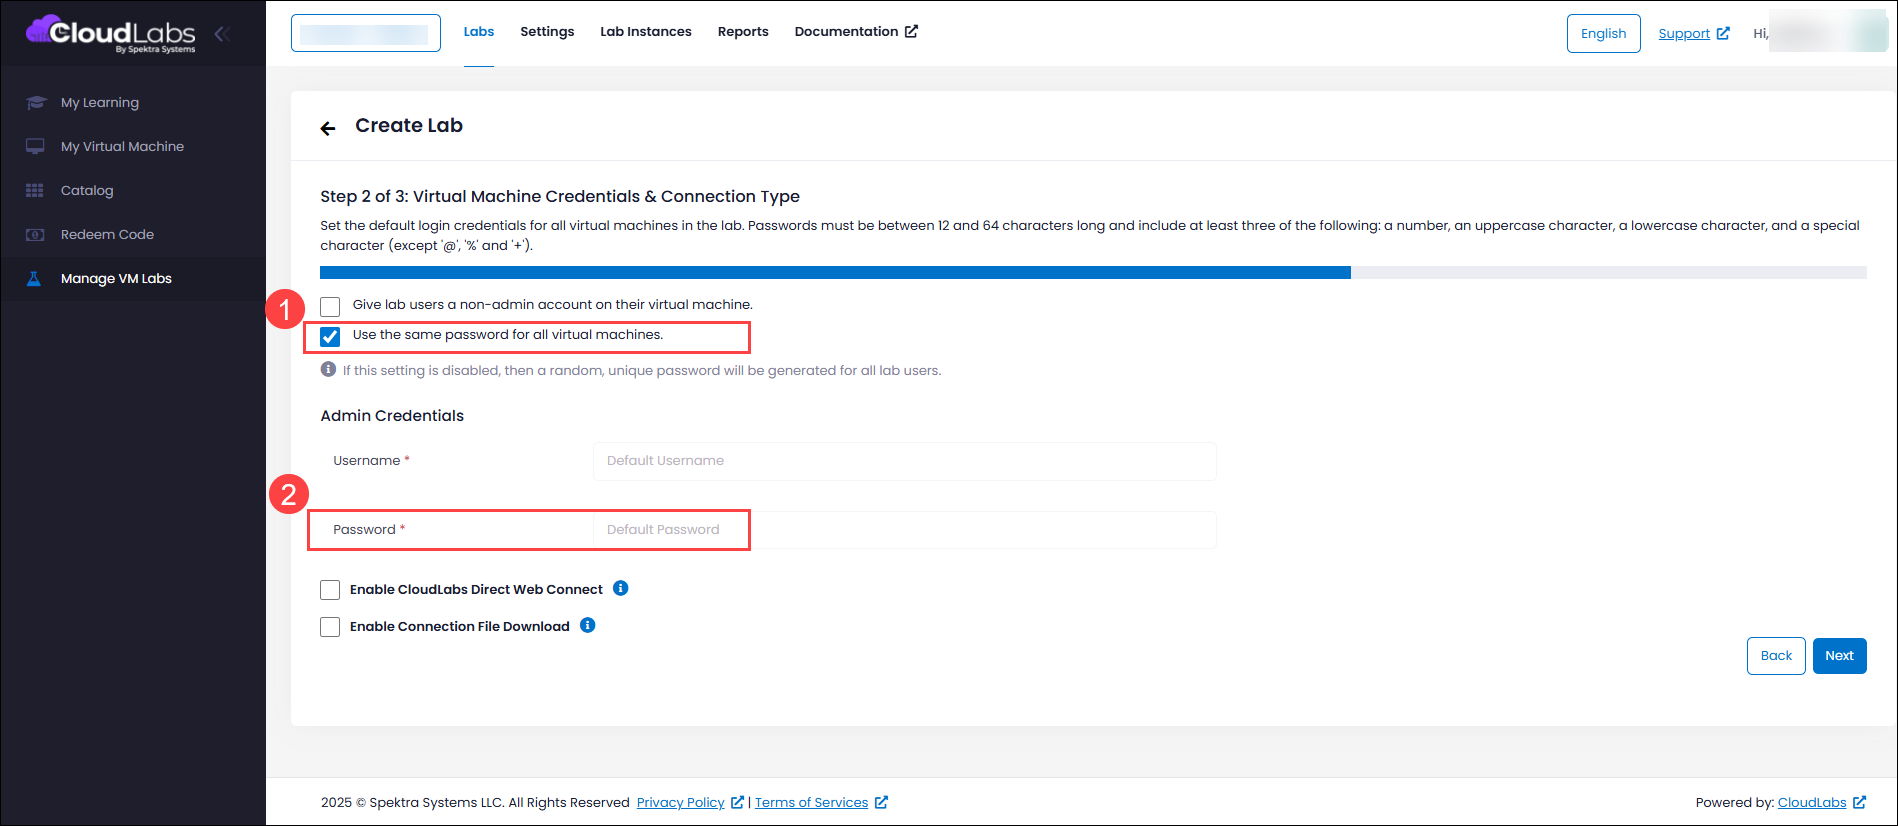
Check the Use the same password for all virtual machines (1) checkbox to use the same Password (2) for all users.
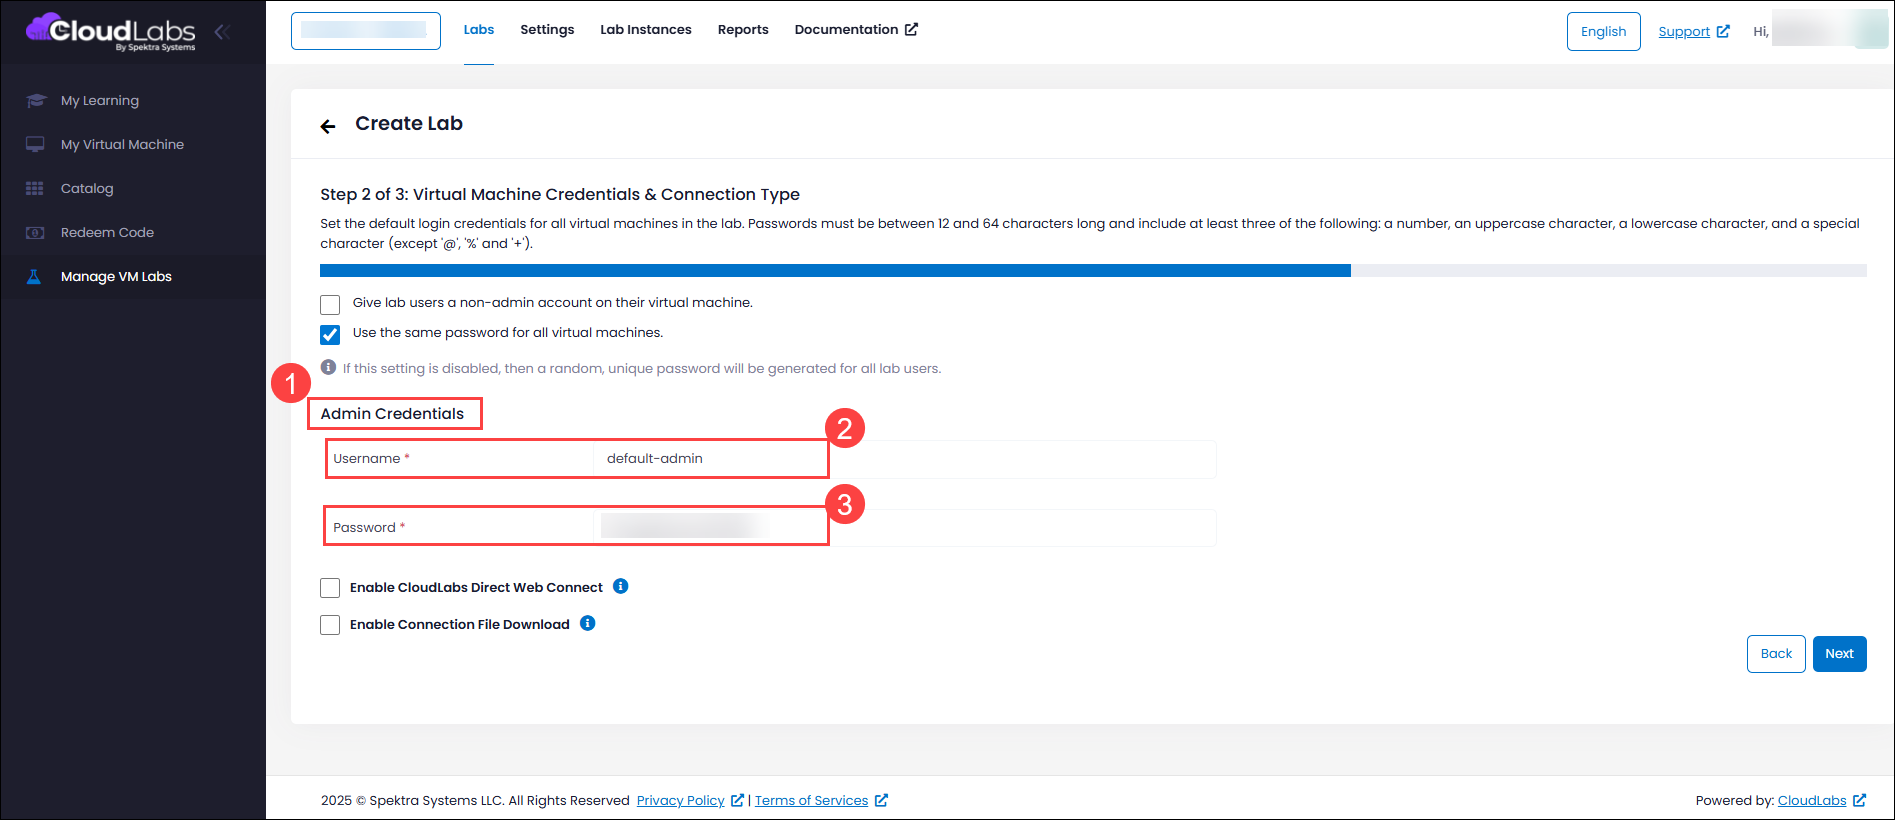
Admin Credentials (1): Provide a unique Username (2) and Password (3) for the administrator account.
Important Note:
When creating a lab, ensure the username and password follow these rules:
Username Requirements:
Maximum 20 characters
Cannot contain special characters:
\ / " [ ] : | < > + = ; , ? * @Cannot be empty or end with a period (
.)Must not use reserved names (e.g.,
administrator,admin,root, etc.)✅ Examples:
admin1234
Password Requirements:
Must be between 12 and 72 characters
Must include at least one uppercase letter, one lowercase letter, one number, and one special character
Allowed special characters:
! , $, *, (, ), -, _, =, ;, : , ' , , . , ~(Do not use@ or #as It breaks the direct web connectivity connection established from CloudLabs so it is not recommended to use )✅ Example:
Myazvmlabs2025!
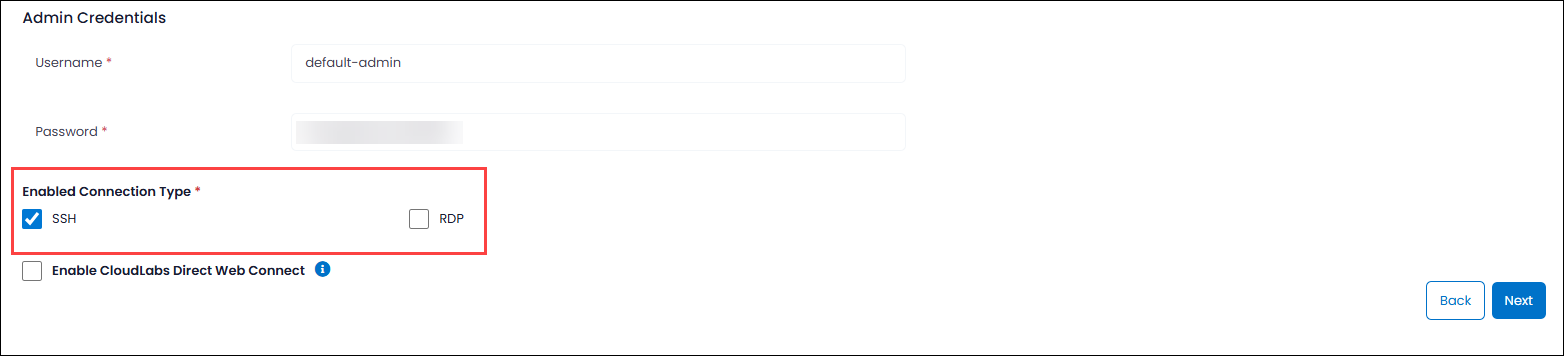
Enabled Connection Type: Choose the type of connection you want to use for the lab. CloudLabs offers support for both RDP and SSH connections for accessing its labs.
For Windows-based labs, you have the option to select an RDP connection.
For Linux-based labs, you have the flexibility to choose between RDP, SSH, or both.
Note
If you opt for an RDP connection in a Linux-based lab, the RDP port 3389 will be opened, but you will need to manually install the RDP package within the lab template using an SSH connection. Additionally, we have also opened ports 8888, 8787, and 80 for other services or applications you may wish to configure.
Users can access Linux VMs through Web Connect using either SSH or RDP. If SSH is selected, the VM is accessed via SSH; if RDP is selected, the VM is accessed via RDP. When both RDP and SSH are selected, RDP is the default connection through Web Connect, while users who wish to use SSH can connect directly via their local command-line interface. Additionally, to use RDP, the Linux image must already include a compatible RDP package. Without this package, the RDP connection will not work, so it’s important to ensure the Linux image is properly prepared to support RDP access.
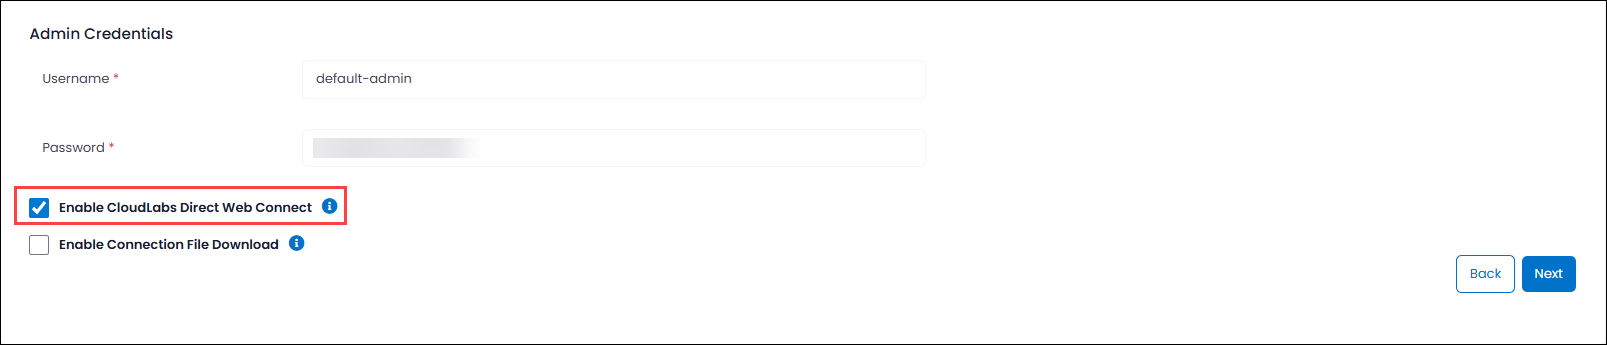
To enable connectivity to lab instances via RDP/SSH through HTTP, select the Enable CloudLabs Direct Web Connect checkbox. This feature allows you to connect to your lab instance using any browser, offering greater flexibility and ease of access.
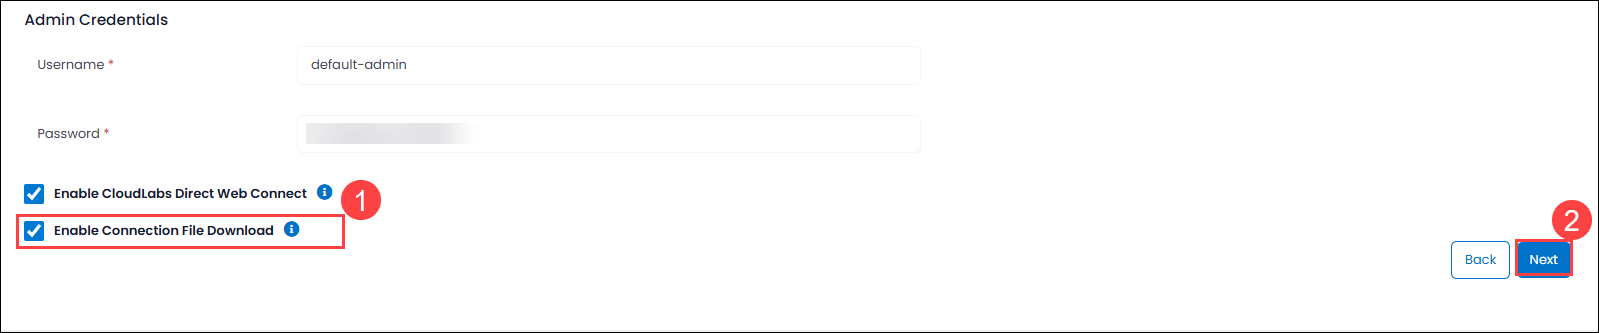
Enable Connection File Download:
The downloaded RDP file can be used to connect to the Virtual Machine using a local RDP Tool. When Enable Connection File Download (1) is selected for a lab, users and lab admin will be have option to download the RDP connection file. After reviewing the configuration, click Next (2) to proceed.
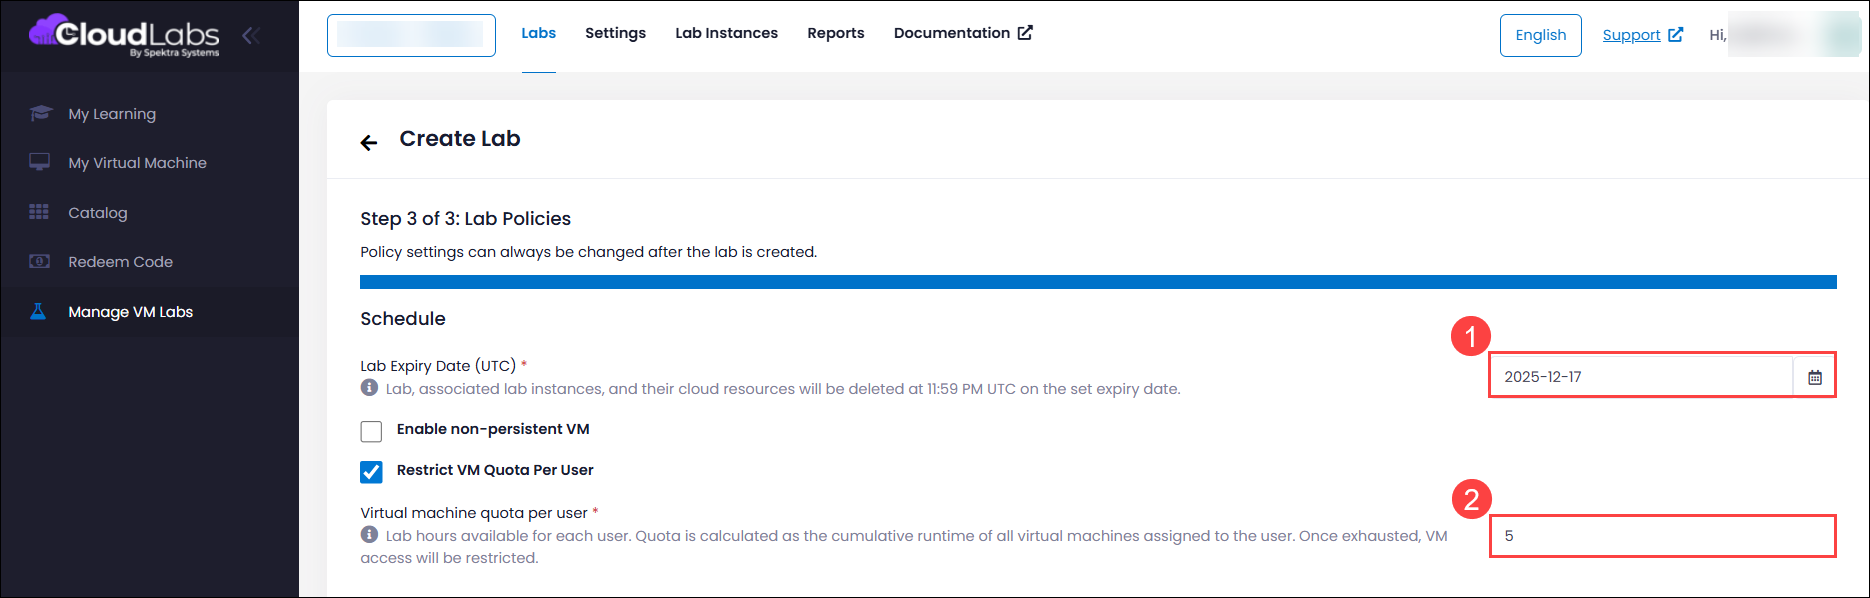
Step 3 of 3: Lab Policies
Schedule
Lab Expiration Date (1): Provide an expiration date for the lab. Once the expiration date ends, all the lab instances will be deleted automatically.
Virtual Machine Quota Per User (2): Provide the number of hours you want to allow for users.
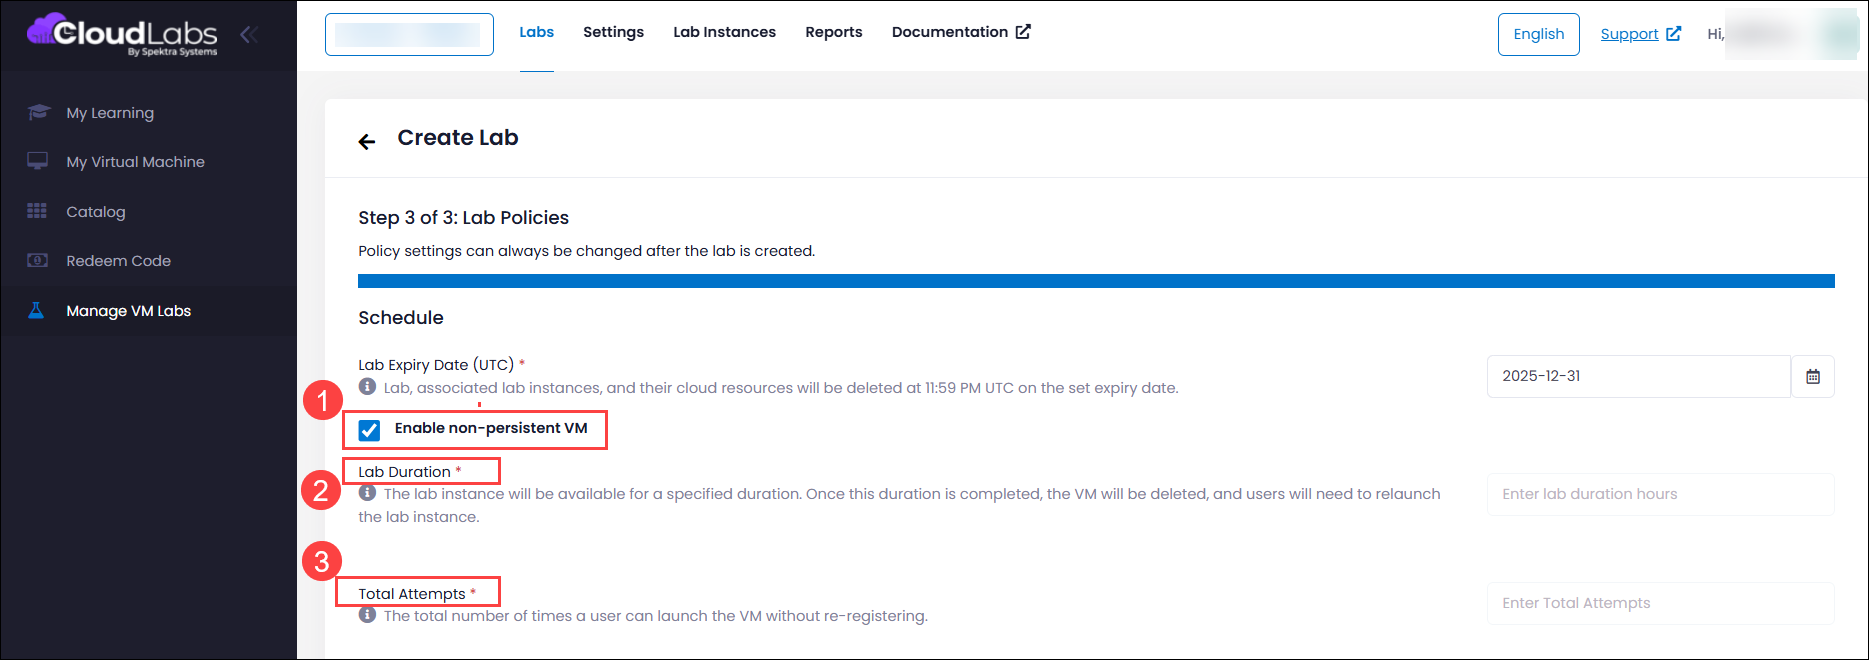
Enable Non-Persistent VM (1): Enable this feature to have the virtual machine (VM) instance available for a specified duration. Once this duration is completed, the VM will be deleted, and users will need to relaunch the lab instance if they want to use it again.
Lab Duration (2)- The amount of time the VM instance will be available before it is deleted.
Total attempts (3)- The number of times a user can launch the VM.
Automatic shutdown & disconnect
Automatic shutdown & disconnect features allow you to control your Azure cost and keep it within budget.
Shut Down Idle Virtual Machine (1): This option stops the virtual machines if the virtual machine is in an idle state.
Shut Down Virtual Machine When Users Disconnect (2): This feature automatically stops the virtual machine when the user closes the RDP session.
Shut Down Virtual Machine When Users Do not Connect (3): This feature stops the virtual machine if the user doesn’t connect to the lab instances.
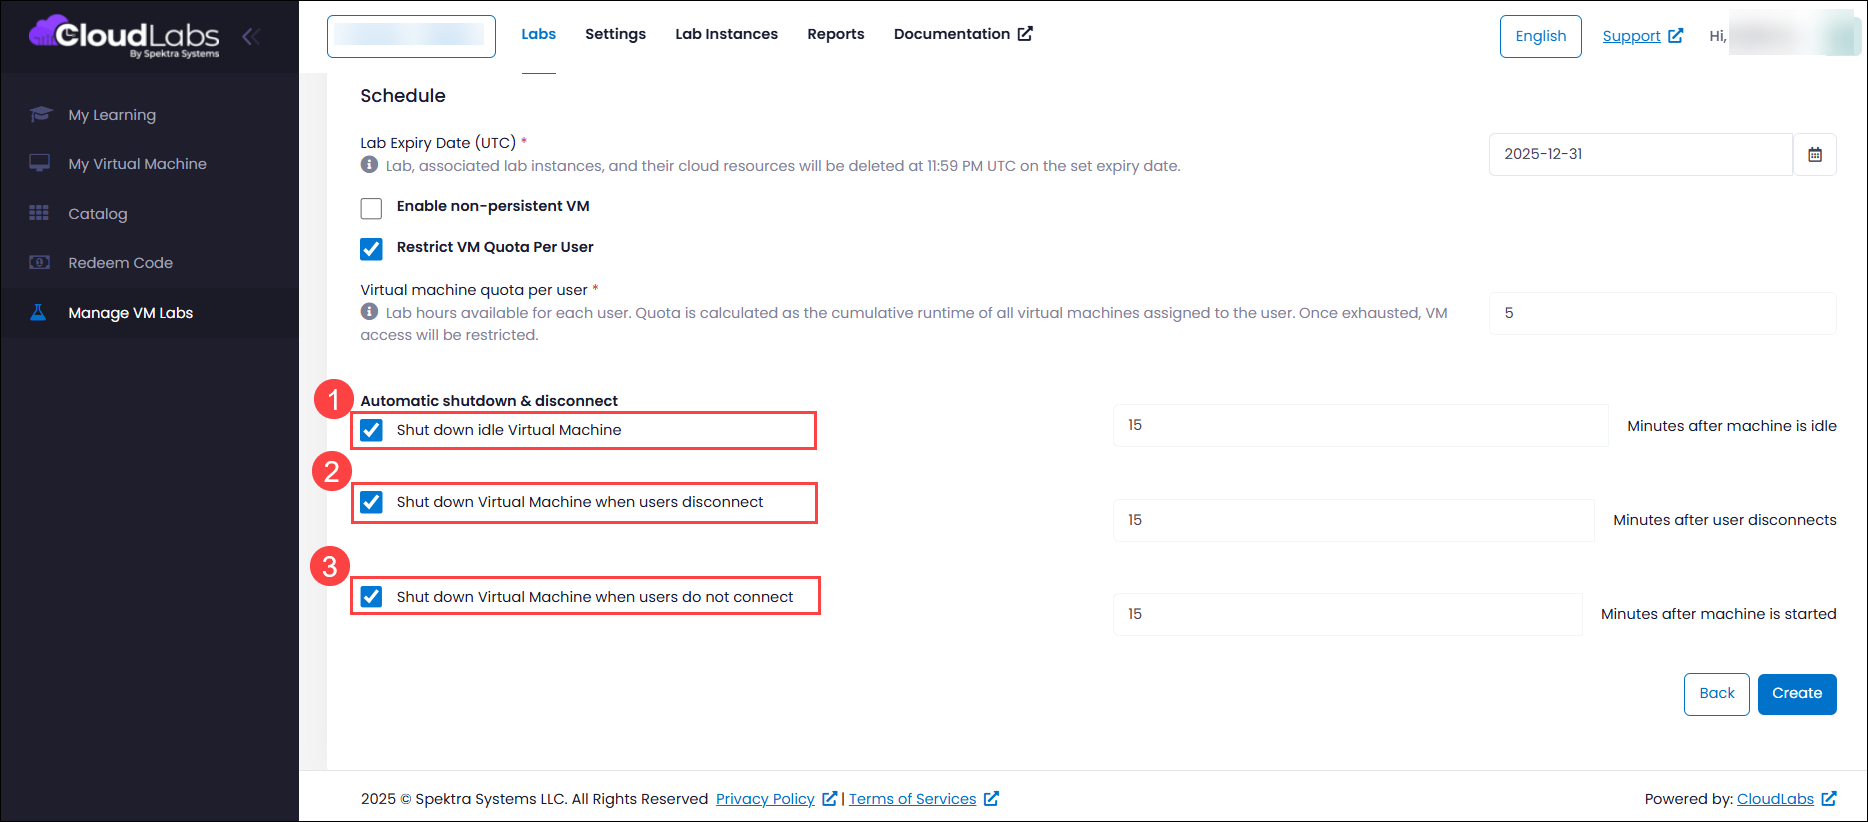
Click on the Create button and wait for a few minutes to complete.
Note:
When creating a lab, if the checkbox is enabled, the Idle Tracker tool is installed inside the VM. It monitors inactivity based on the configured timeout settings and displays a pop-up notification indicating that the VM is idle and will shut down after 10 minutes. If no activity is detected during this period, the VM is automatically deallocated.
To ensure that the VM Idle Tracker is installed, verify the Idle Tracker health status from the Instances section of each deployment.Even if the Idle Tracker checkboxes were not enabled during lab creation, you can enable it later after the lab and instances are created. Once the checkbox is selected and the lab settings are updated, the Idle Tracker tool will be installed on all VMs within a few minutes (typically less than 5 minutes) and will immediately start monitoring idle activity.
Next Steps
Now you know how to create a lab with different configurations and the required VM image. Once the lab is created, you will be able to see the lab under the labs section in Manage VM Labs. Now you can proceed to manage these labs by following the below links: