Overview:
This document provides a comprehensive description of the onboarding processes for VM-based lab scenarios through the CloudLabs portal. Within this document, you will learn how to create an ARM template, a CloudLabs template, set up a CloudLabs On Demand Lab (ODL), manage users, and troubleshoot basic issues.
VM-based labs are effective when you want to provide Hands-On learning experience to your users or students within a VM. These labs are particularly useful for working with software applications like Microsoft Power BI, Microsoft SQL Server, and anything you can think of within the VM. To set up a lab successfully, follow the instructions listed below.
In this document you will be going through with the below topics:
Prerequisites
Before you begin onboarding a VM-based lab through CloudLabs, ensure you have the following prerequisites:
Admin access to CloudLabs Admin Portal (If access is unavailable, kindly reach out to your point of contact or CloudLabs Support.
Active subscription(s) in CloudLabs. To Onboard a VM based lab, you would require one or more shared subscription(s) depending on the expected user count. If you would like to use Spektra's subscriptions, then please reach out to your point of contact or CloudLabs Support. If you would like to use your subscriptions, refer Onboard the Subscriptions to CloudLabs document.
Lab Guide/Reference documents containing necessary instructions, often provided through GitHub which are in GitMarkdown format.
Information used to onboard a VM based lab
To onboard a VM based lab to CloudLabs, use the below details:
Subscription Type: Depending on the lab's needs and access constraints,
Shared Subscription explained below is an appropriate option for implementing a VM based lab. Since you are not providing access on Azure Portal, you can choose this option where the same subscription can be shared between multiple users to access the lab environment.
Shared Subscription : One subscription can be shared by many people. The user will be able to isolate the resources of other users at the Resource Group level.
Once you are ready with pre-requisites and Subscriptions to onboard the labs on CloudLabs Admin Portal, you need to follow the instructions mentioned below:
Let’s begin with the Onboarding Process:
Setup Template on CloudLabs
The first step in the onboarding process is to create a template through CloudLabs.
You can follow the detailed guide mentioned below to login to the CloudLabs Admin Portal.
Follow the below mentioned guide to Add Template in CloudLabs.
You have successfully onboarded the template into CloudLabs.
Setup ODL on CloudLabs
Now, you need to create the ODL and map the template which you have created in the previous step to it. Also, the ODL must be created and managed only by the admins and not users.
Note: One template can be mapped with multiple ODLs.
To create ODL from CloudLabs Admin Portal, follow the instructions mentioned in the below guide.
You have successfully onboarded the On-Demand Lab (ODL) into CloudLabs.
Note:
a) Once you have tested the lab configurations from the ODL you created, it is recommended to create another ODL for production labs.
b) For information on how to invite users, manage users, extend lab duration and much more, refer Manage Access documentation.
Launch the lab
From the On Demand Labs Page (1), choose your ODL (2) and click on the Users icon (3) to register into the environment.

Click on + Add User and enter your details, then click on Submit.

Now you have successfully registered yourself as a user.
Within the Users page, you will find an instance registered under your name, indicated by its status being in the Approved state (1). Proceed by clicking the Launch (2) button.

Now you will be navigated to a different browser tab where you will be able to view the page as shown in the screenshot below. On this page, click on the Launch Lab button.

Upon clicking the Launch Lab button, the deployment process will initiate, leading you to the screen illustrated in the provided screenshot below:

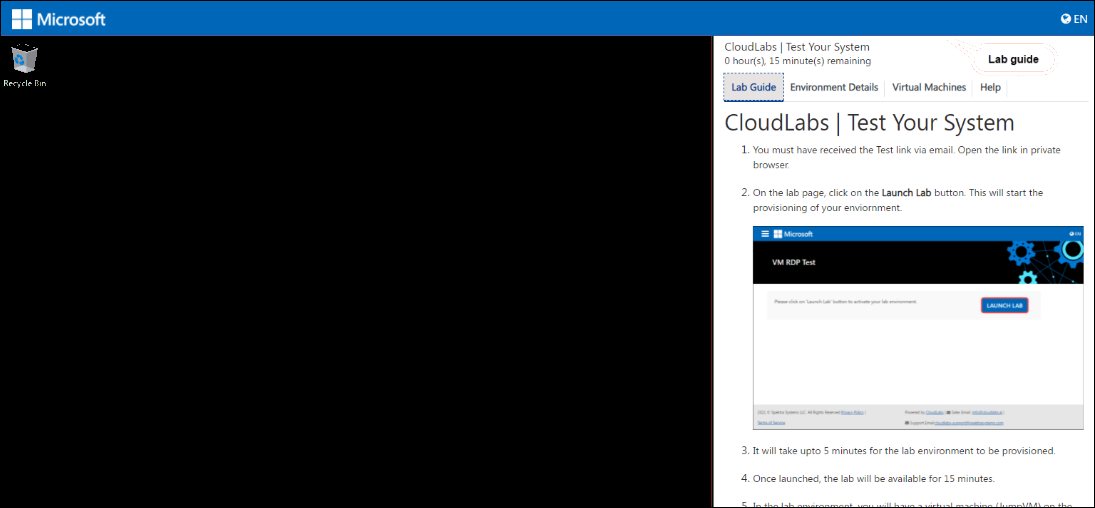
After the instance is successfully deployed, you will encounter the screen depicted in the below provided screenshot:

You can also activate the lab at bulk using Bit.ly URL by following the below steps.
From the On Demand Labs Page, choose your ODL (1) and note down the ODL ID. Click on the Elipses icon (2) and select Manage Activation Codes (3) to create an activation code.

Click on + ADD ACTIVATION CODE

Provide the below values for the Activation Code properties.
Name: The Activation code should always follow the naming convention ACTIVATE<--ODL-ID-->. For instance, if your ODL ID is 1462, then the Activation Code will be ACTIVATE1462.
Customer: Provide your company/customer name.
City: Provide your city name.
Country: Select your country from the dropdown.
Expiry Date: Select an expiry date for the Activation code, post which the Activation code will be invalid.
Finally, click Submit to save details.

Copy the Bit.ly URL and share it with the users.

Users can activate their labs by following the below steps:
Navigate to the Bit.ly URL.
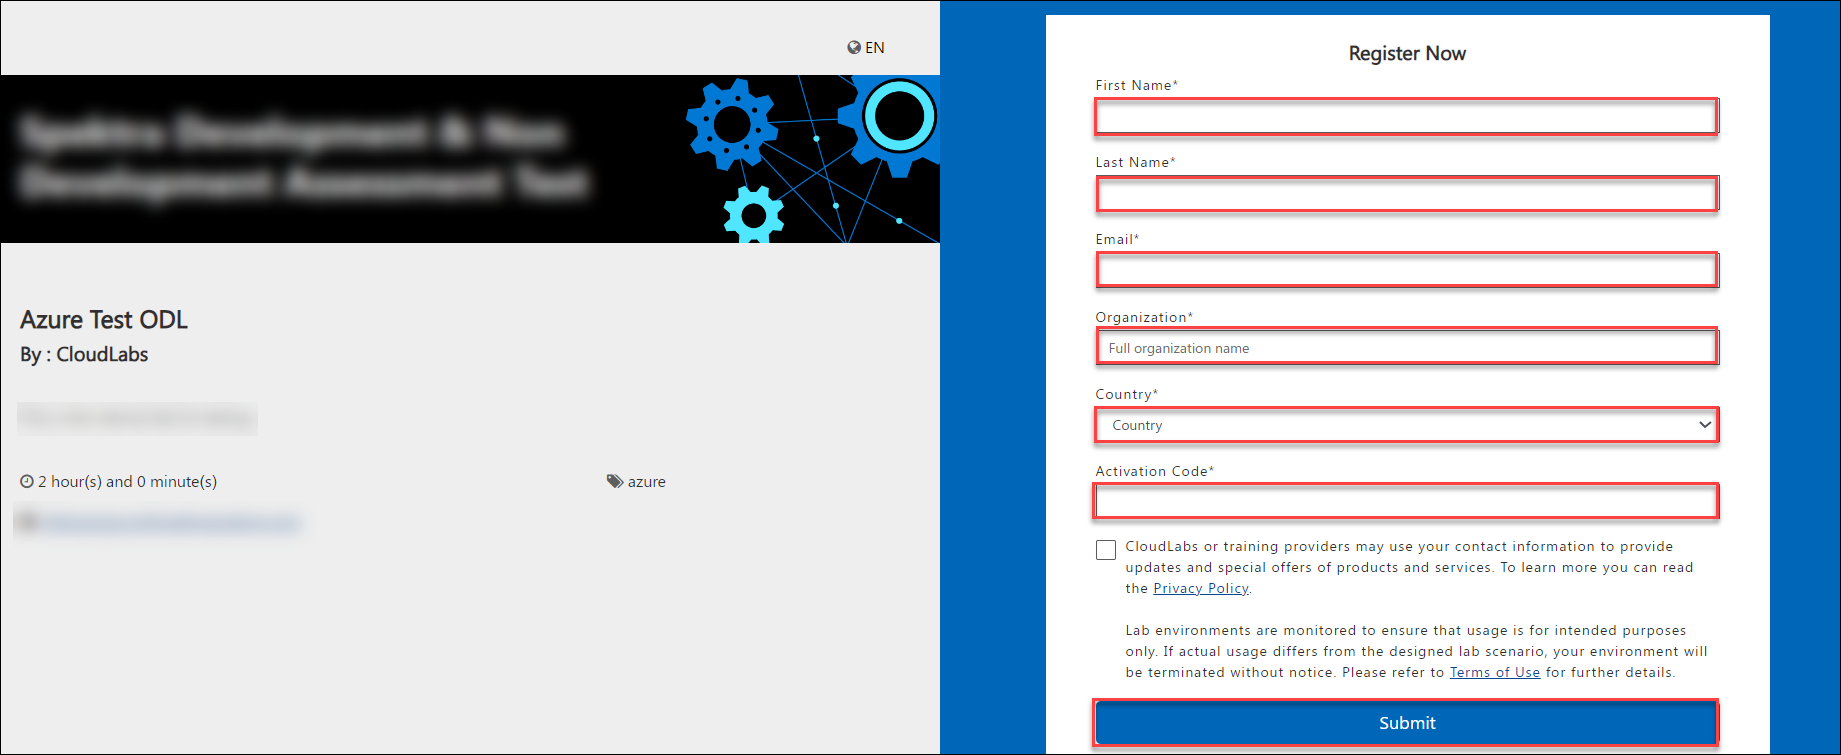
Provide the required details.
Click on Submit.

Common Issues and Resolutions
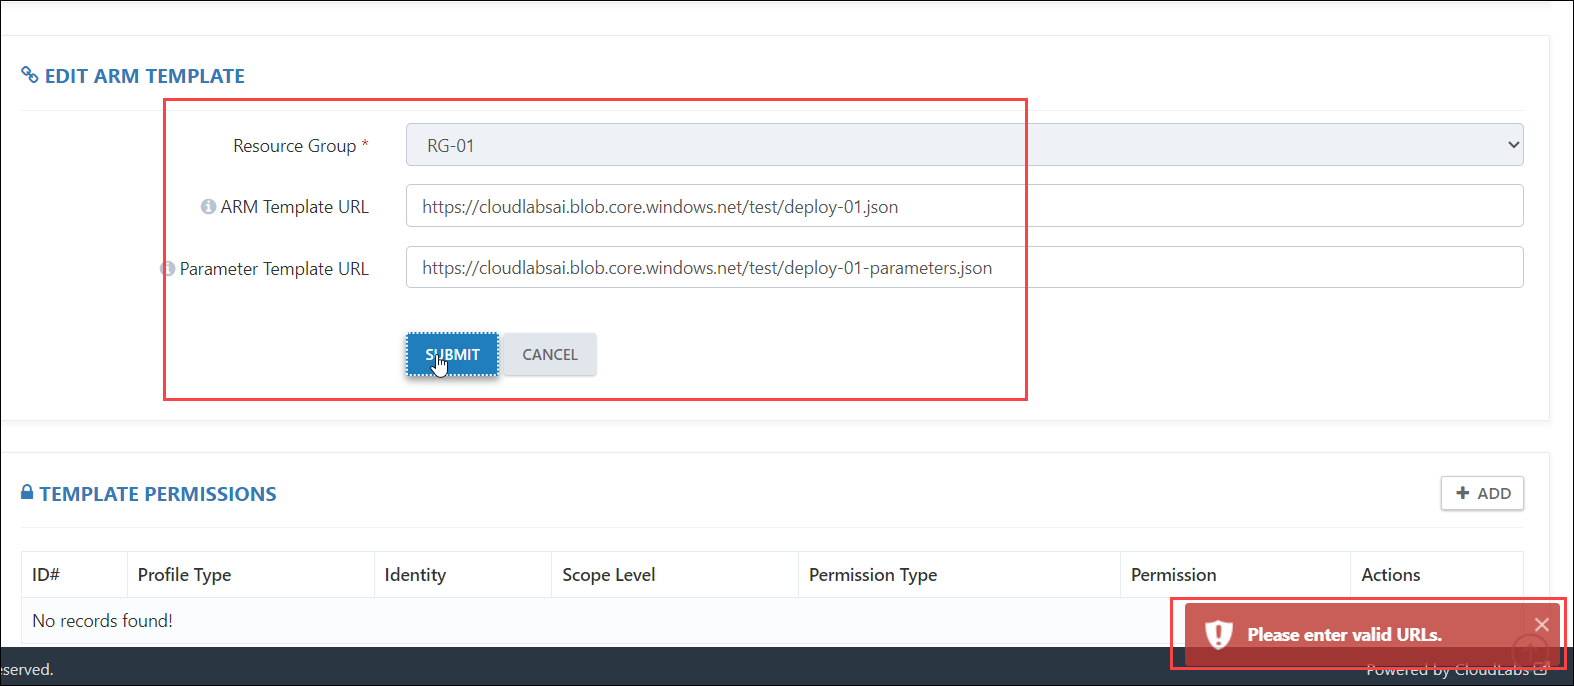
If you are creating your templates and adding it in CloudLabs, make sure the URLs of ARM and parameter file are publically accessible. If you are providing URLs from Private repo/Stroage Blob, you will be encountered with the error mentioned in below screenshot.

Make sure you are adding the URLs of ARM temaplte and Parameter files in it's respective fields.
If you are creating your own ARM templates, make sure you are providing all the required output parameters in the file to access RDP over HTTPS.
While creating the ODL, make sure you map the ODL with correct template to avoid conflict in labs.
If you are creating your own ARM templates, make sure you are following the Syntax correctly to avoid deployment failures.