Overview
This guide explains how to enable the virtual machine images available in the Azure marketplace, which means that only these marketplace images will be available while creating the labs across your tenant. To perform any action under global-level settings, you would need access to the CloudLabs portal with global admin permission. Refer to CloudLabs Identity and Access Management for more details.
Enable Marketplace Image
Follow the steps below to enable the Azure Marketplace images for the labs:
Login to https://portal.cloudlabs.ai/.
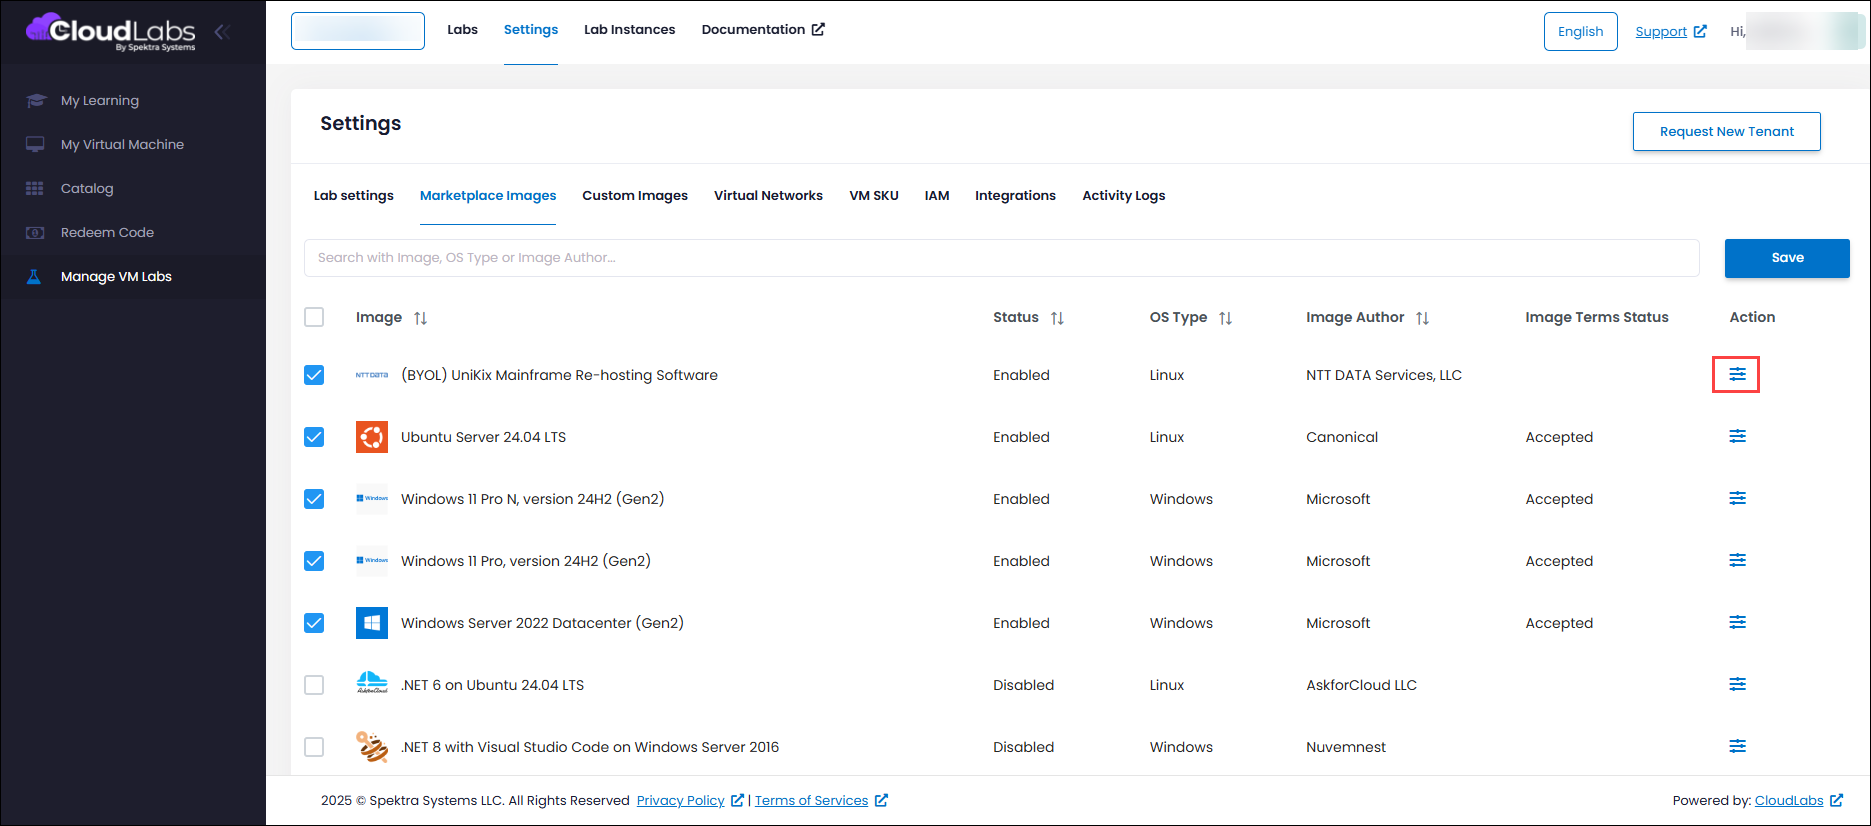
Navigate to Manage VM Labs (1) > Settings (2) > Marketplace Images (3).
You can see the marketplace image details—Image Name, Status (enabled/disabled), OS type, Image Author, Image Terms Status, and Action. You can search for the VM image name and enable the image you want to show while creating the lab.

Once you enable the image by clicking on the checkbox (4) corresponding to the required image, click on Save (5). This will accept the Standard terms of the image and enable the image for lab creation.
Note: If you have onboarded your own subscription (BYOS), click on 'Save' to ensure these images are available and enabled.
Accept Standard Terms
Once you enable and save the image, CloudLabs automatically accepts the standard terms set by Azure in the CloudLabs-managed subscription associated with your tenant. If, in any case, the Standard terms of the marketplace image are not accepted, you can accept that manually. Follow the steps below to accept the standard terms:
Login to https://portal.cloudlabs.ai/.
Navigate to Manage VM Labs > Settings > Marketplace Images.
You can see the marketplace image details like Image Name, Status (enabled/disabled), OS Type, Image Author, Image Terms Status, and Action.
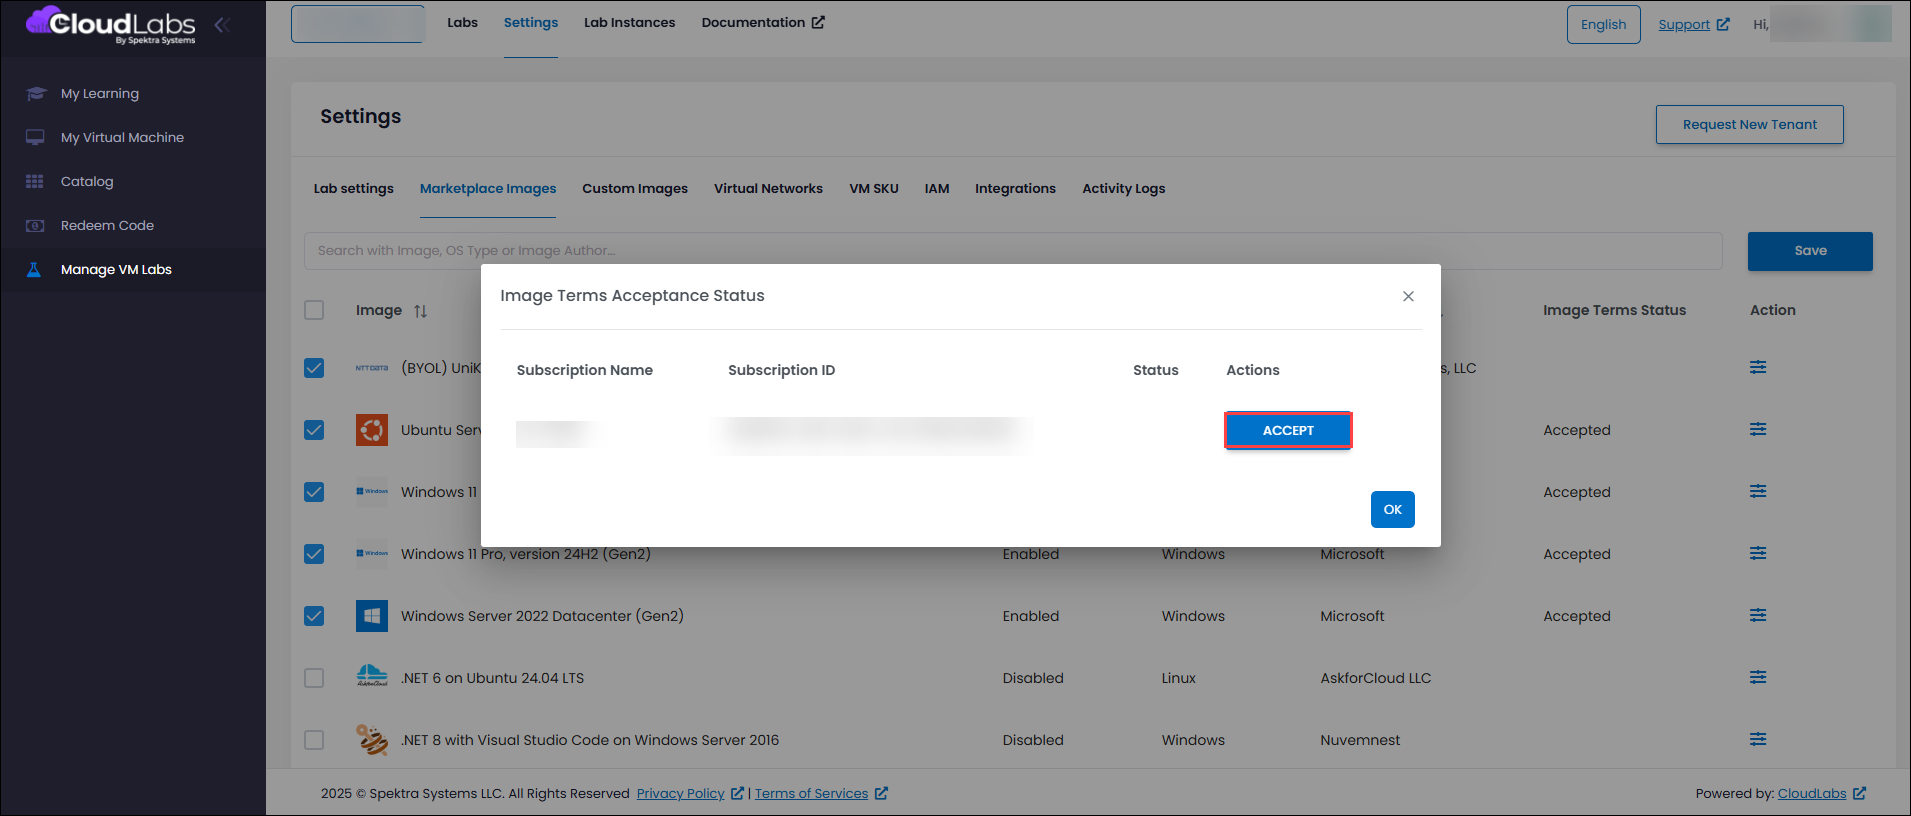
Check the image term status corresponding to the marketplace image that you have enabled. If the status does not show as Accepted, click on the Image Terms Acceptance Status under the Action column corresponding to the image.
This will pop up a window asking if you want to accept the standard marketplace terms with all the details. Click on Accept and wait for some time.
If the Standard Marketplace terms are still not accepted, please reach out to labs-support@spektrasystems.com for assistance.
Note: If you have onboarded your subscription (BYOS), enabling and saving the image will allow CloudLabs to automatically accept the standard terms set by Azure in your subscription as well.
Next Steps
In this article, you have learned how to enable Marketplace images for VM Labs and accept Standard Marketplace terms for the image.
You can now start creating labs with the enabled Marketplace images. Follow the Create Labs article to understand the steps in detail.