Overview
This guide provides step-by-step instructions for integrating Microsoft Entra ID groups with CloudLabs VM Labs. By synchronizing the lab with a Microsoft Entra group, user management becomes automatic and aligned with your organization's Microsoft Entra ID.
Once this integration is completed, you will be able to assign labs to Entra ID groups and all group members will have access to the labs. Please note that group members are synchronized every 24 HRS, you can force sync if you want to have immediate group membership changes reflected in CloudLabs.
Before proceeding with the next steps, you can choose either of the following Entra ID Group integration types in CloudLabs:
Entra ID Direct Access
Entra ID Administrative Units (optional)
NOTE: Both options allow group-based integration to CloudLabs, but AU-based sync lets you scope synchronization to a smaller subset of groups in your Entra ID.
Let’s look at the steps:
Create an Entra ID Service Principal
Setup Entra ID Group Sync Integration within CloudLabs
Sync Group Members
Create an Entra ID Service Principal
To get started, CloudLabs requires permissions to read your Entra ID data (groups and their members) in order to enable the integration. As the first step, please create a service principal within your Entra ID organization as mentioned below:
Find the Microsoft’s documentation on how to Create Service Principal here: Create a Service Principal
Create a service principal with following specifications:
Name: “CloudLabs-EntraID-GroupsSync-SPN” (or any other name as per your organizational best practices)
Supported Account Type: Accounts in this organizational directory only
Redirect URI: <Leave Blank>
To create a Client secret, follow the steps below:
Navigate to the “Certificates & secrets (1)” tab within the app registration details page & click on “Client secrets (2)”
Click on “+ New client secret (3)”, provide the details like “Description (4)” & “Expires (5)” and then click on “Add (6)”.
.png)
NOTE: Kindly copy the secret value and save it locally once the client secret is created as it may disappear shortly after the creation of the secret.
Navigate to Entra ID App registrations (1) > Overview (2) and make a note of the following values:
Client Id (3): Service principal client ID.
Tenant Id (4): Provide the Microsoft Entra Tenant ID of your Microsoft Tenant.
.png)
Client Secret (7): Secret Value.
.png)
Once you have these values ready, you can proceed to next step: Entra ID Direct Access or Entra ID integration using Administrative Units (AU).
Entra ID Direct Access
Pre-requisites for Entra ID integration via Direct Access
Once the prerequisite of creating a Service Principal is completed, the next step is to grant the Service Principal access to the Entra ID groups.
Within the service principal, navigate to API Permissions and Click on Add Permissions. Select Microsoft Graph.
Select Application Permissions and search for “Directory.Read.All”.
.png)
Click on Add Permissions and Grant Admin consent for your organization.
Entra ID Administrative Units (AU)
Pre-requisites for Entra ID integration using Administrative Units (AU)
Before enabling integration with Microsoft Entra ID Administrative Units (AUs) in CloudLabs, ensure the following requirements are met:
Microsoft Entra ID P1 license
Using Administrative Units is a feature available only with Microsoft Entra ID Premium P1 (or higher) licensing.Service Principal (SPN) must have "AdministrativeUnit.Read.All" API permission
To allow CloudLabs to read information about Administrative Units and the associated groups, the Service Principal (SPN) used for integration must be granted the "AdministrativeUnit.Read.All" application permission from Microsoft Graph API.
To provide the necessary permissions, please follow the steps below:
- In the service principal, navigate to API Permissions and Click on Add Permissions. Select Microsoft Graph.
- Select Application Permissions and search for "AdministrativeUnit.Read.All"
.png)
SPN should be added as "Group Administrator" on the AU scope
Additional to the API permissions, the SPN must be scoped to the Administrative Unit to manage or retrieve its group memberships. You must assign the SPN the “Group Administrator” role at the Administrative Unit level, not at the directory-wide level.
To achieve this, follow the steps below:
- Navigate to the AU (1) you wish to integrate with CloudLabs, click on “Roles and Administrators (2)” and select “Group Administrator (3)”.
.png)
- Click on “Add assignments”.png)
- Search for the SPN using the Application Client ID and select the application..png)
- Click on “Next” and proceed to assign the permissions.NOTE: Important Limitation – Service Principal Access to Administrative Units
Microsoft Entra ID does not currently enforce Administrative Unit (AU) scoping for applications (service principals) when accessing group or user data via Microsoft Graph API. Even if an app is assigned the Group Administrator role scoped to a specific AU and granted API permissions such as “AdministrativeUnit.Read.All”, it can still read group memberships across the other AUs (e.g., AU2) within the Entra ID.
This behaviour is due to current Microsoft Azure platform limitations.
Recommendations: Since Entra ID integration using AUs is an optional enhancement, we recommend not adding any groups to AUs that are not intended to be read by the CloudLabs Sync Group Members functionality or the associated Service Principal.
Setup Entra ID Group Sync Integration within CloudLabs
Once the above prerequisites are completed, you can proceed to set up the Entra ID group sync integration in CloudLabs by following the steps below:
Navigate to the CloudLabs portal using a browser.
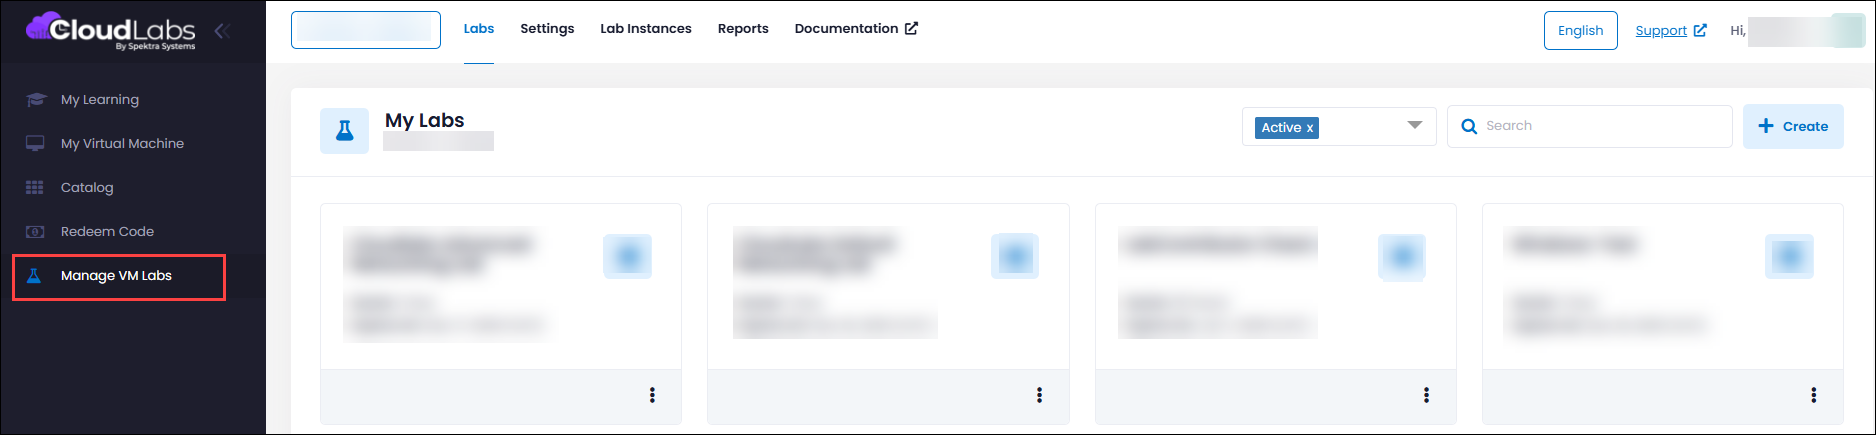
Navigate to the Manage VM Labs tab present in the side pane.
Navigate to the Global Settings page.

Navigate to the Integrations (1) tab within the Settings page and configure the following details:
Entra ID Group Configuration (2): This configuration will be used to synchronize the Microsoft Entra Groups.
Authentication Context (3): Select how CloudLabs should authenticate and sync Entra ID groups for your labs.
Entra ID Direct Access (7) - Synchronize groups directly from the entire Microsoft Entra ID tenant.
Entra ID Administrative Units (8) - Limit synchronization to groups within a specific Entra ID Administrative Unit.
Tenant Id (4): Provide the Microsoft Entra Tenant ID of your Microsoft Tenant.
Client Id (5): Provide the service principal client ID.
Client Secret (6): Provide the secret key of the service principal.
NOTE: The service principal must have the pre-requisites completed beforehand to perform the group sync operation depending on the type of Entra ID integration (Entra ID Direct Access or Entra ID Administrative Units).
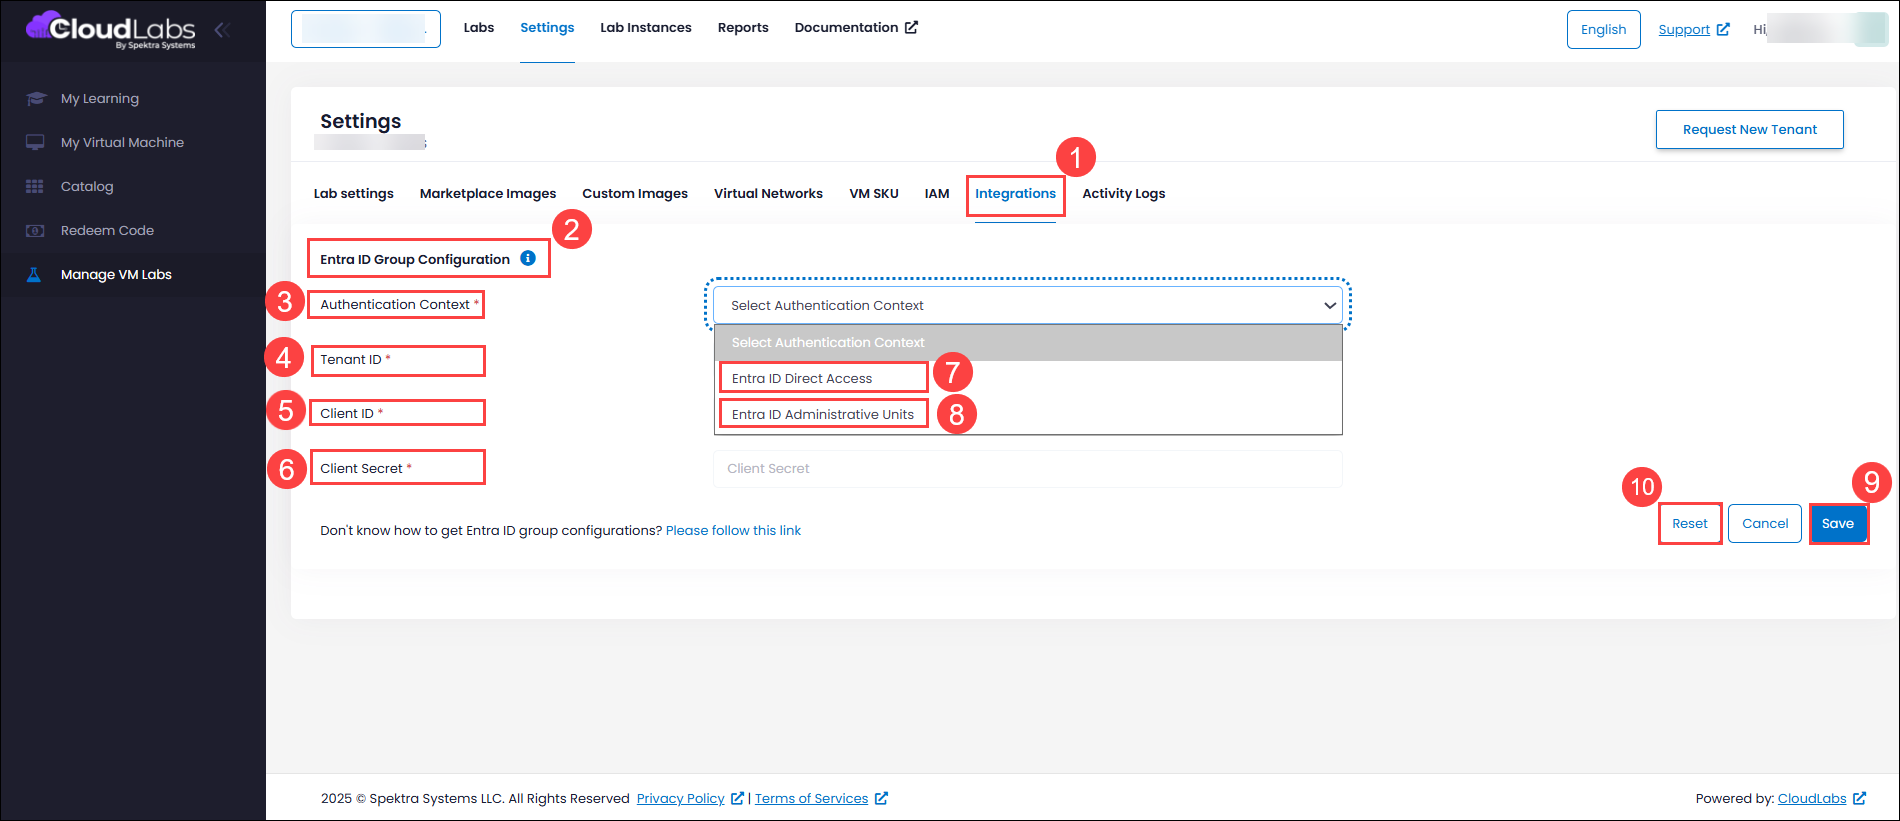
Once the details are provided, click on Save (9) and confirm the updates.
To reset the Integration configuration click on Reset (10).
Sync Group Members
Now that you have learned how to integrate Microsoft Entra ID groups with CloudLabs VM Labs, you can proceed with syncing group members to a lab.
Navigate to your Lab > Users.
Click on Sync Group Members.
Select a group (1) from dropdown and click Save.
In case of AU integration, the AU name (2) will be mentioned next to the group name.
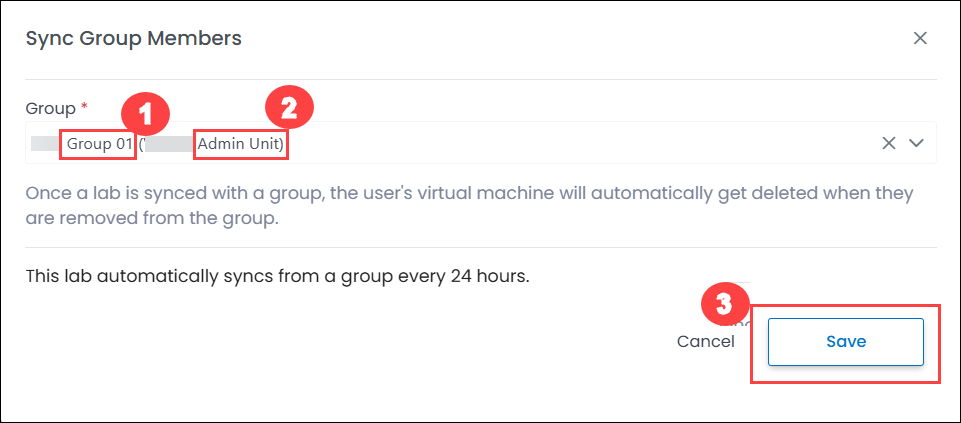
You will now see that group members are now available in users listing. Please note that group members are synchronized every 24 HRS You click on Sync Group Members again to force sync any changes.
.png)
Troubleshooting
If you are unable to see group dropdown list or sync group members, please verify that your service principal still has required permissions and secret is not expired.
Please review activity logs for more error information or contact Support for further troubleshooting.
Next Steps
In this article, you have learned about syncing Entra ID group members as lab users to a lab within CloudLabs.
Once the users are added to a CloudLabs lab via the Sync Group Members option, the Lab Admin can Add and Manage Lab Users as required.