Overview
If your lab requires a different VM size and disk configuration combination, CloudLabs VM labs provide you the option to create your own custom VM SKU and use it for your lab. This document is designed to guide you through the process of creating and managing/enabling the VM SKU from CloudLabs global settings. It provides detailed instructions on how to:
Create VM SKU using CloudLabs VM labs.
Enable the VM SKUs.
Enable/Disable regions for VM SKUs.
Requesting Quota against VM SKU
Delete Custom VM SKU
To perform any action under global-level settings, you would need access to the CloudLabs portal with global admin permission. Refer to CloudLabs Identity and Access Management for more details.
Create VM SKU using CloudLabs VM Labs
You can create a VM SKU using CloudLabs VM Labs. Once the VM SKU is created in CloudLabs, you can use the VM SKU to provision the lab VMs. Follow the steps to create a VM SKU in CloudLabs VM Labs.
Login to https://portal.cloudlabs.ai/.
Navigate to Manage VM Labs (1) > Settings (2) > VM SKU (3). Under VM SKU, click on Create (4).
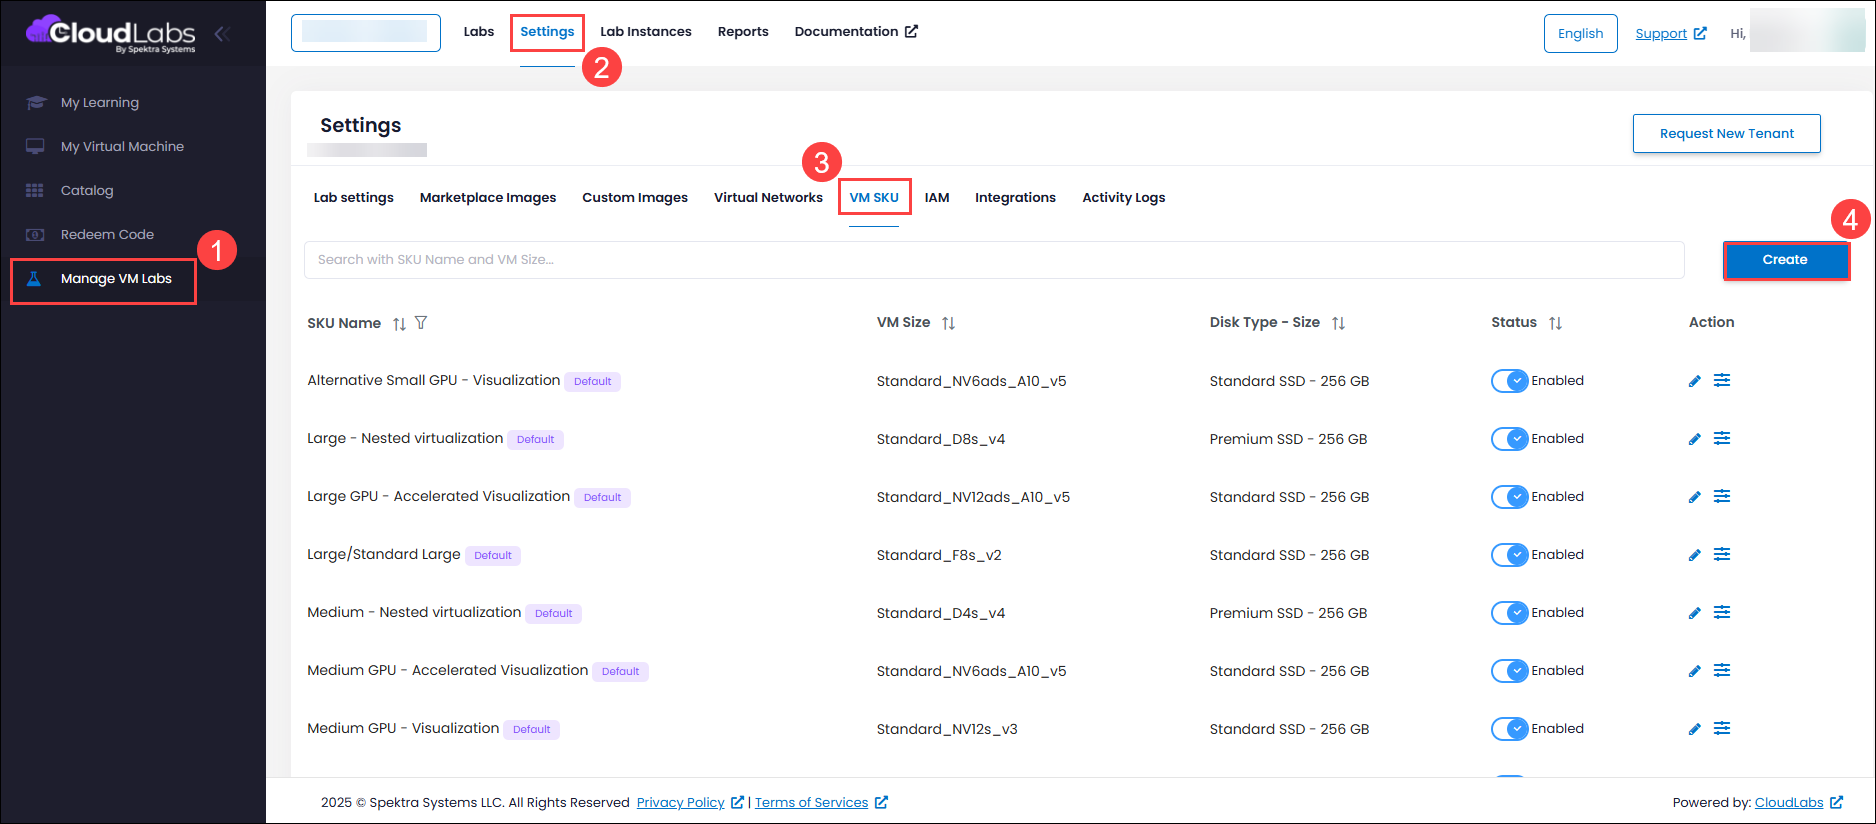
This will pop up a window where you need to enter the details of the new VM SKU. Fill in the details, click the 'Create' button to add the new VM SKU.
Name: Enter the name of your custom VM SKU.
Regions: Select the regions where this SKU will be available. Only the regions enabled at the global lab-level settings will be visible here. Note that this VM SKU will show up only if you select one of these regions when you create a lab.
VM Size: Select the VM size from the dropdown.
Disk Type: Select the type of disk.
Disk Size: Select the size of the disk.
.png "image(379).png")
Before you create the VM SKU, please refer to the following links:
See the list of all available sizes in Azure: Sizes
List of available virtual machine sizes for a subscription: Resource SKUs - List
Refer to the Information on Disk Types: Disk types
Note: If you are planning to create a custom VM SKU with a disk size of 32 GB or 64 GB, please be advised that such configurations are supported exclusively for Linux distributions.
Enabling a VM SKU
You can enable or disable the predefined or custom VM SKUs. Once a VM SKU is disabled, it will no longer appear as an option when creating labs. To enable or disable a VM SKU, follow these steps:
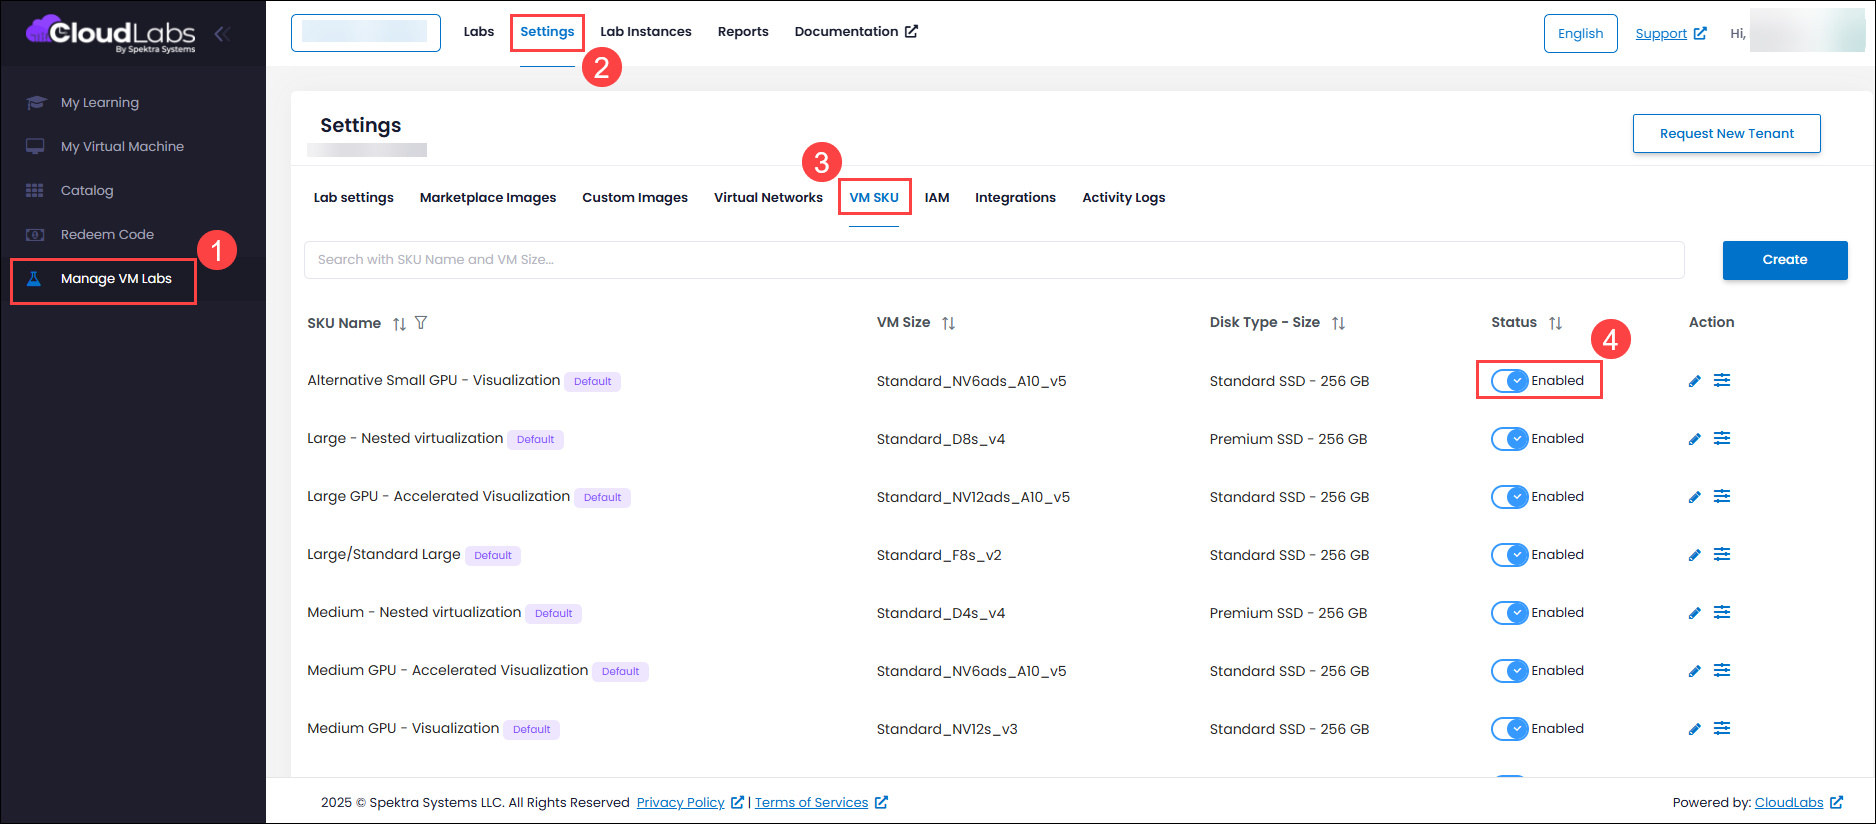
Navigate to Manage VM Labs (1) > Settings (2) > VM SKU (3), and find the VM SKU you want to enable or disable in the list.
Use the toggle switch in the 'Status' column to Enable or Disable (4) the SKU.
Enable/Disable Regions for VM SKUs
You can enable or disable regions for VM SKUs. Once a region for a VM SKU is disabled, it will no longer appear as an option when creating labs. To enable or disable regions for VM SKUs, follow these steps:
Navigate to Manage VM Labs (1) > Settings (2) > VM SKU (3), and find the VM SKU you want to enable or disable regions for in the list.
Click the pencil icon (4) under the 'Action' column.

In the Enable Regions for VM SKU window, toggle (1) the regions where the SKU should be enabled or disabled under the Action section. Once done, click on OK (2).
.png "image(330).png")
Ability to Request Quota against VM SKU
You can now request a quota increase for specific VM SKUs directly through the platform, ensuring you have the necessary resources for your deployments. This feature streamlines the process of communicating your quota needs, making it easier to request additional capacity for virtual machine deployments.
To request a quota increase for a VM SKU, follow these steps:
Navigate to Manage VM Labs (1) > Settings (2) > VM SKU (3), and find the VM SKU for which you need to request a quota increase.
Click the Menu bar (4) under the 'Action' column.
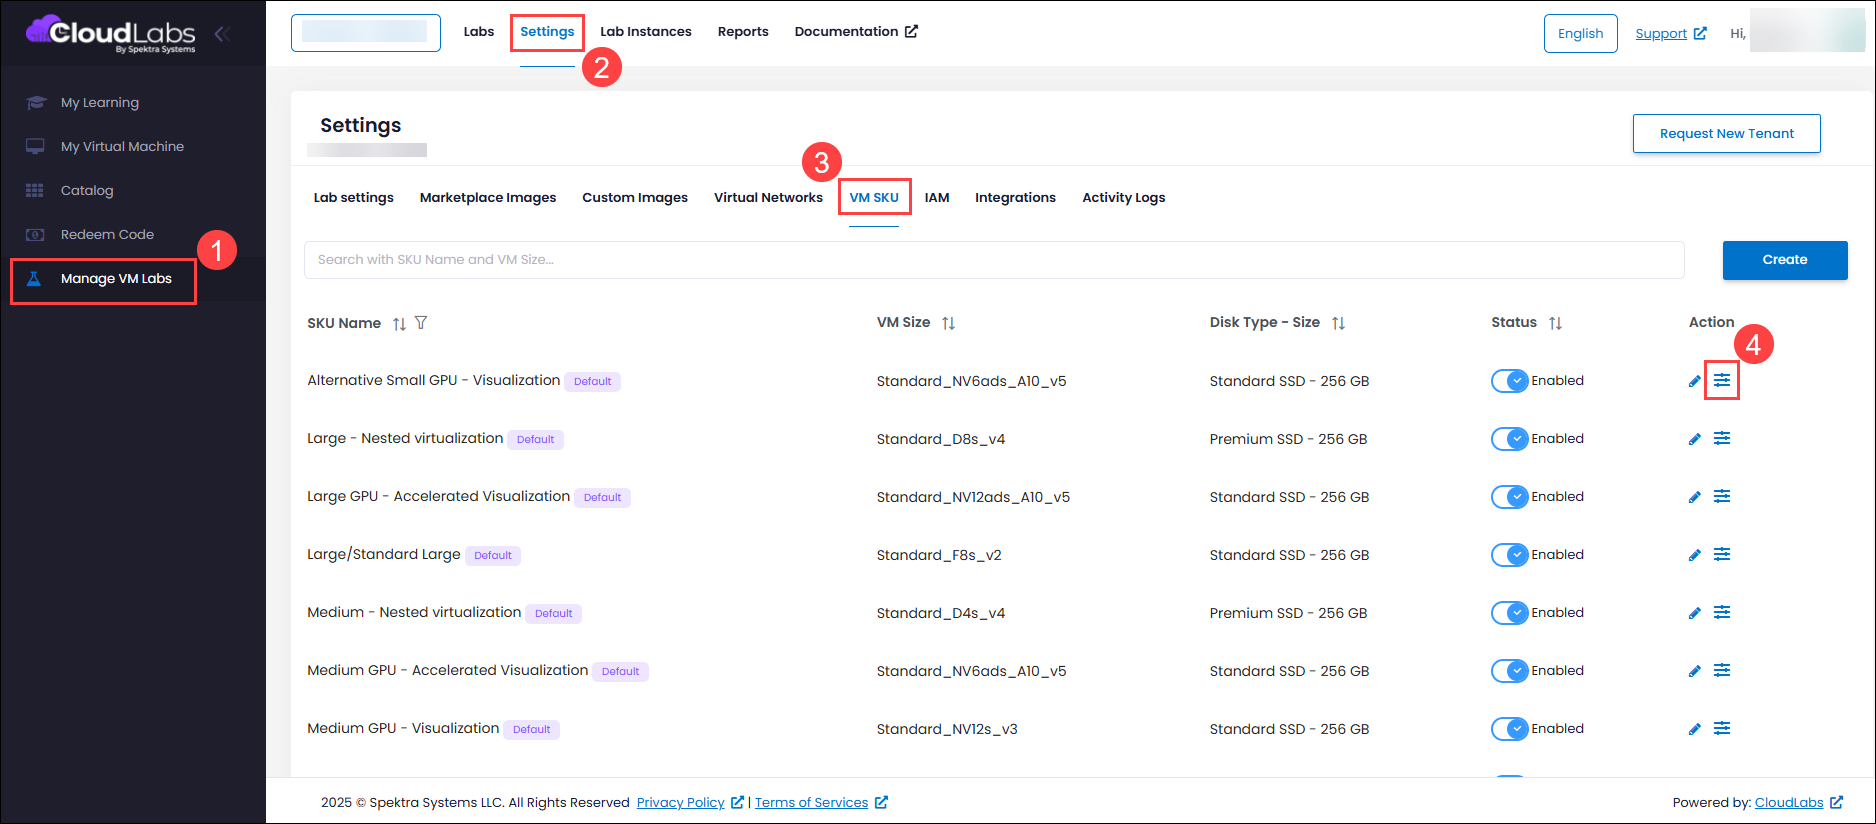
This will draft an email for you to address the CloudLabs support team, requesting an increase in the quota for virtual machine deployments. In the email draft, include the required vCPU count per region and send it to the CloudLabs support team. The team will process your request and provide the necessary quota adjustments as quickly as possible, ensuring that your deployment needs are met effectively.
.png)
Once your VM SKU quota increase request has been processed and the required quota has been approved, you can proceed with deploying virtual machines using the specified VM SKUs.
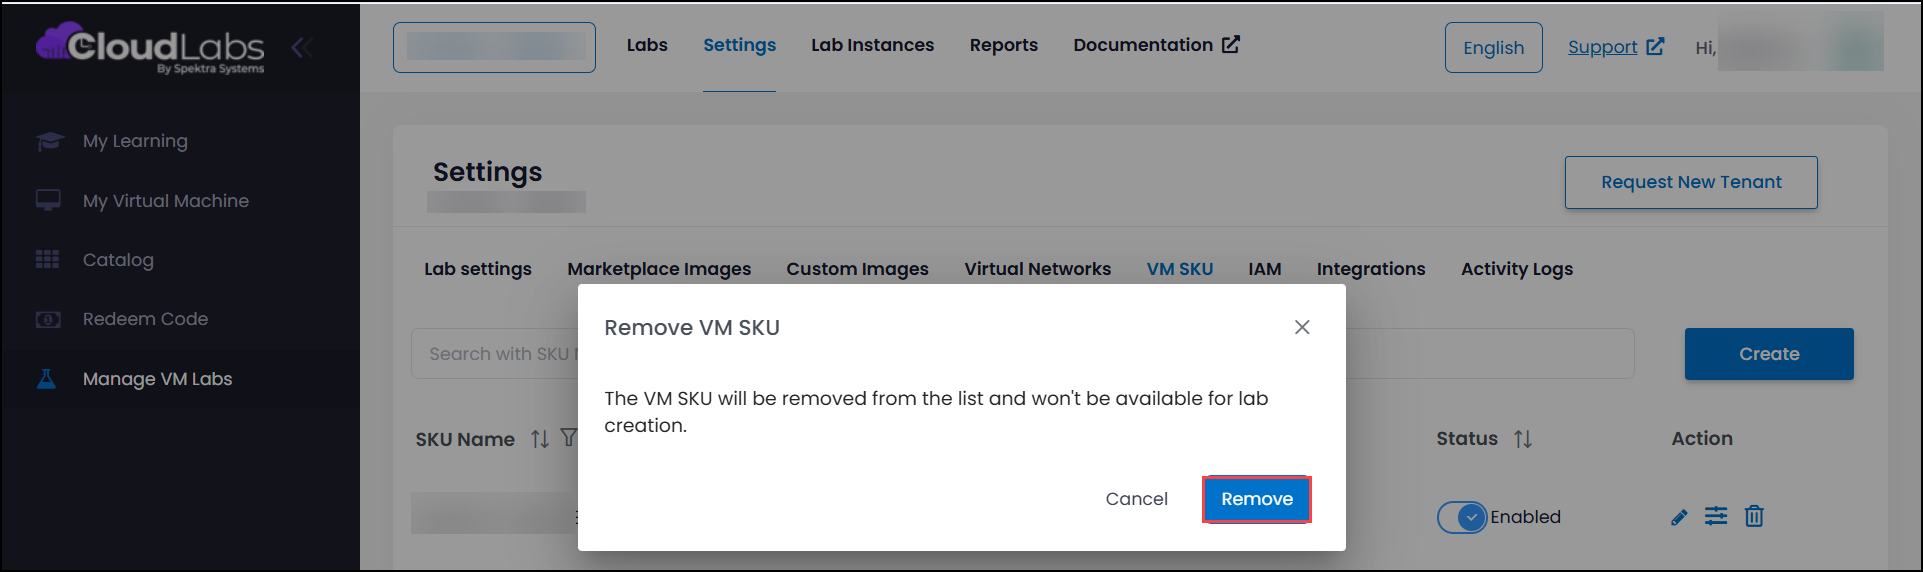
Delete Custom VM SKU
You can delete a custom VM SKU in CloudLabs. Once deleted, the custom VM SKU will no longer be available in the VM SKU list. Please note that pre-defined VM SKUs cannot be deleted; only custom VM SKUs can be removed. To delete Custom VM SKU, follow the below steps:
Navigate to Manage VM Labs (1) > Settings (2) > VM SKU (3), and find the VM SKU that you want to delete.
Click the Trash icon (4) under the 'Action' column.
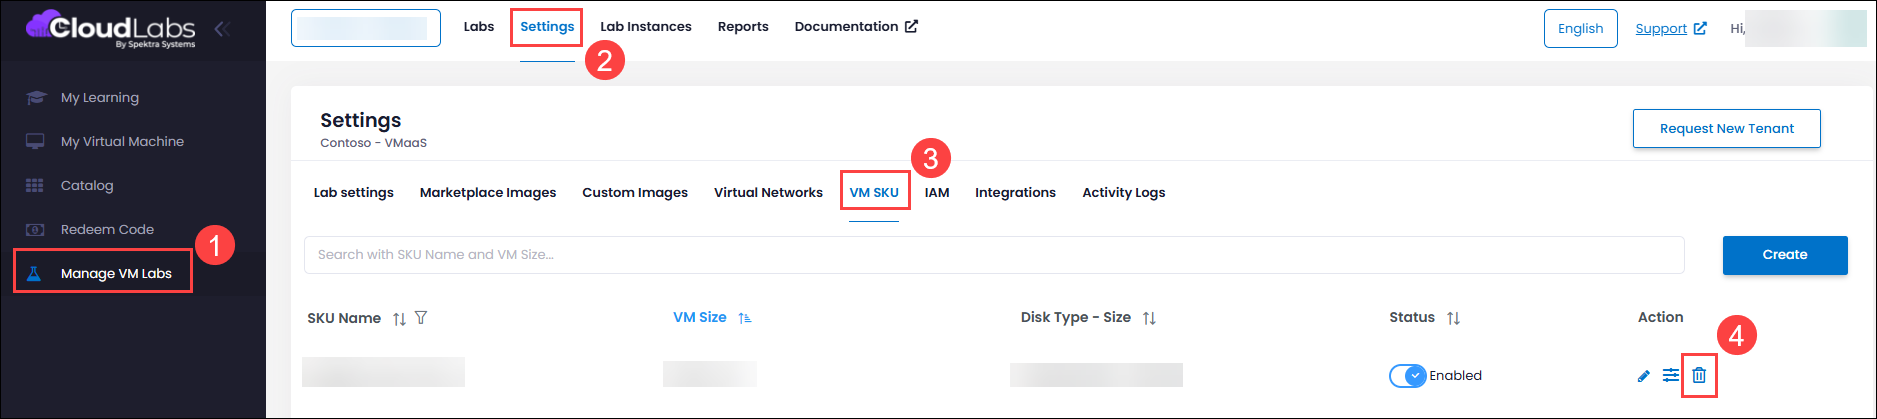
A pop-up will appear asking for confirmation. Click on Remove to confirm, and the SKU will be deleted.
Next Steps
In this article, you have learned how to create VM SKU, Enable the VM SKUs, Enable/Disable regions for VM SKUs, Request Quota against VM SKU and also Delete Custom VM SKU from CloudLabs global settings.
You can now start creating labs using these VM SKUs. For detailed steps, refer to the Create Labs article.