Overview
We will learn how to set up and onboard AWS accounts to CloudLabs AI platform.
Pre-requisites:
AWS Root account and login credentials
We only need the AWS Root Account to begin the initial setup, and we'll take care of the rest later.
Please follow the steps given below and get stared with the setup:
Login to AWS console with Root Account credentials.
Once logged in, select My Organization from the drop-down menu next to the organisation name on the right top.

Click on Add an AWS account under Organization.
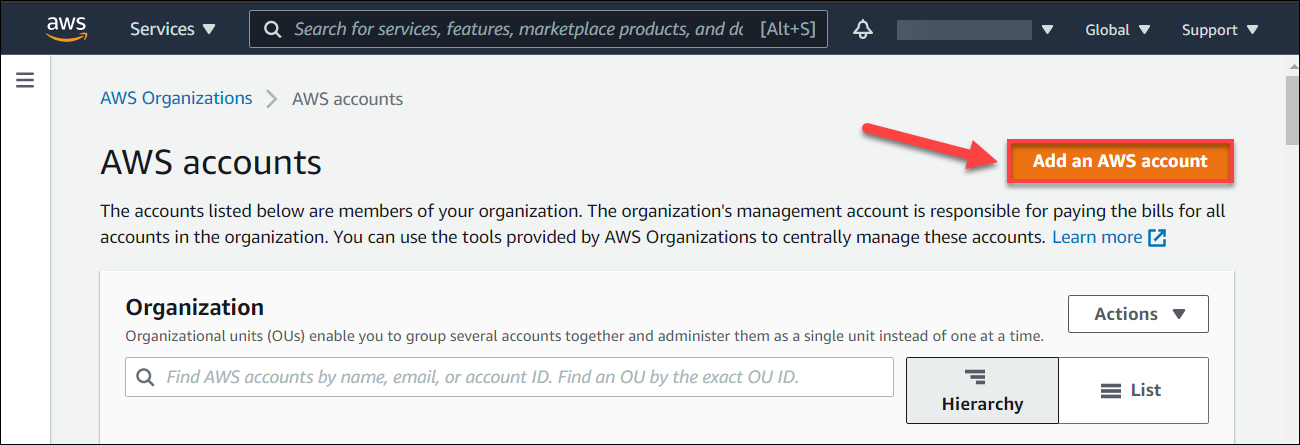
Choose Create an AWS Account and fill all the details asked in this form.
AWS account name: Give your AWS account a name, such as Contoso-Labs-001. (Note: Using a sequential number along with the account name is recommended.)
Email: accountName@domain.com
IAM role name: Keep default role i.e. OrganizationAccountAccessRole
Finally click the Create AWS account button.
If you want to establish more AWS accounts, repeat steps 3–4.
Note down the Account ID for future reference once the account has been successfully created.
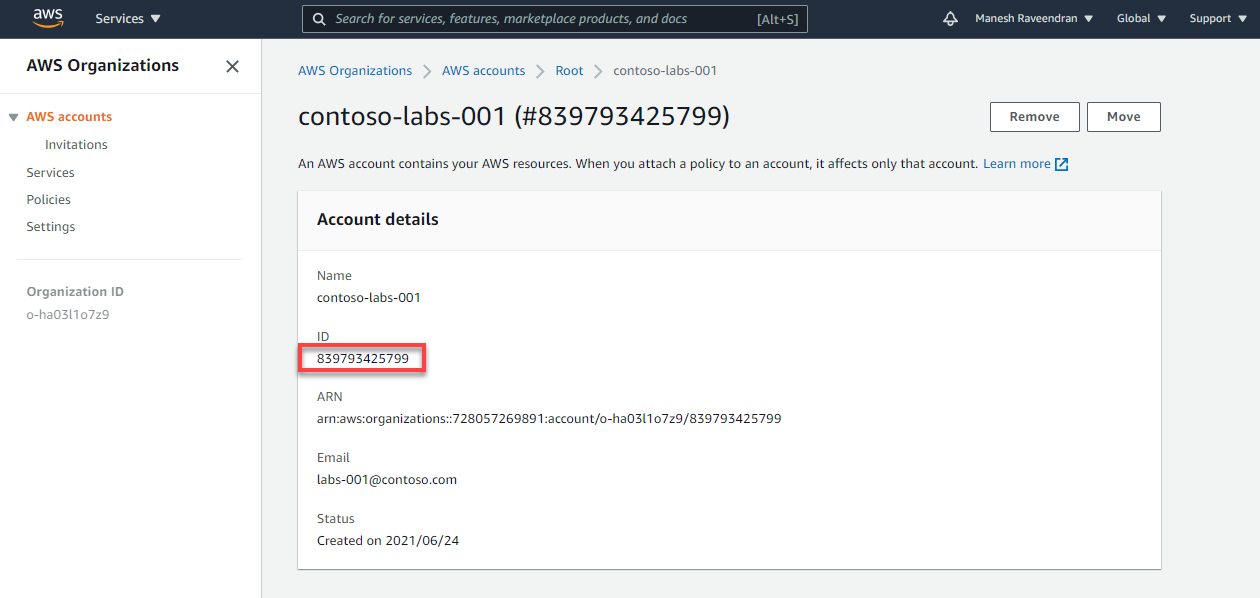
Include the newly created accounts in the root account's access list.
For each newly created account, you must now add a group and inline policy.
Navigate to Identity and Access Management (IAM) and select User groups
Now, click on Create Group button to create a new groups
Name the group MemberAccountAdmins.

Goto permissions and click on create inline policy under Add permissions.
.png)
Choose JSON and place the below policy. You should update you Account ID in it.
"arn:aws:iam::NEW_ACCOUNT_ID:role/OrganizationAccountAccessRole{
"Version": "2012-10-17",
"Statement": [
{
"Sid": "Stmt1508134114000",
"Effect": "Allow",
"Action": [
"sts:AssumeRole"
],
"Resource": [
"arn:aws:iam::<AccountID1>:role/OrganizationAccountAccessRole",
"arn:aws:iam::<AccountID2>:role/OrganizationAccountAccessRole",
"arn:aws:iam::<AccountID3>:role/OrganizationAccountAccessRole"
]
}
]
}
Note: You must add the same number of roles as you have accounts, i.e. one role per account and each role should have account ID in it.

Click on review policy and then create policy

If you plan to create additional AWS accounts after implementing inline policy, make sure to change the policy and add role with new Account ID.
Setup Admin Group and add administrator access policy to it.
Go to Identity and Access Management (IAM) and click select Groups
Click on Create Group and enter name for group such as Admins
Goto Attach permissions policies and search for AdministratorAccess and select the same from the list.
Click on Create Group
Setup IAM user account and add it to the Admins group you just created.
Click on users under Access Management and click on Add user to add a new IAM user
User name: give IAM user a name such as admin-user
Select access type:
Enable Access Key - Programmatic access & Password - AWS Management Console access
Console Password you can choose either autogenerated password or custom Password.
Require password reset: you can disable this check box to avoid the reset password at next login.
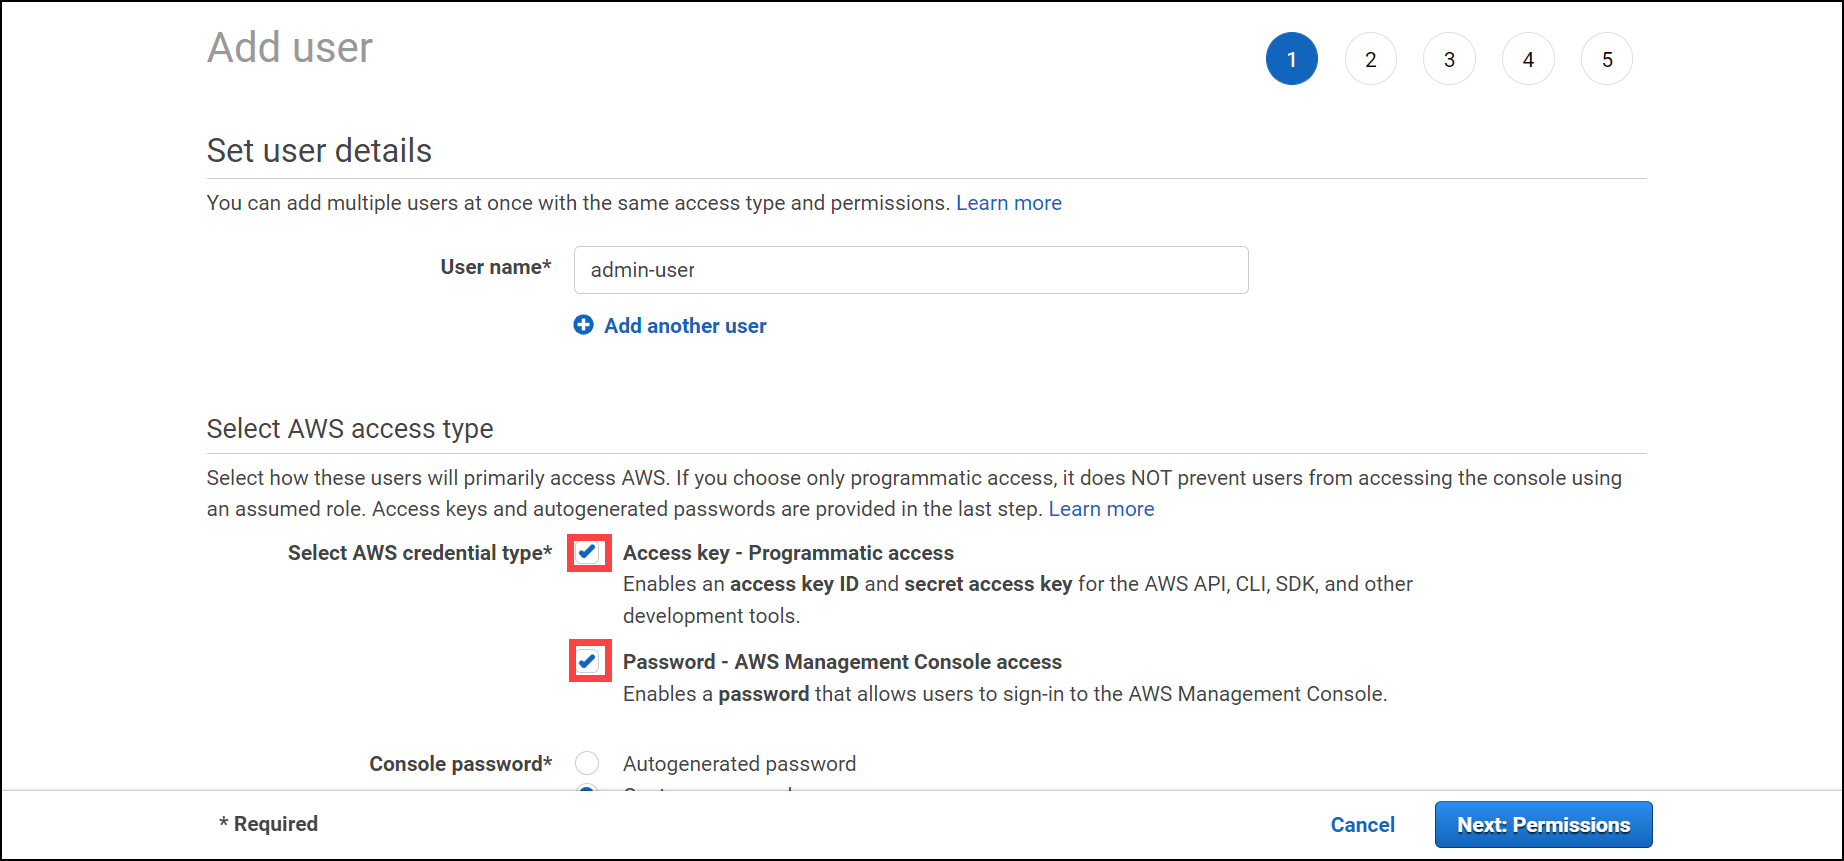
Click Next permissions

Set admin permission for this user by selecting Admins group and then click on Next: tags
Tags are optional, you can leave them blank or enter any value here, then click Review and Create User.
Note: Please make sure to copy the Access Key and Secret Key that has been generated.This would be required later.
Note: You'll need this user to switch roles on newly generated accounts and get their access key and secret key, which are required to onboard the accounts to CloudLabs Platform.
Create a admin user and keys in the new accounts.
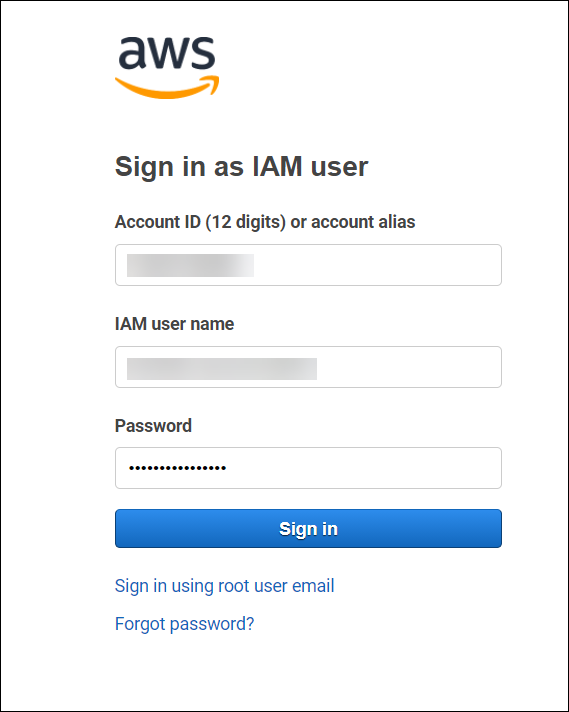
Login to AWS console as an IAM user with admin-user user credentials you just created in the above section.
To login, you will need your Root account ID and IAM admin-user credentials.
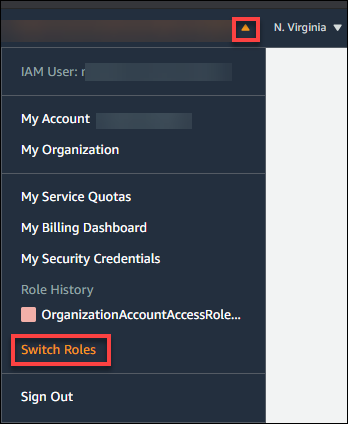
Now, use the drop-down on the IAM user available on the right top to switch roles to newly created account OR target account.
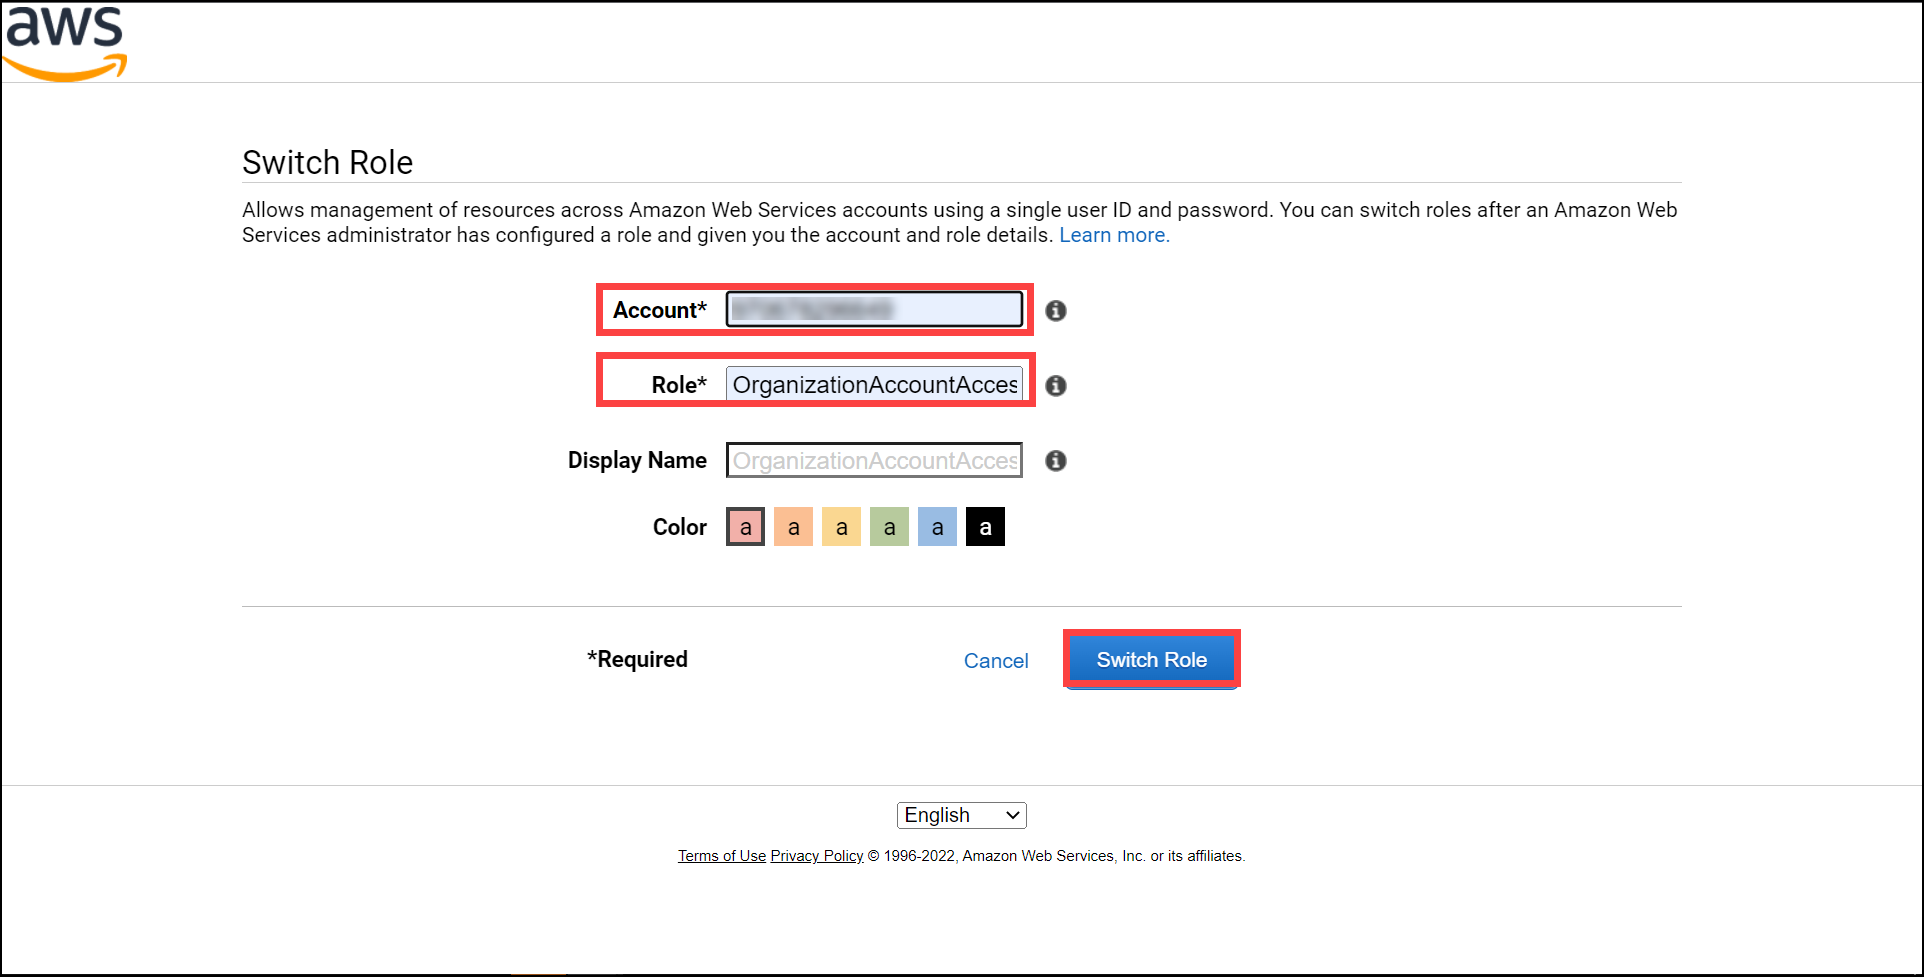
Enter the details as below:
Account: Enter your newly created AWS account's accountID.
Role: Enter role name as OrganizationAccountAccessRole
Leave all other fields empty and click on swich role
Now that you're inside your newly created account, you'll need to create an admin user with access to the account, as well as secret keys.
Go to Identity and Access Management (IAM) and create new user by clicking on add user, name it dev-admin.
Enable programmatic access as the access type to create the access key and secret key.
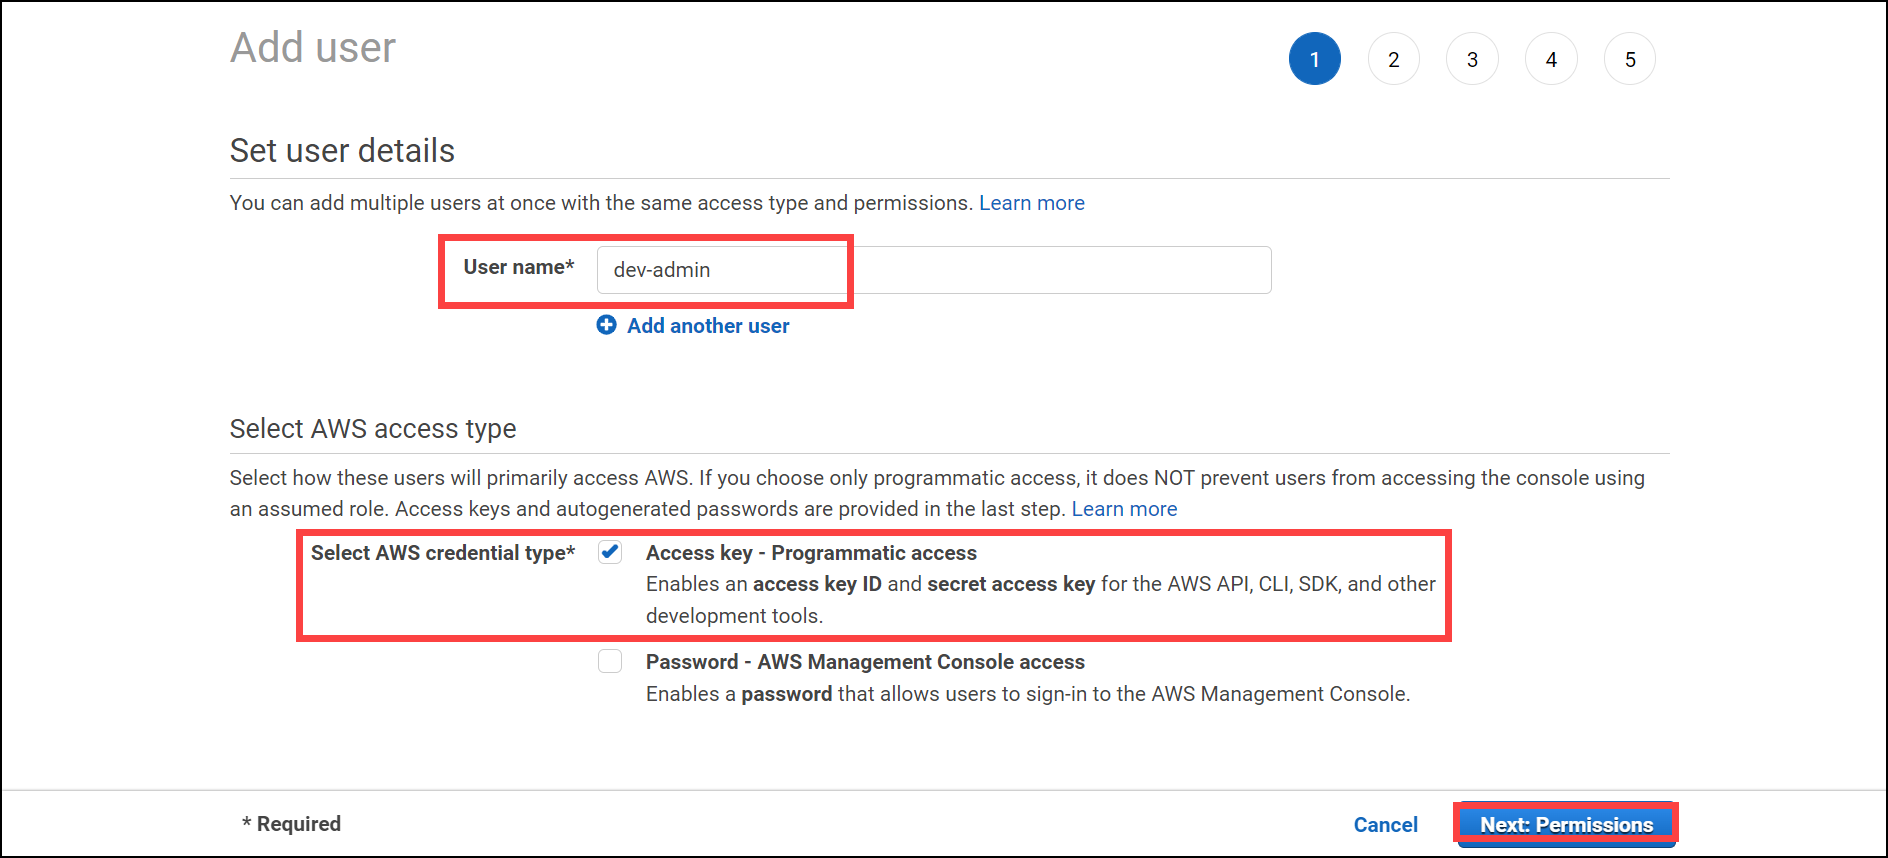
Click on Next: Permissions
Add dev-admin user to Admins group and then click on Next: tags
.png)
Tags are optional, you can leave them blank or enter any value here, then click Review and Create User.
After confirmation, the newly created Access Key and Secret Key will be available. Save these. The Secret Key will not be available afterwards.
Repeat steps 3–10 for each newly created AWS account, being sure to keep the access keys and secret keys noted.
Once all AWS accounts are created and assigned with the required permissions, onboard those accounts to CloudLabs AI platform.
i. Select the Subscriptions tab from the right-hand menu and then click on + ADD button to add subscription group for AWS accounts.
.png)
ii. Next, create a subscription group by filling in the details like image below:
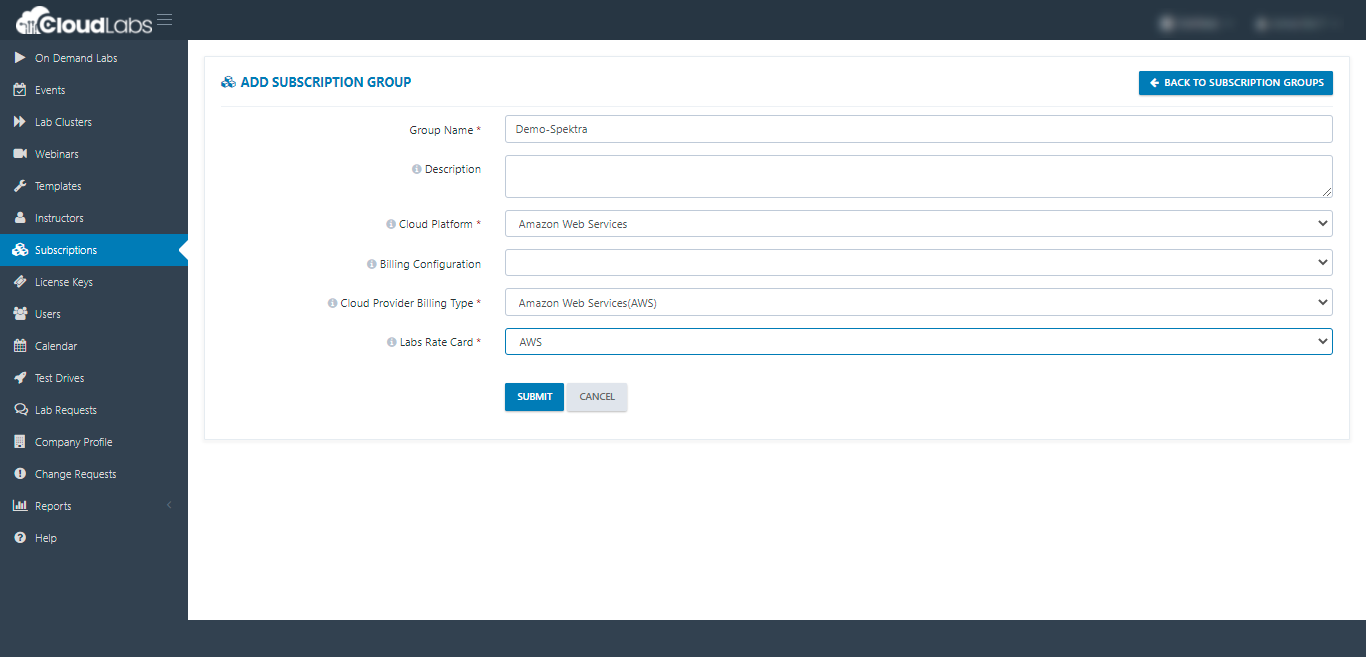
Cloud Platform: Choose Amazon Web Services from the drop-down.
Cloud Provider Billing Type: Choose Amazon Web Service(AWS) from the drop-down.
Labs Rate Card: Choose AWS from the drop-down.
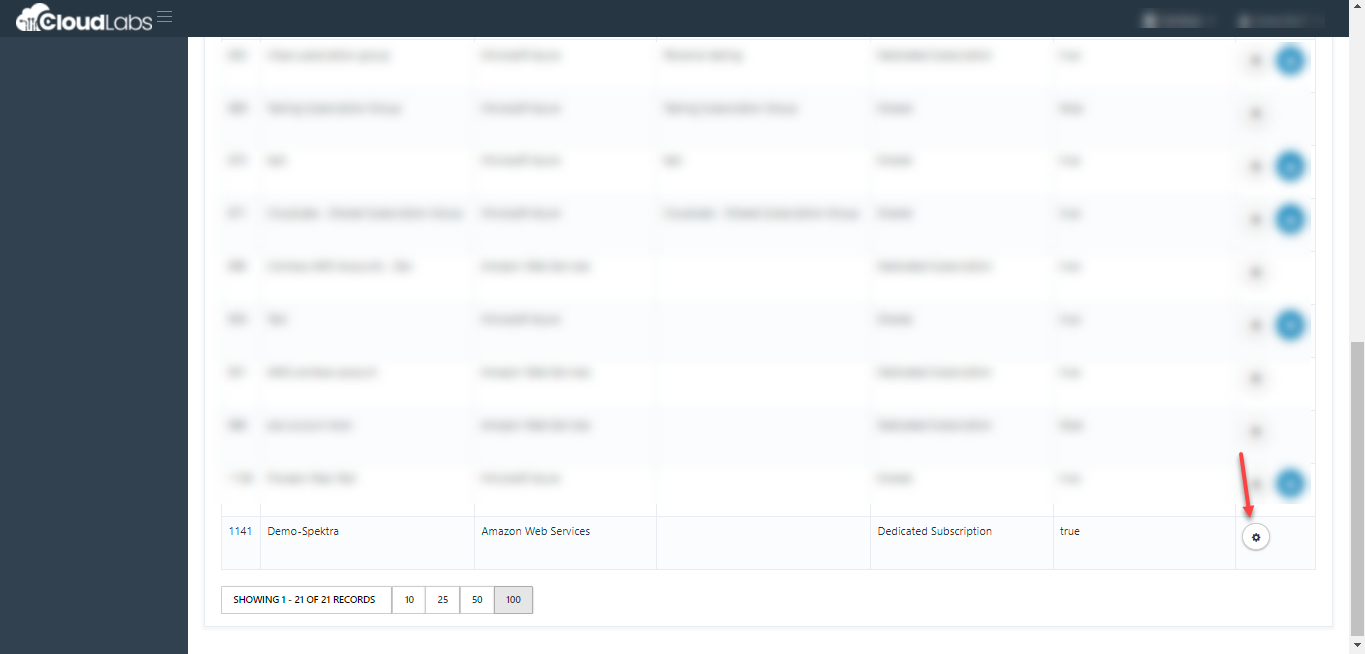
iii. Next, Click on the settings Icon to the right of the Subscription group name you just created.
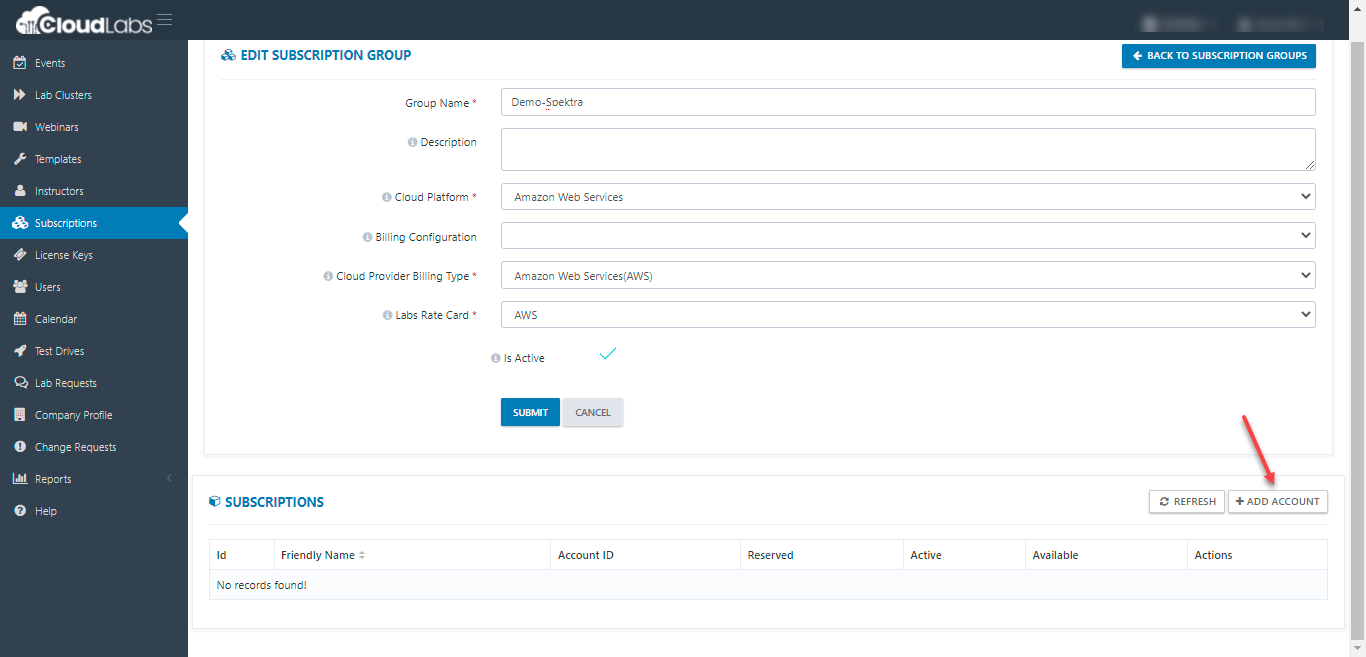
iv. Next, Click on + ADD ACCOUNT to add subscription to the subscription group.
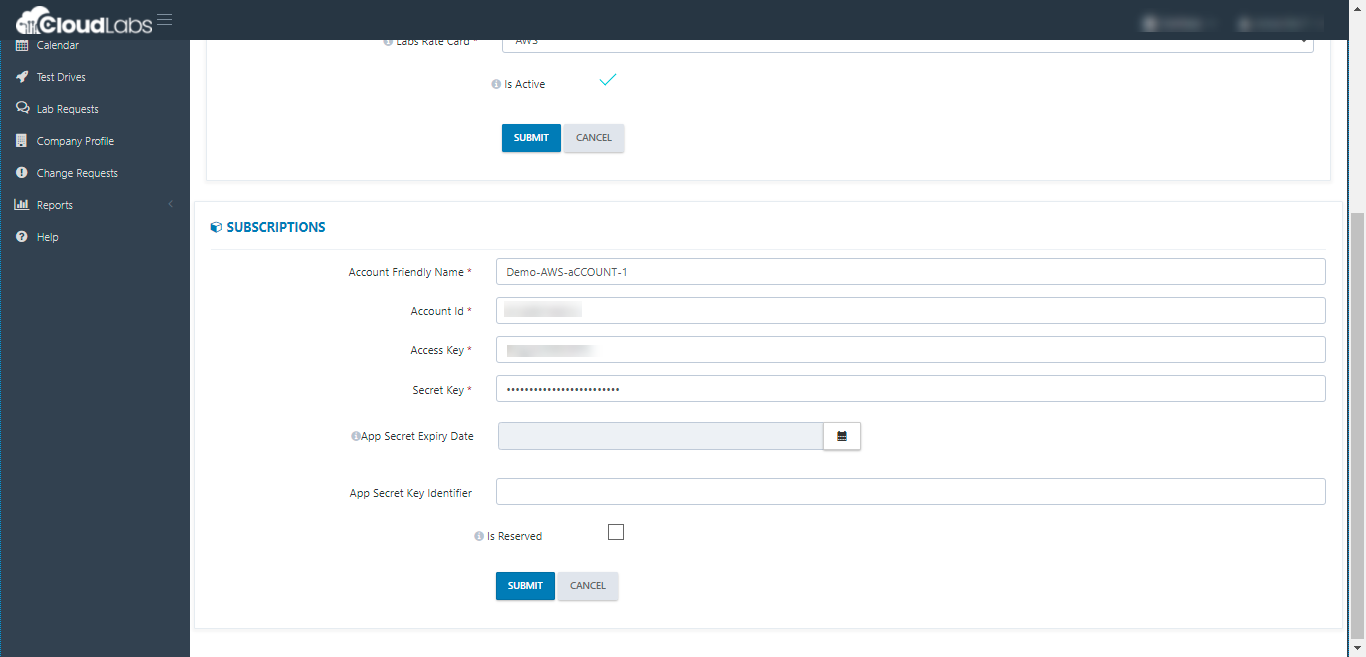
v. Next, we can add the Account Friendly Name, Account Id, Access Key, Secret Key and click on SUBMIT.
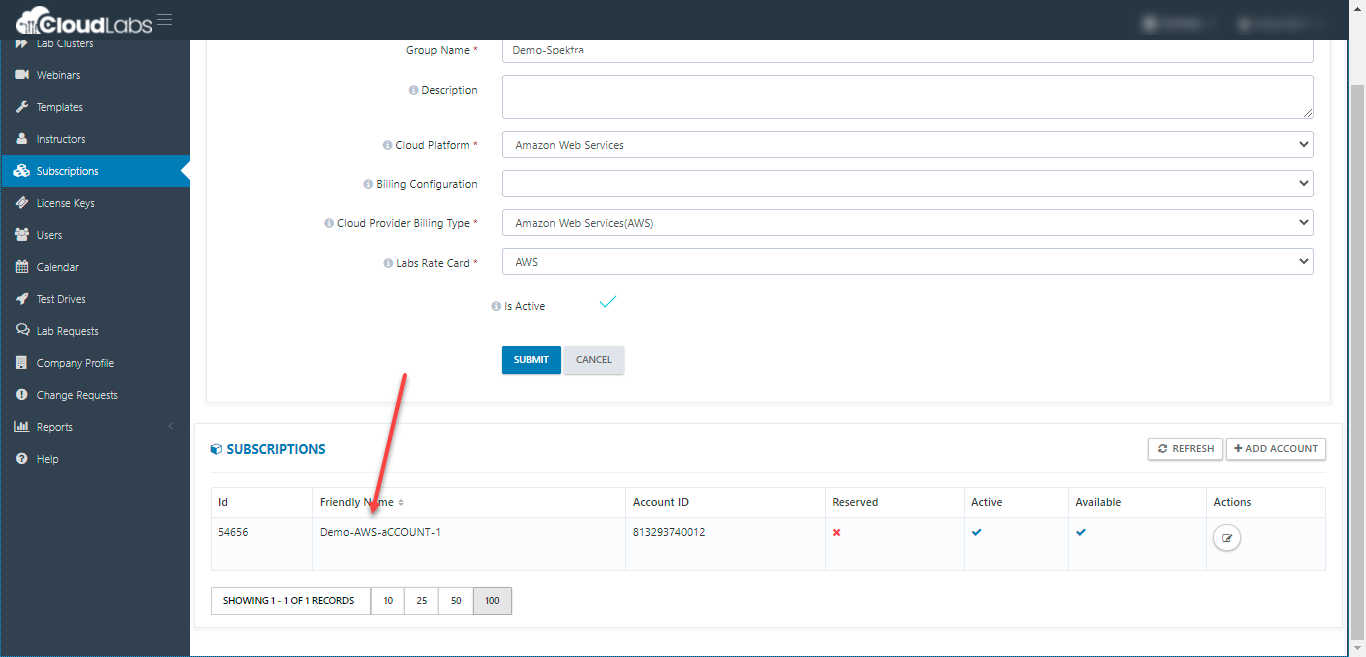
You can repeat the steps (i) to (v) if you have more subscriptions to onboard.
Note: If you need to onboard the subscriptions in BULK, you can share these details with us, and we'll be happy to assist you with the backend onboarding.
Steps to create cost and usage report in AWS
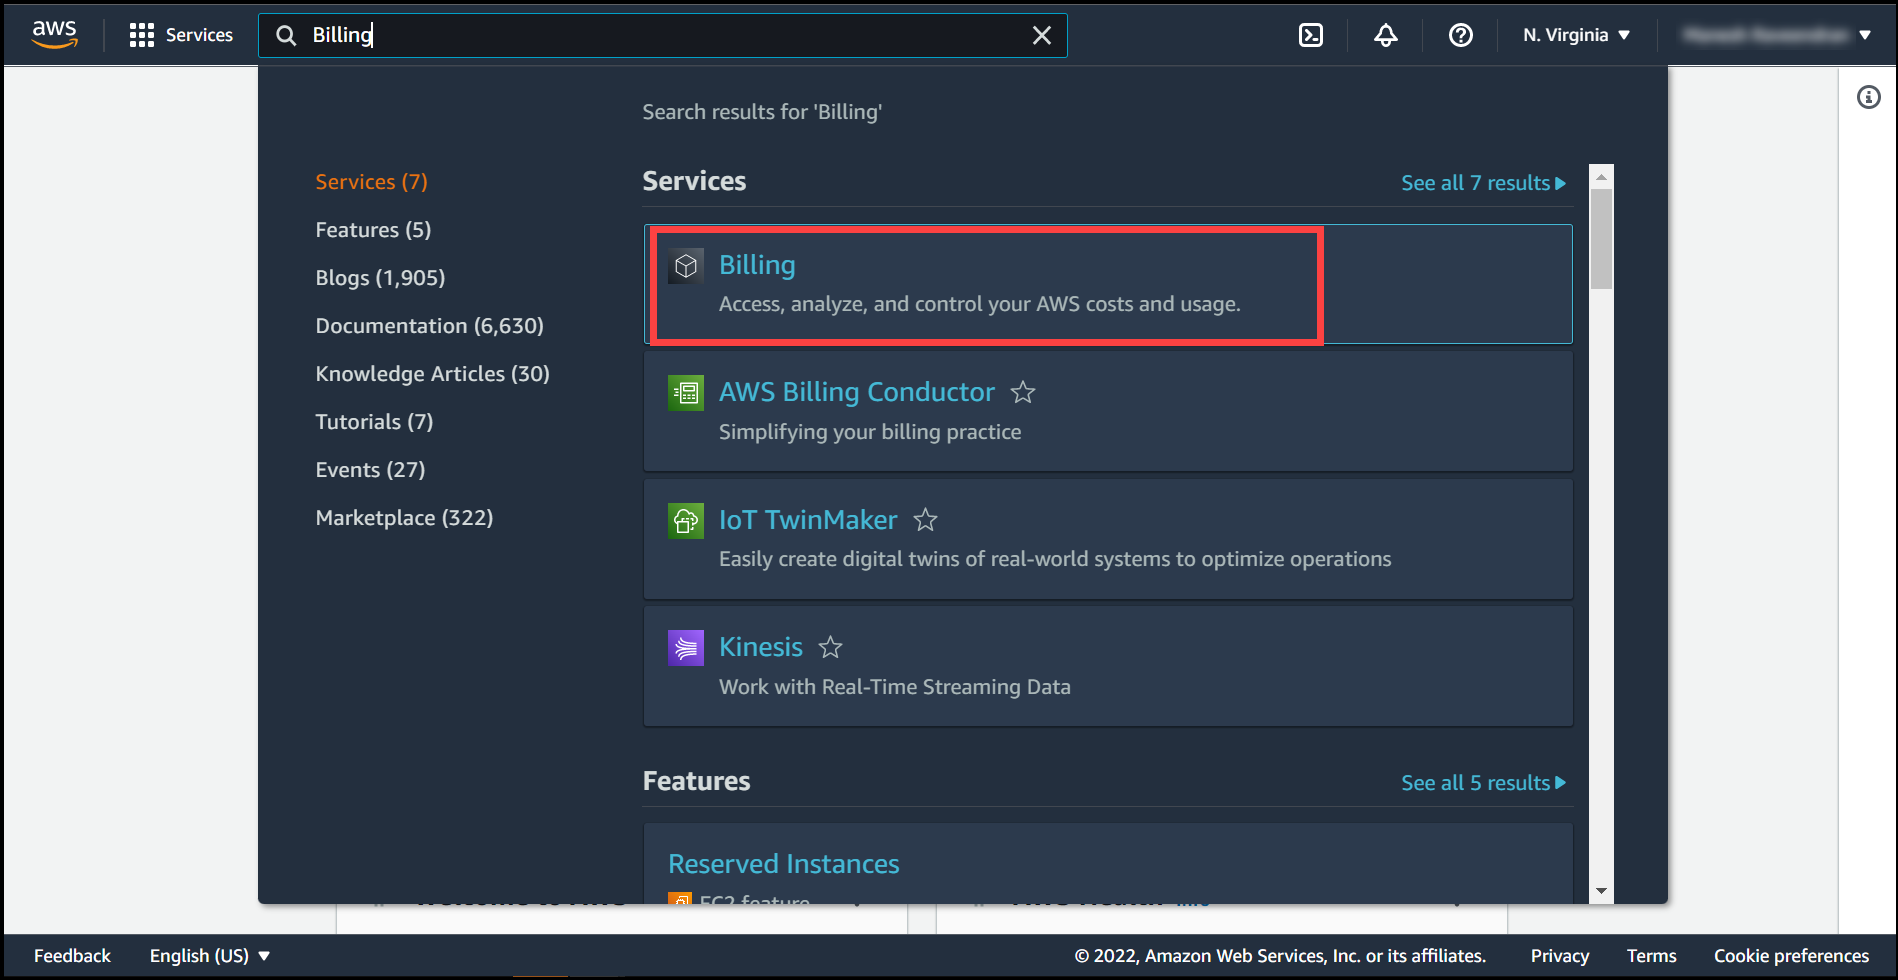
Now, go back to the AWS Root account & search for Billing in AWS services section.
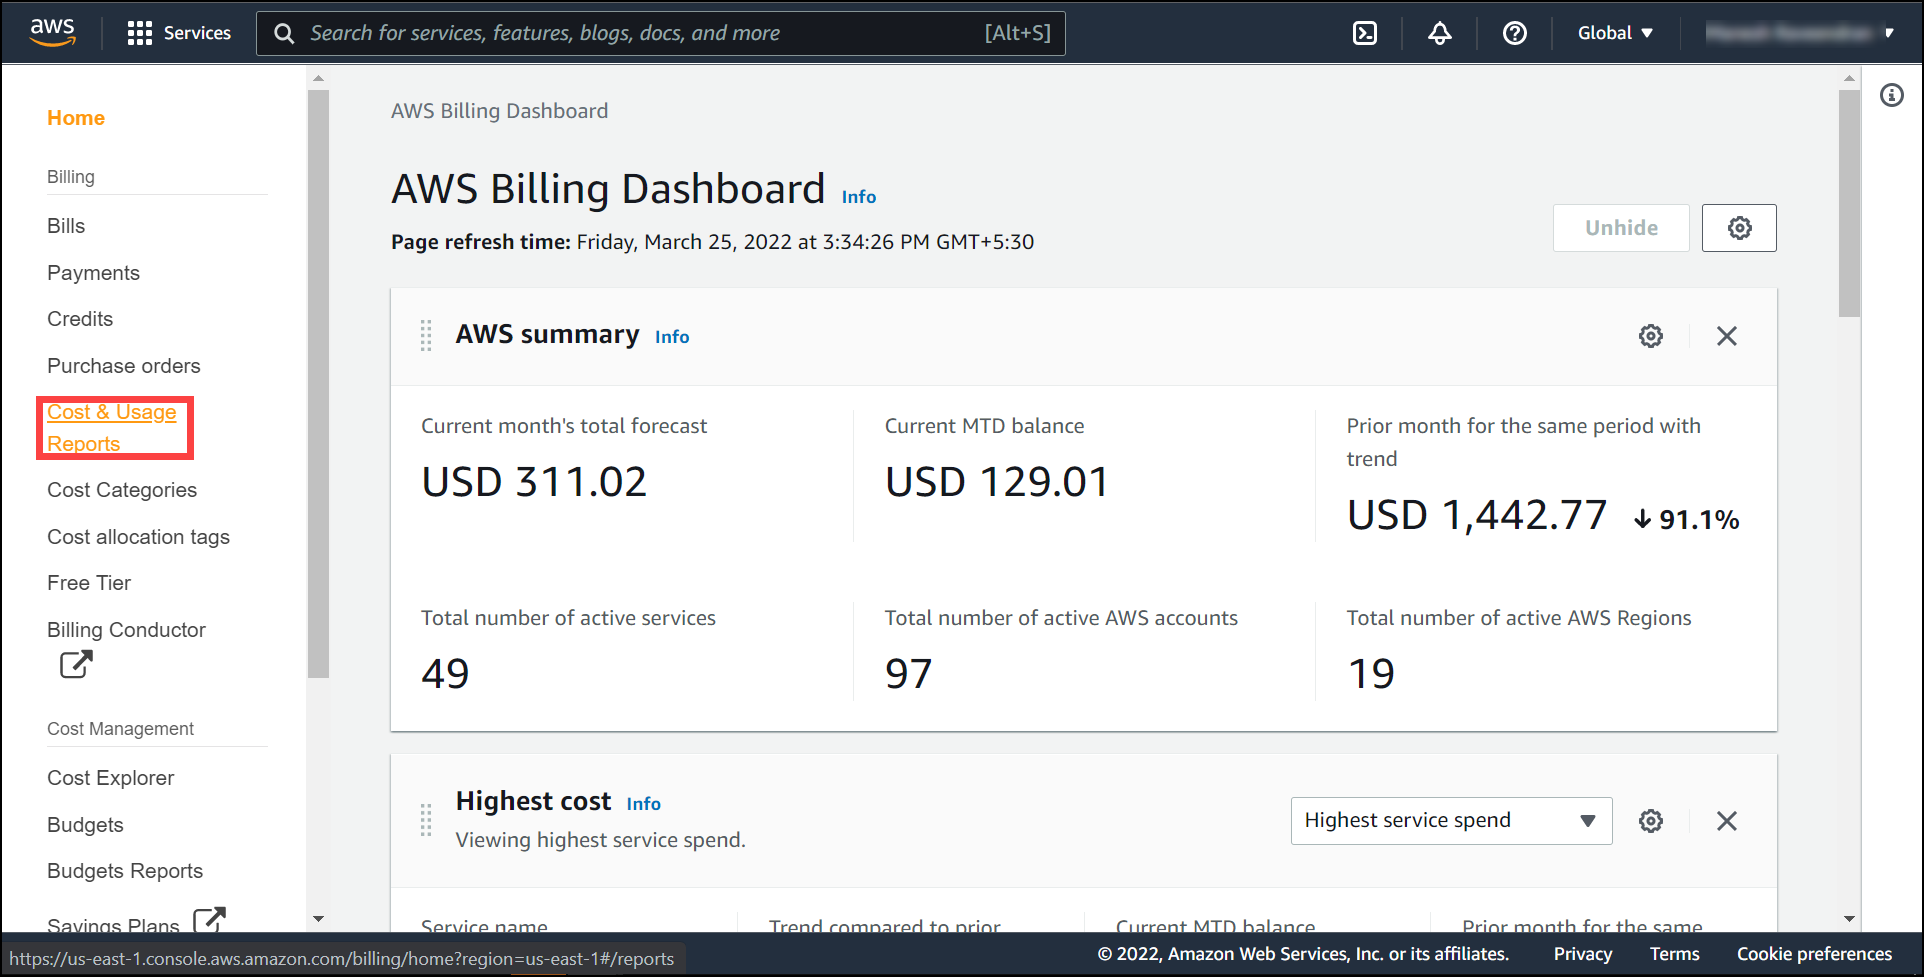
Navigate to cost and usage reports on the left tab as mentioned in the image below and open it.
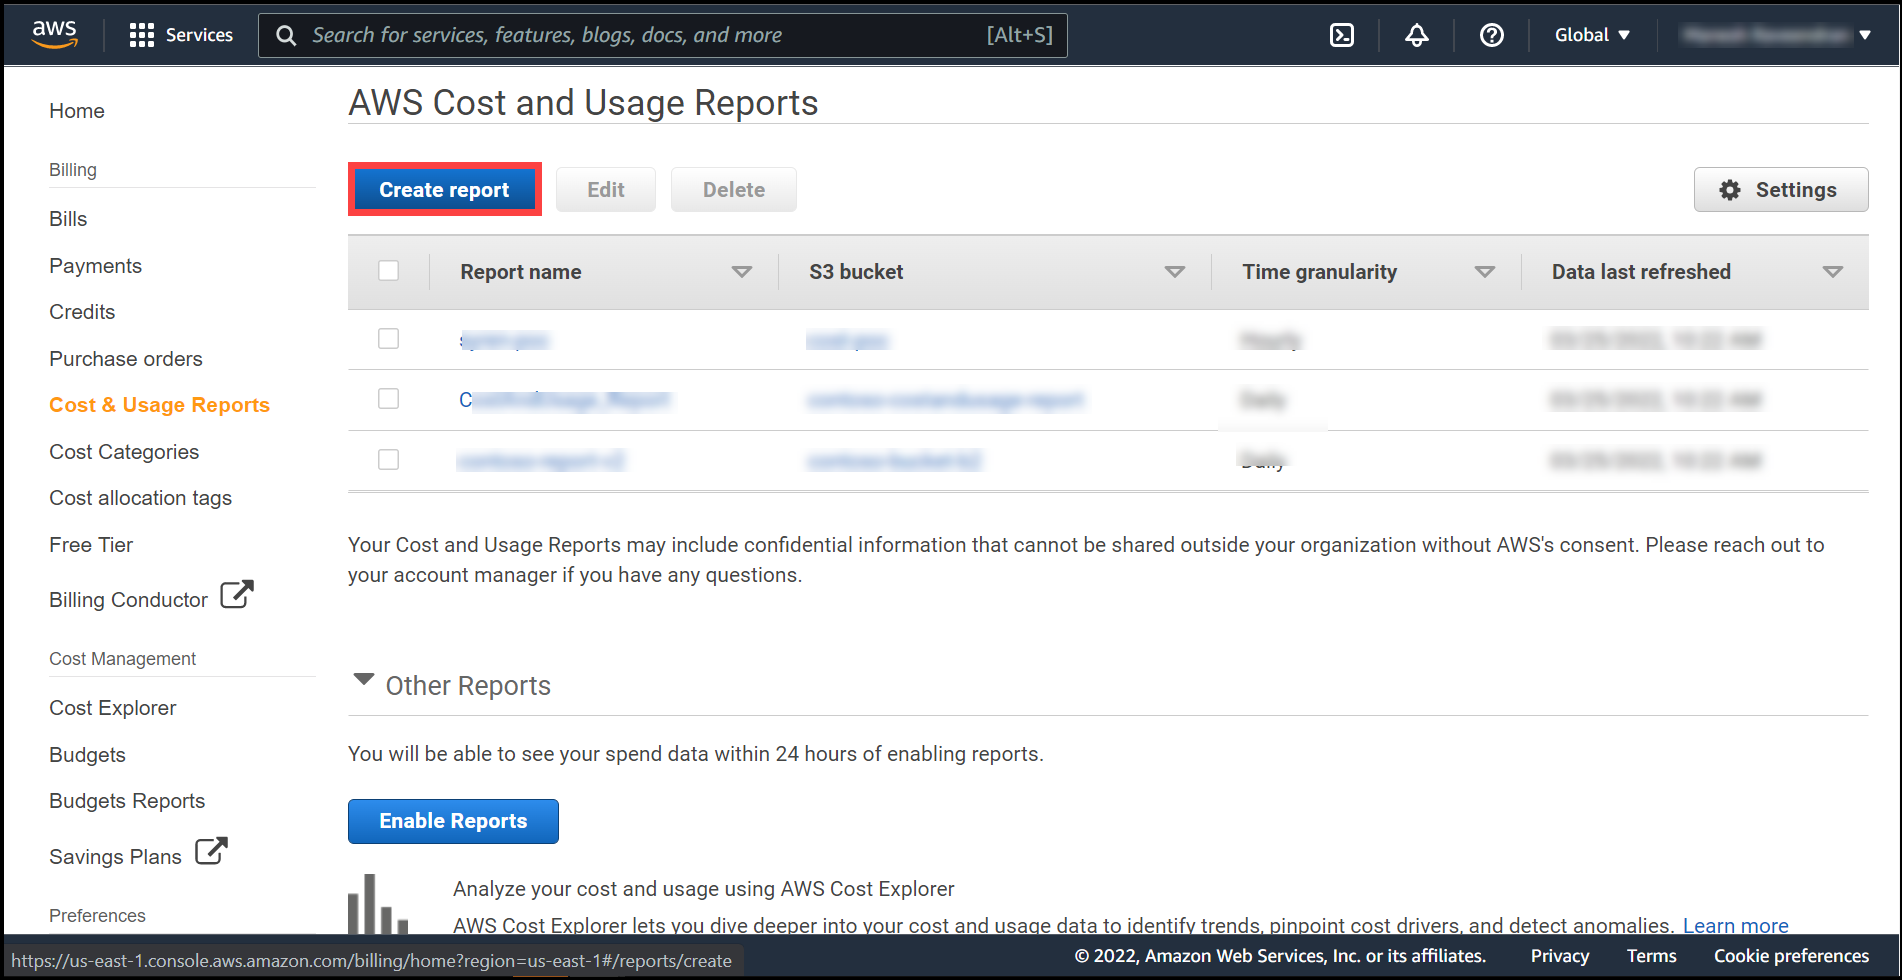
Click on create report.
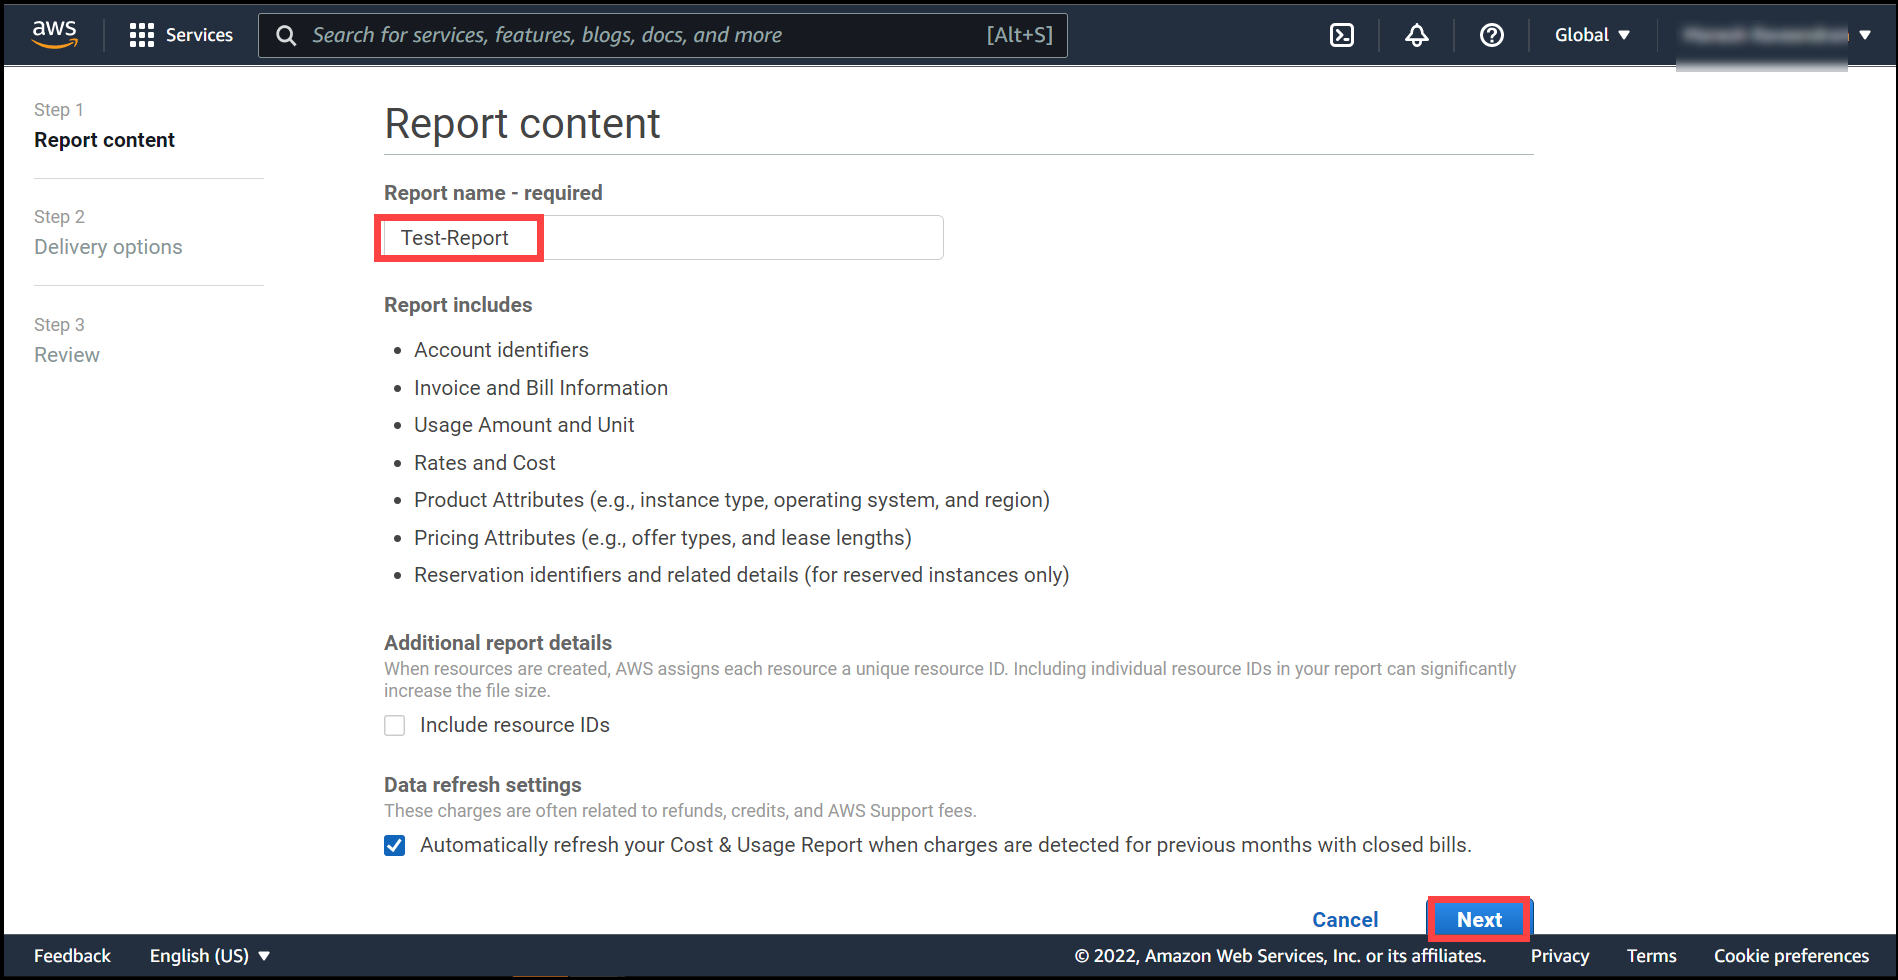
Give your report a name example Test-Report and leave the rest of the settings as default. Click Next.
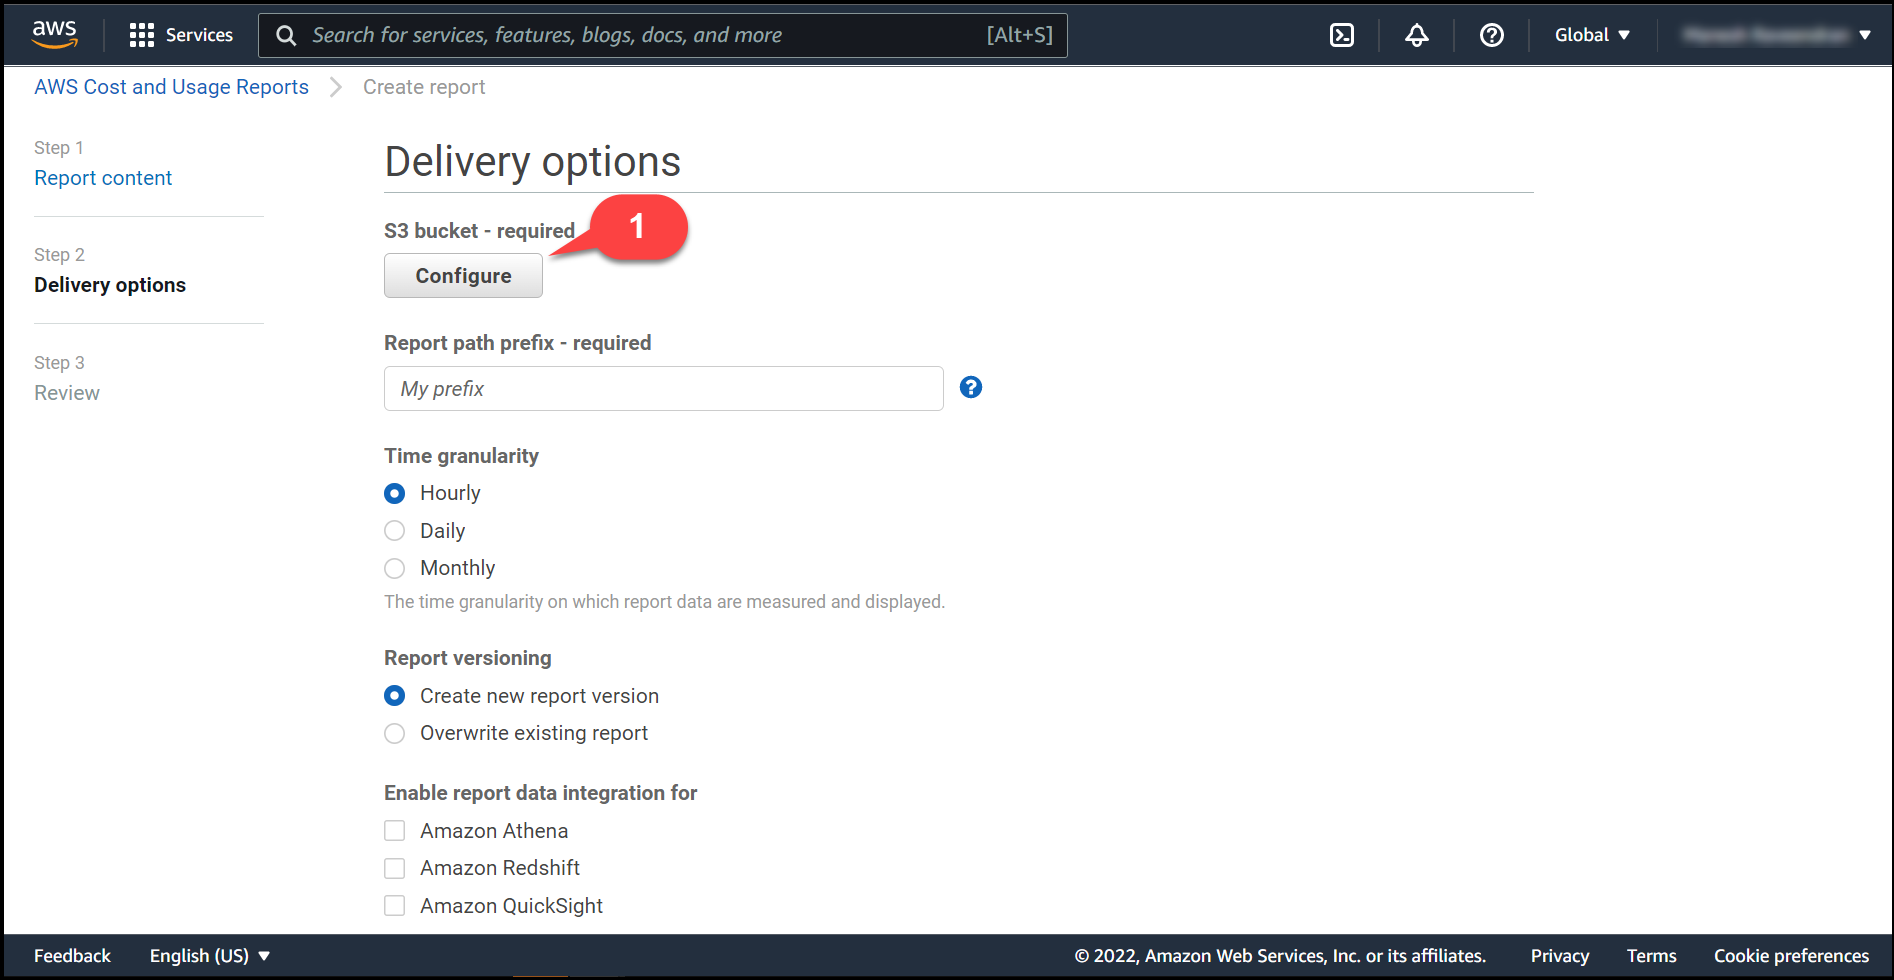
Configure(1) a S3 bucket for reports by clicking on configure button.
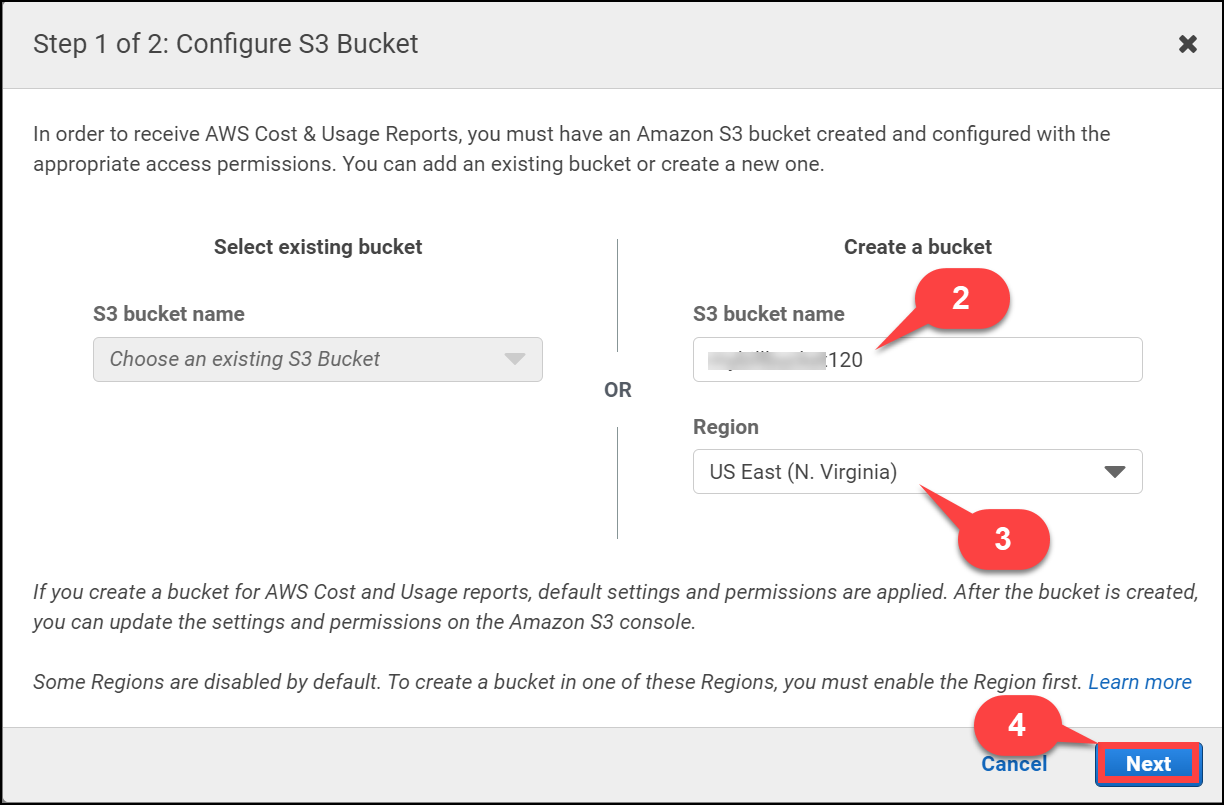
Create new S3 bucket name (2) or use any previous bucket where you want to make cost and usage reports to be available. In this case we are creating a new bucket and selecting a Region(3) as well where our bucket should be created. Click Next(4).
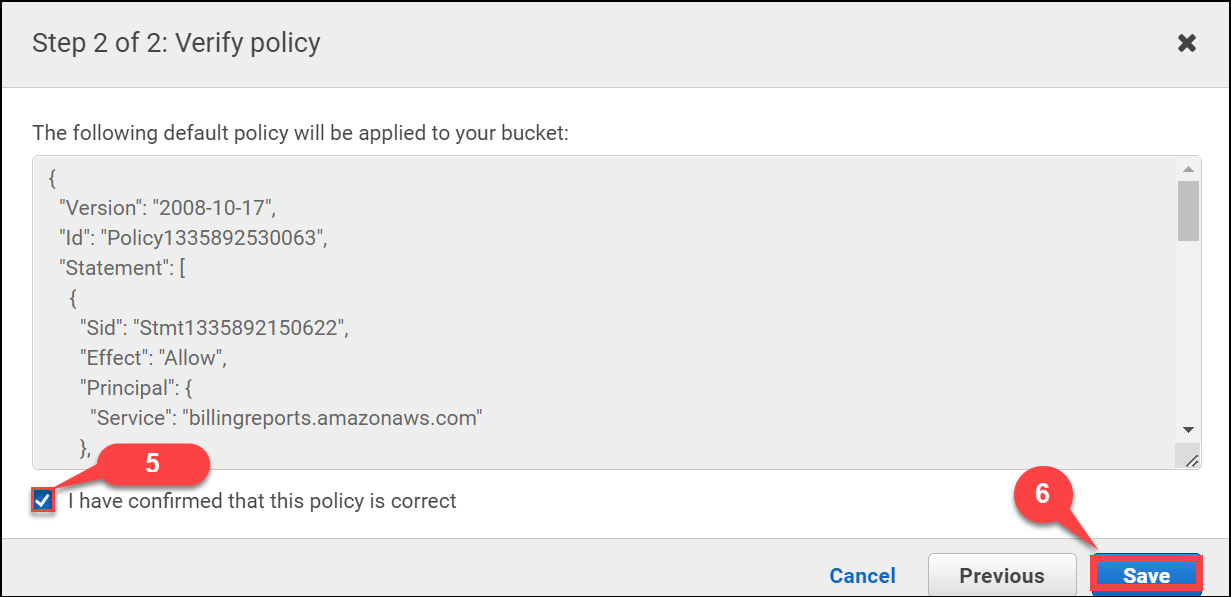
After Clicking on Next, we need to click on Checkbox(5) to acknowledge the policy and then click on Save(6).
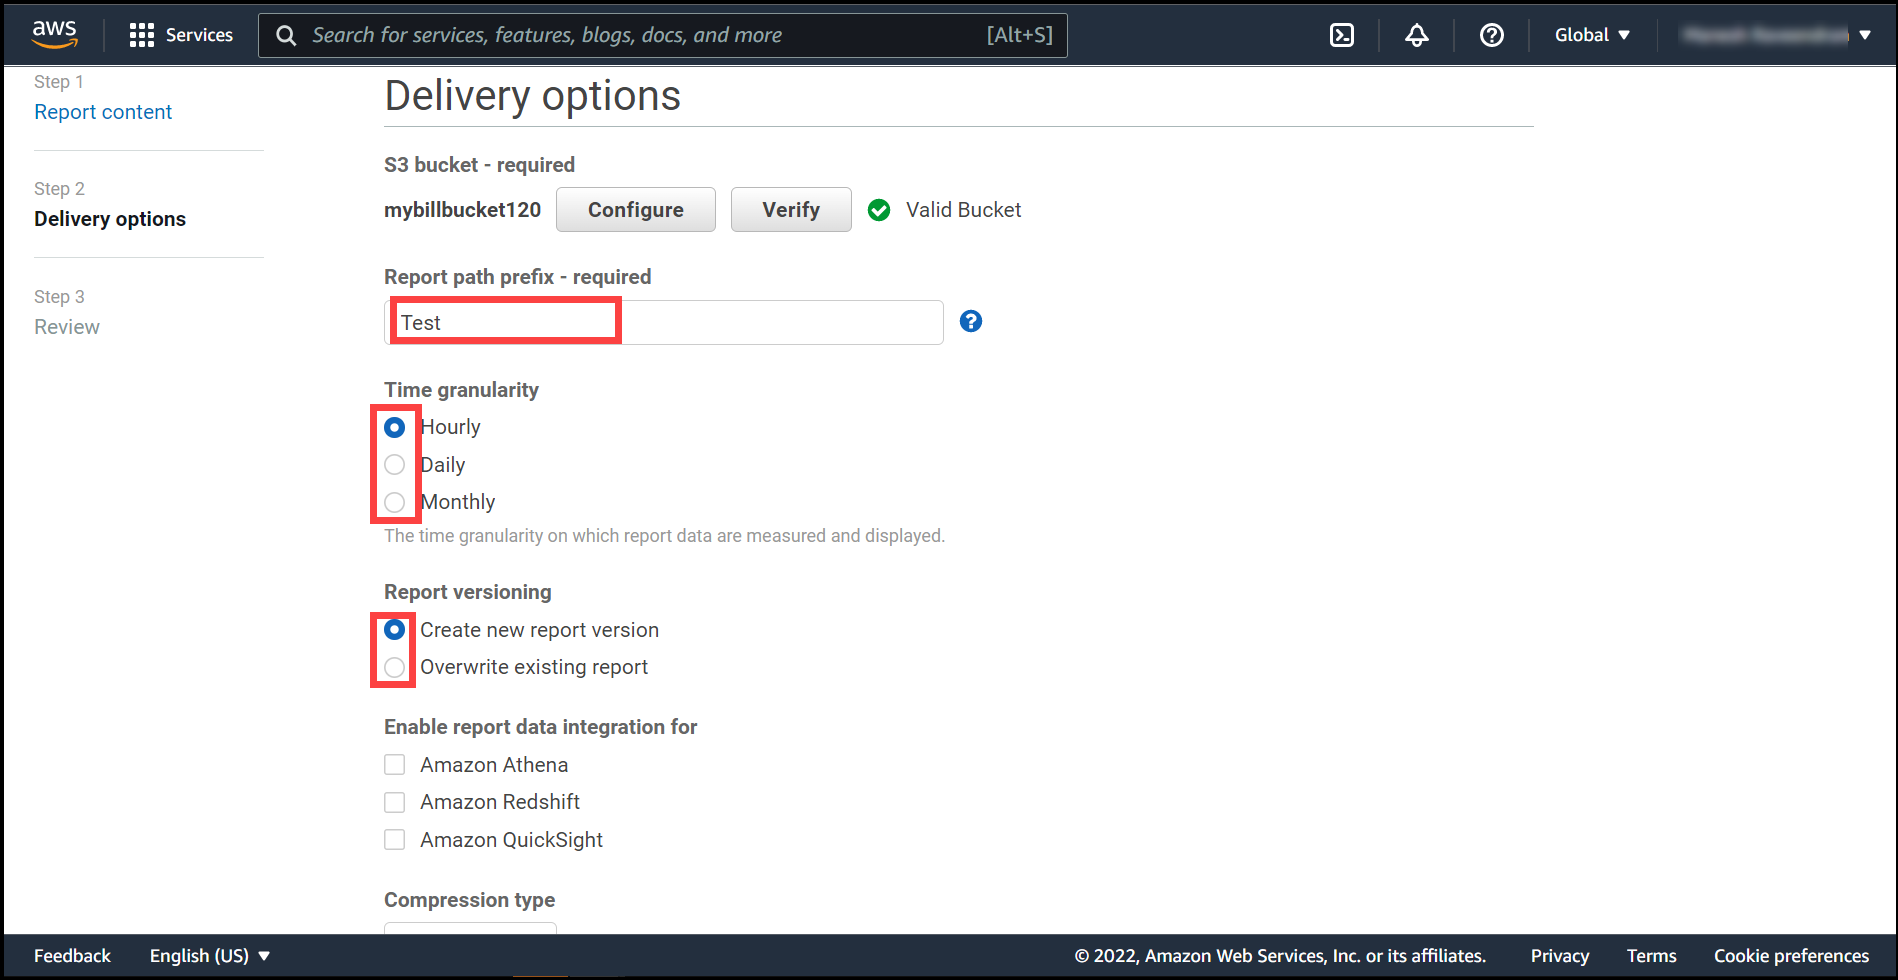
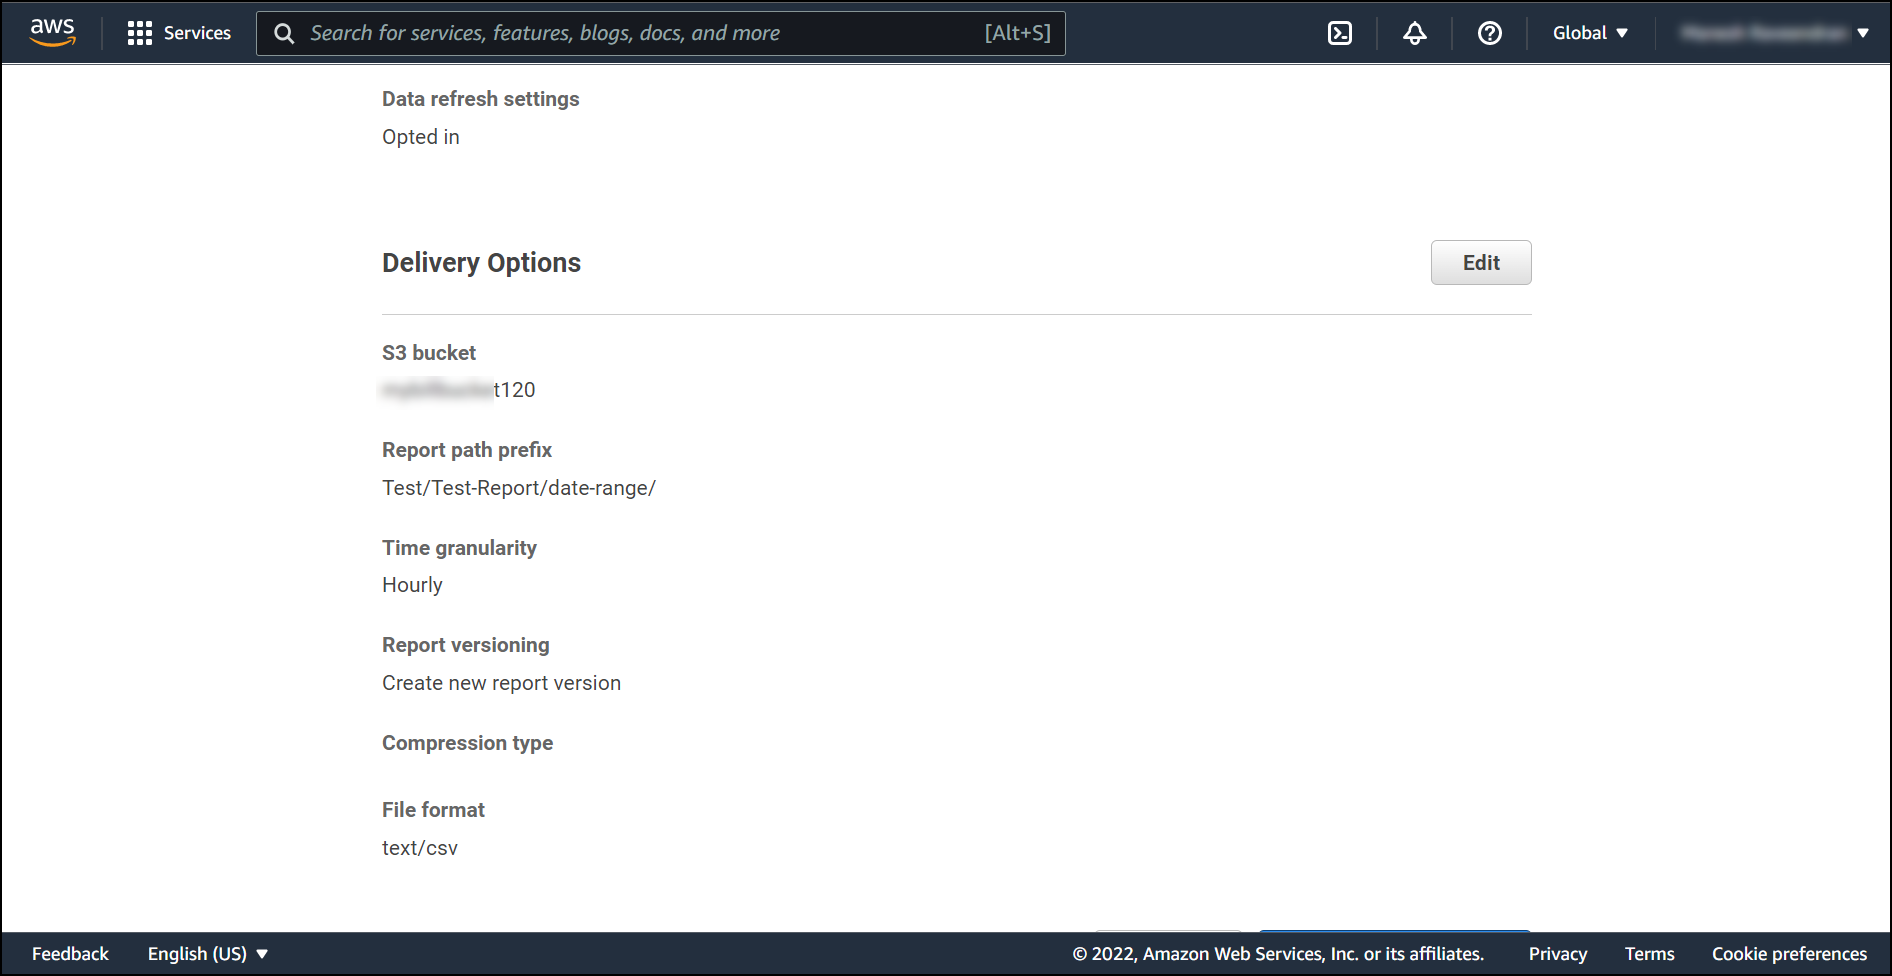
(a) For Report path prefix, enter the report path prefix that you want prepended to the name of your report. You can put any prefix word like here we have added Test.
(b) For Time Granularity, we can put on hour basis, monthly basis, or yearly basis, hereby we have added on hourly basis.
(c). For Report versioning, we can either continue data entry on previous reports or we can create new one, hereby we have chosen the format of new report version.
(d) Then choose compression type, hereby we have chosen ZIP format. Then click Next.

You can review the data at last page and make changes if anything is required.
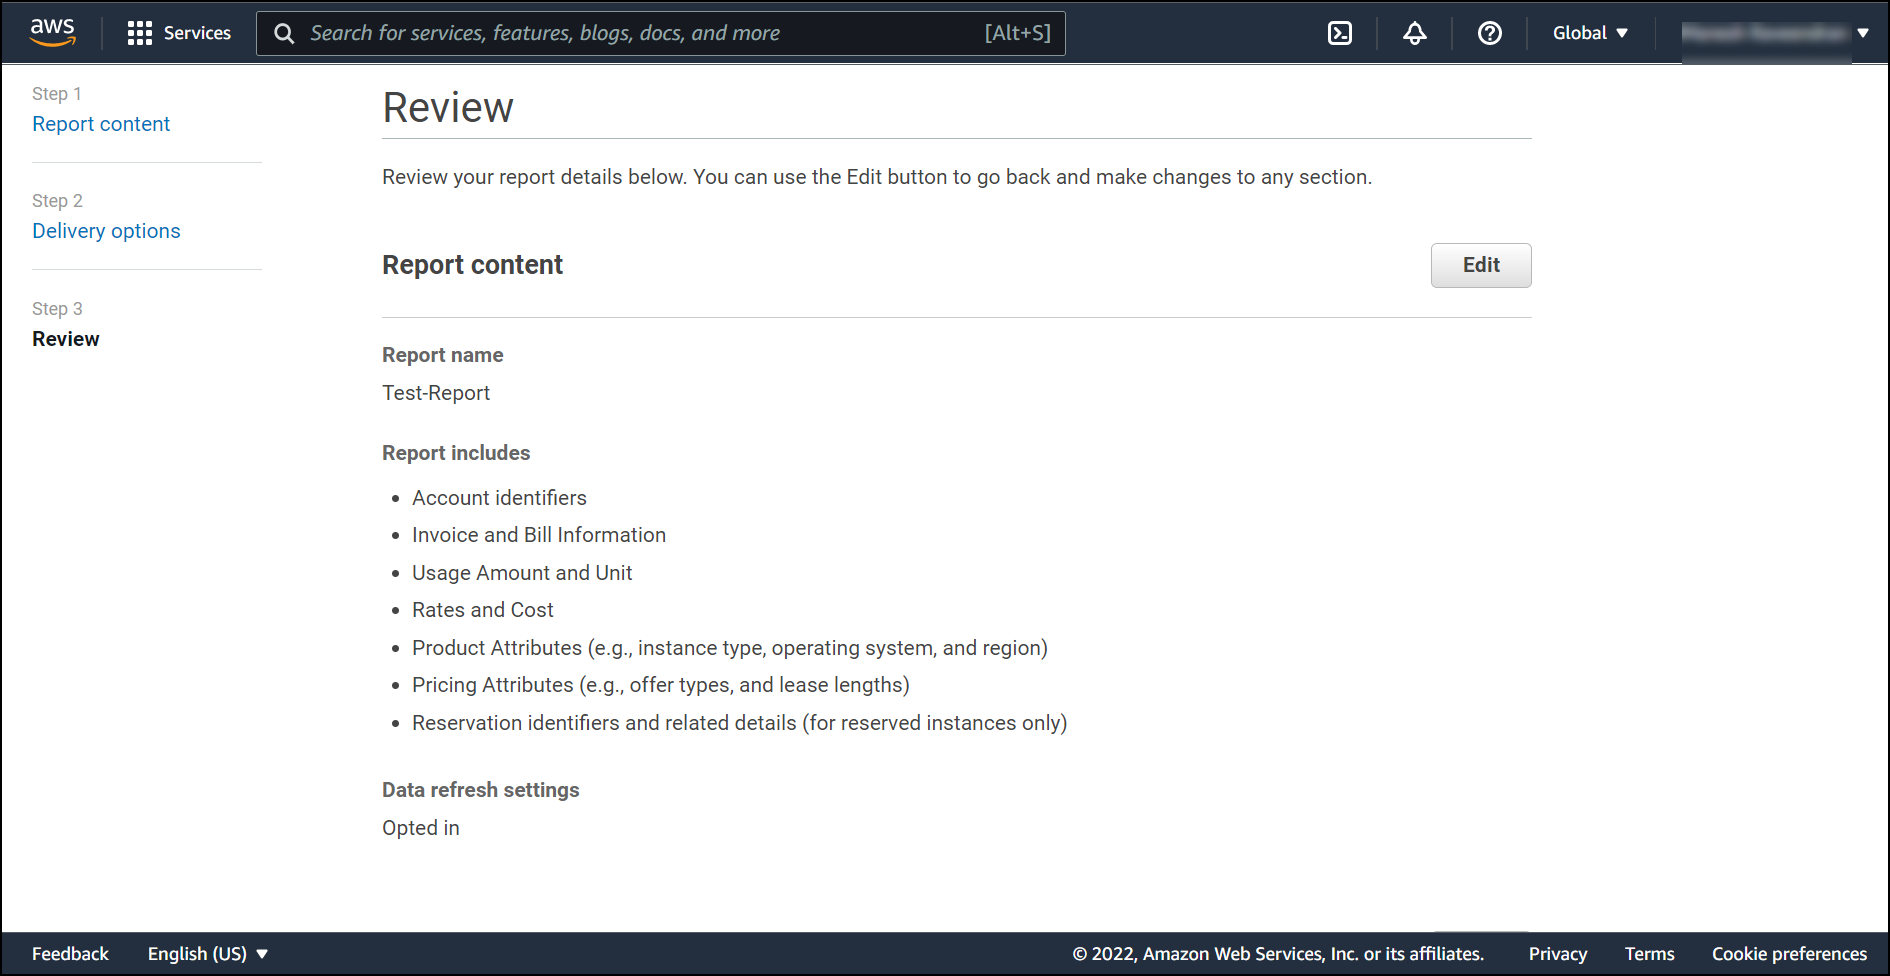
Click Review & Create if no changes are required.
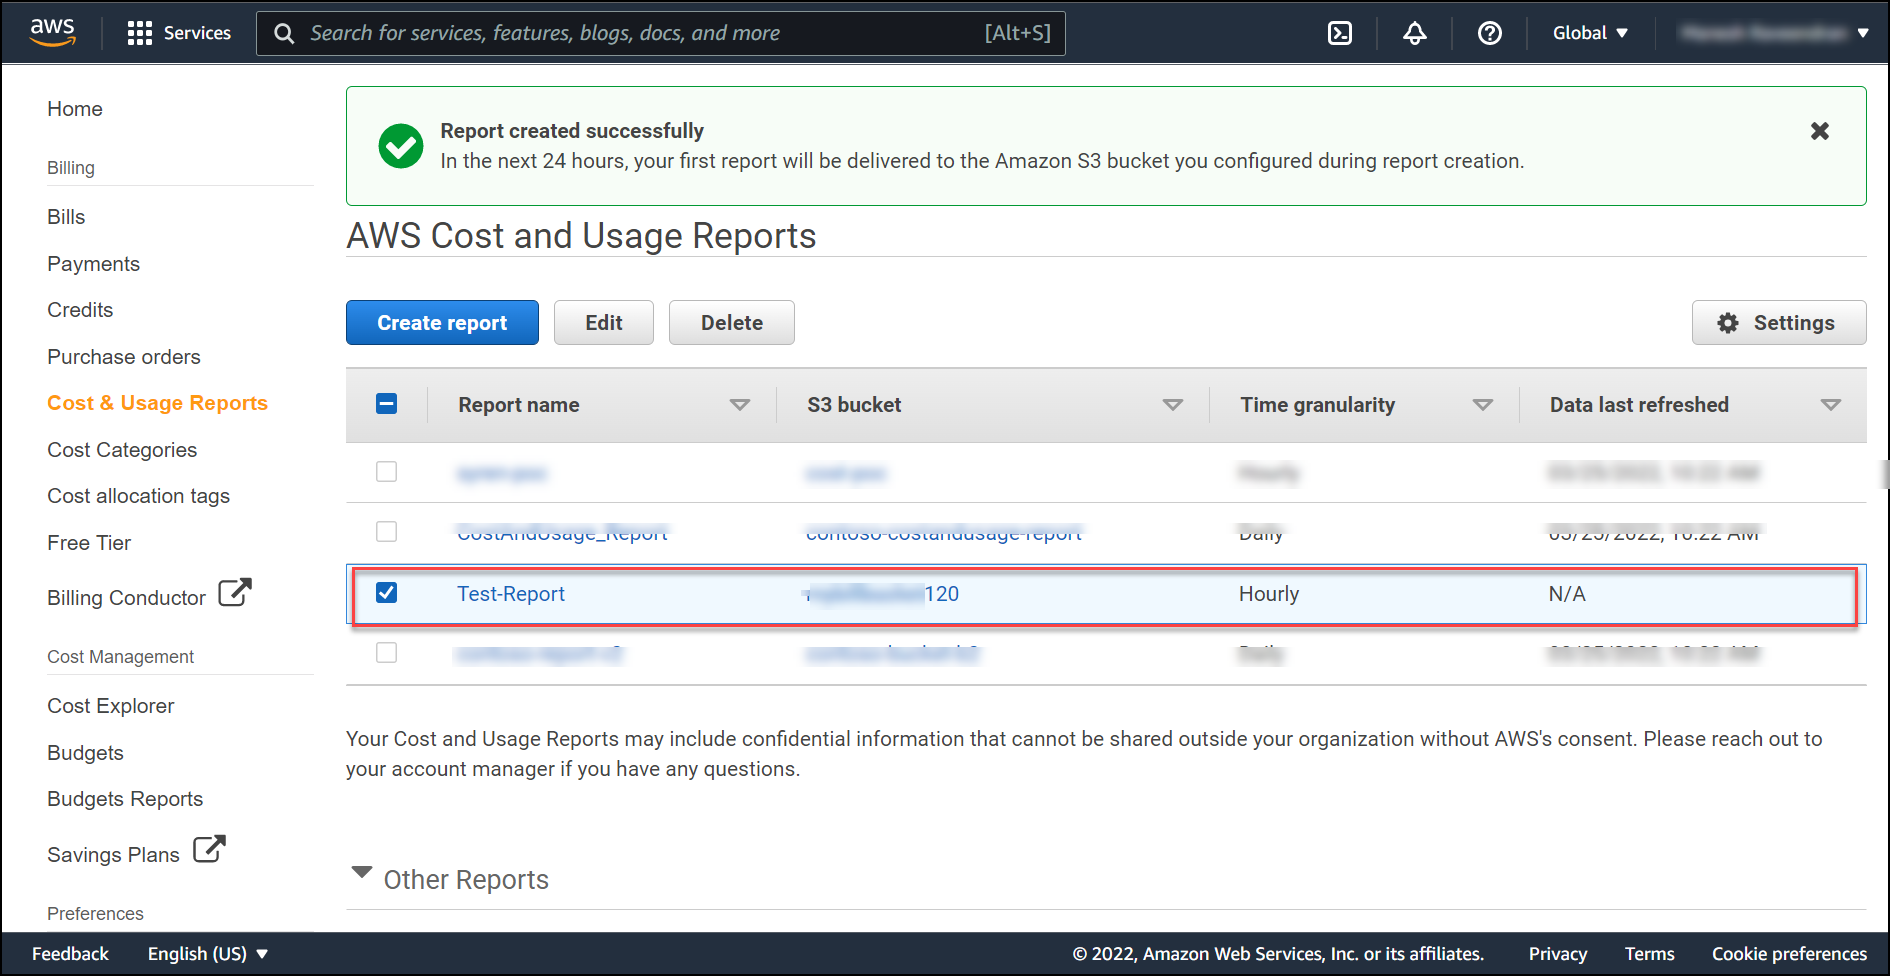
On the Billing Service main screen, you will be able to see your Cost and Usage report, and within the next 24 hrs you will start getting your first report.
Please create an excel file with below details and send it over to CloudLabs so we can start generating reports.
Name: [a nick name for billing configuration]
OrganizationId: [root account Id]
AccessKey: [access key of admin IAM user]
SecretKey: [secret key of admin IAM user]
BucketName: [name of the bucket created for cost and usage report]
BucketRegion: [region of the bucket created for cost and usage report]
ReportName: [name of the cost and usage report]