CloudLabs supports different ways to distribute the labs to your attendees. In the following sections, we will dive deep into them.
Option 1: Generate Vouchers
CloudLabs simplifies access through voucher redemption, offering the ability to configure vouchers at the ODL or course level. After configuration, these vouchers should be distributed to attendees. These recipients can then redeem their vouchers on portal.cloudlabs.ai,, granting them seamless access to the labs and courses. Please follow the below steps to configure Vouchers from the Admin Portal.
Log in to the Admin Portal of CloudLabs by following this link
Click on the Edit button for the ODL, as shown below.

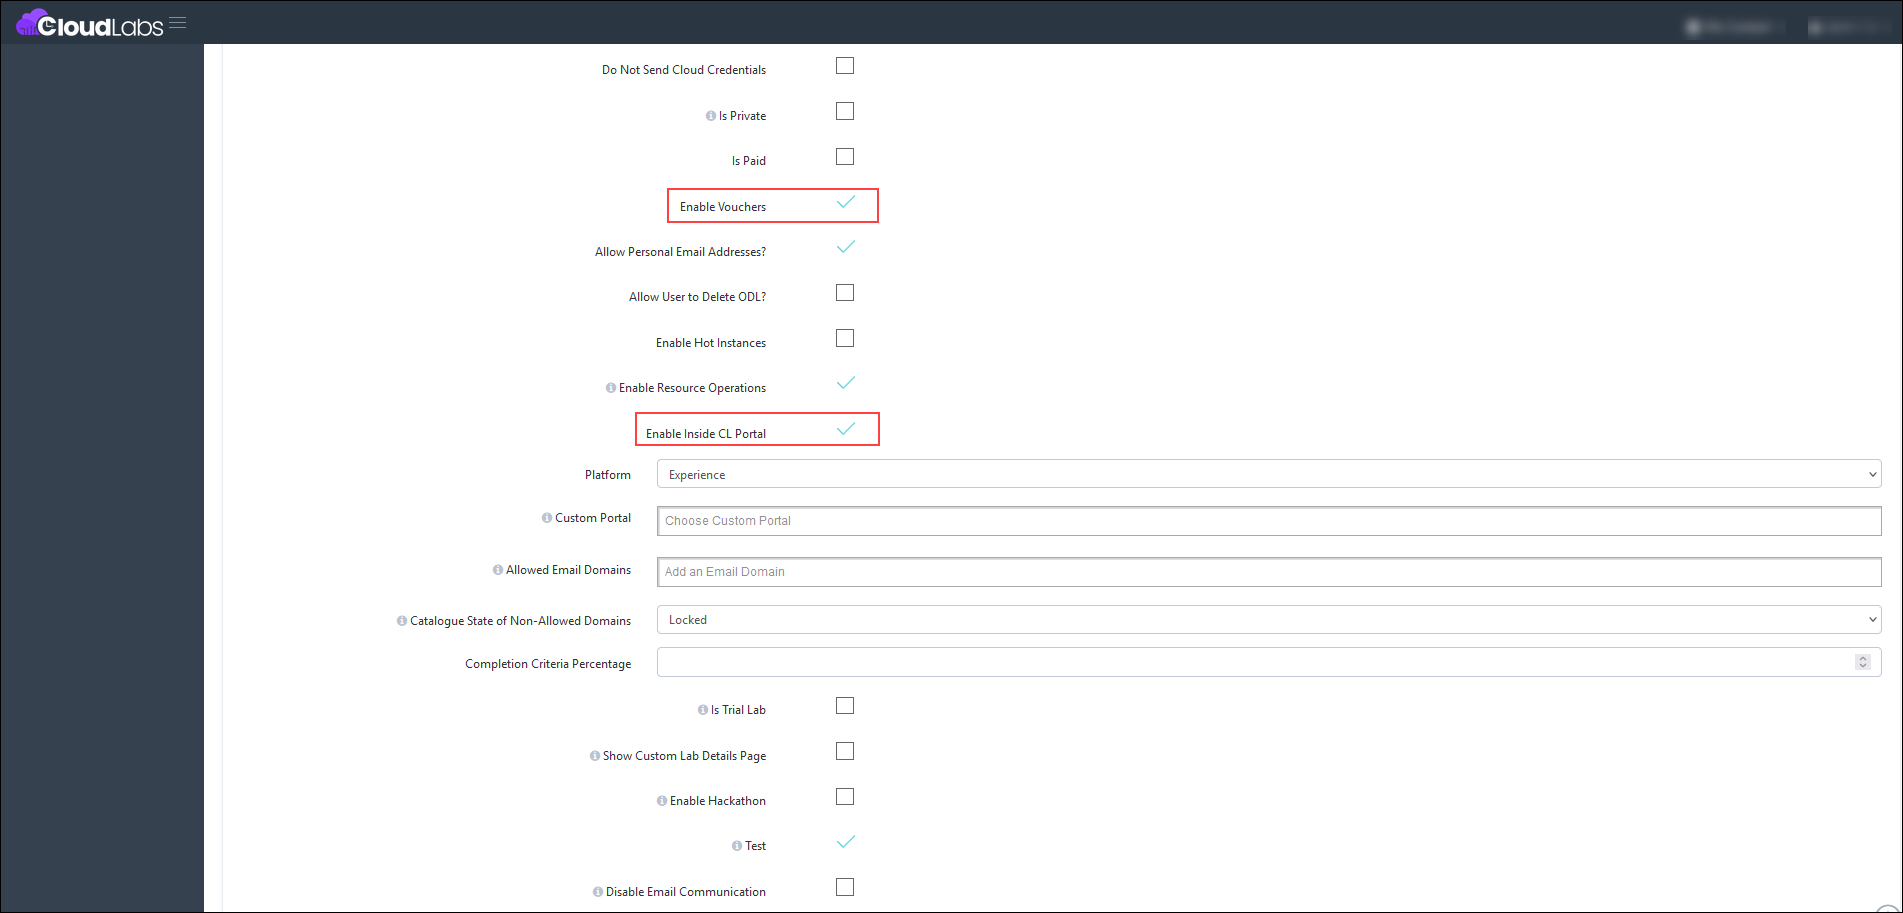
Once you are in the ODL, make sure that the below-mentioned checkboxes are checked:
Enable Vouchers
Enable Inside CL Portal

When Enable Inside CL Portal is Checked, the below sections are displayed that need to be filled:
Platform: CloudLabs offers two platform options: Experience and Portal. Select the platform where recipients will access their labs and courses.
Custom Portal: Here, you can provide the custom portal where the lab environment will be launched as requested by you earlier (if any).
Allowed Email Domains: Users with only the domain name(s) mentioned in this section will have access to labs and courses without any restrictions. For example: gmail.com, outlook.com, etc.
Catalogue State of Non-Allowed Domains: There are three options available, they are:
Locked: Only the allowed email domains will be able to launch the lab. Other domains can be viewed but will remain in a locked state.
Unlocked: All domains can use the launch option regardless of the specified allowed domain.
Hidden: Only the allowed email domains will be able to view and launch the lab. Other domains will not have access to view labs or courses.

The next step is generating the Vouchers for distribution. Click on the three dots corresponding to the ODL, and then click on the Vouchers button, as shown below.

On the Vouchers page, click on the + Add Vouchers button as shown below.

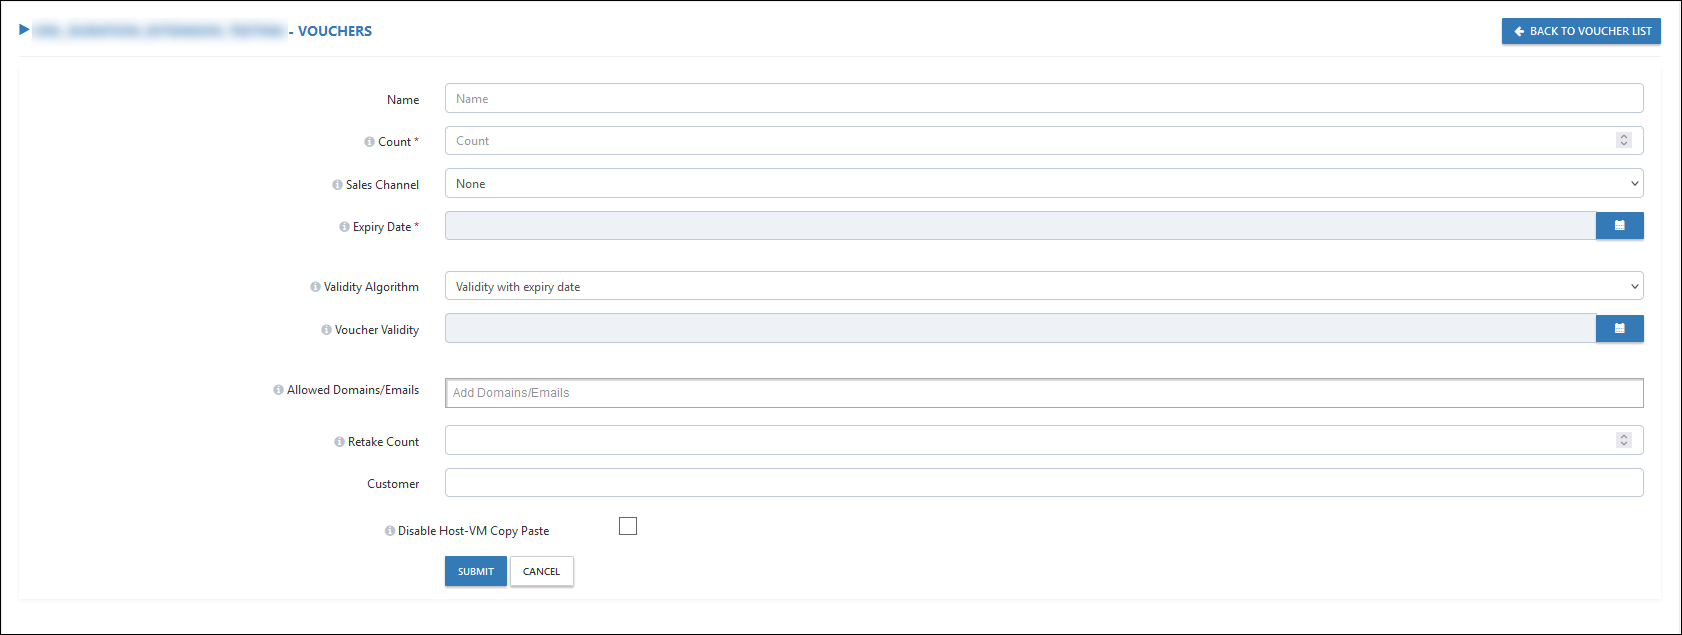
On the Add Vouchers page, enter the following details and click on Submit.
Name: Enter a name for the voucher group for identification.
Count: The number of vouchers to be generated.
Expiry date: The date up to which the vouchers will be valid.
Validity Algorithm: This field offers two options: None and Validity with Expiry Date, from which you should select the appropriate category.
Voucher Validity: This option becomes available only when the Validity Algorithm is set to Validity with Expiry Date. If the voucher is redeemed before the expiry date, it will remain valid until that date for any subsequent retakes.
Allowed Domains/Emails: Here, provide the domains/email IDs that are allowed to redeem the vouchers. If left blank, any email address/domain will be allowed to redeem the voucher.
Retake Count: It allows the same user to redeem the same voucher multiple times, up to the specified count. If the Retake Count is 0, it means no retake of the lab is allowed, and the user will be able to interact with the lab only once until it expires. If the Retake Count is set to 1, the user can take the lab twice, and so on.
Customer: Here, provide the name of the customer associated with the lab or course.
Disable Host-VM Copy Paste: If enabled, this setting will disable the copy-paste functionality within the VM.

Once the vouchers are created, they will appear as follows. The ones that are already redeemed will have Redeemed under Status, while the ones that can be redeemed will have Available under Status.

These vouchers can be sent to attendees for redemption and access to the labs. To see how Vouchers can be redeemed, have a look at this documentation.
Option 2: Invite with Email
CloudLabs offers the flexibility to invite users directly from the Admin Portal, eliminating the need for attendees to redeem a voucher or register through a link. With this feature, all lab details will be conveniently delivered to the attendee's email address, ensuring a seamless access experience.
How to Invite Users
Once you are in the admin portal, click on the Users button corresponding to the ODL, as shown in the image below.

Now you are on the Users Page. Click on the + Add User button, as shown below.

Fill in the following details to add a user.
First Name
Last Name
Email
Organization
Country
After entering this information, click on the Submit button.

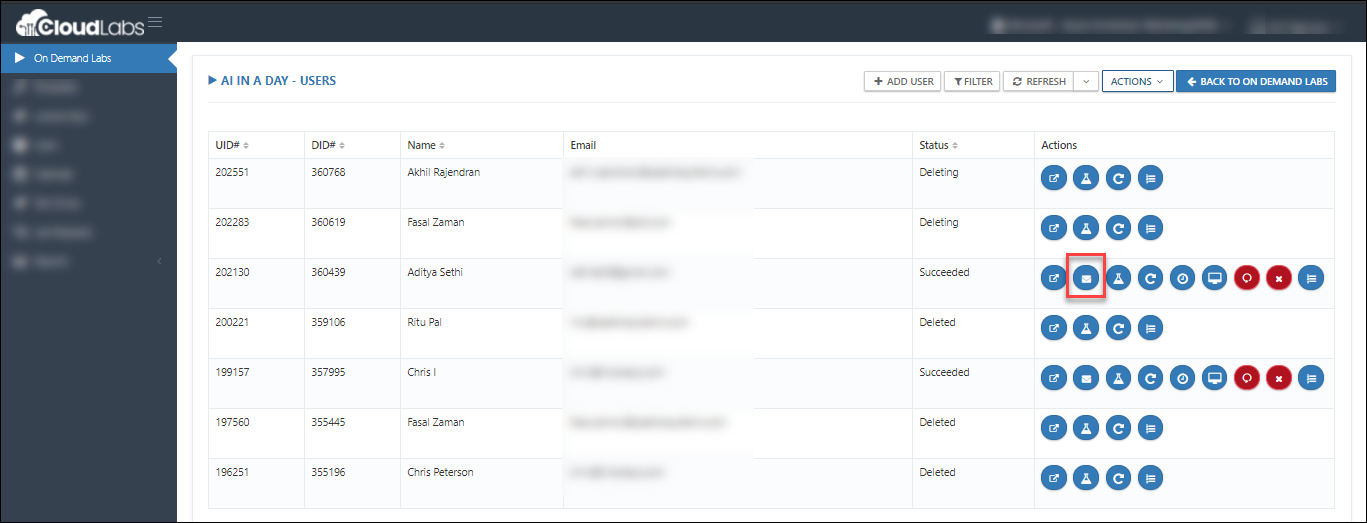
Now click on the send invite option on the user's page, as shown below:

Users will receive an email with all the lab details, which can be used to access the lab seamlessly.
If there are any issues or if additional assistance is needed, please contact our support team for help Contact Support