What is CloudLabs Course?
CloudLabs course lets you package various learning resources, such as video, MS Learn, text, hands-on labs, challenge labs, assessments, etc., in a self-paced course accessible via the CloudLabs Learner portal (e.g., portal.cloudlabs.ai).
CloudLabs course is a collection of ODL packages in a proper flow, so you must create the required templates and ODLs for your labs, assessments, and videos prior to creating the course.
How to create courses in the CloudLabs Portal
Please refer to the below link to follow the login process.
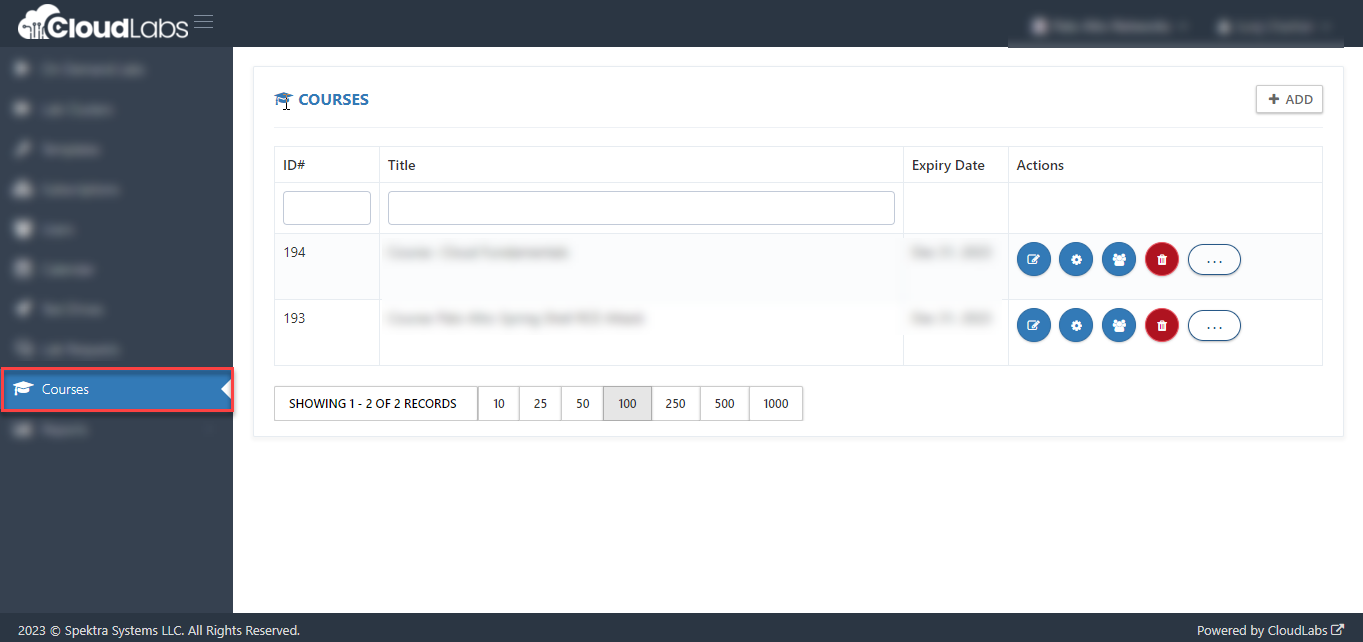
Go to the Courses section, as shown in the screenshot below:
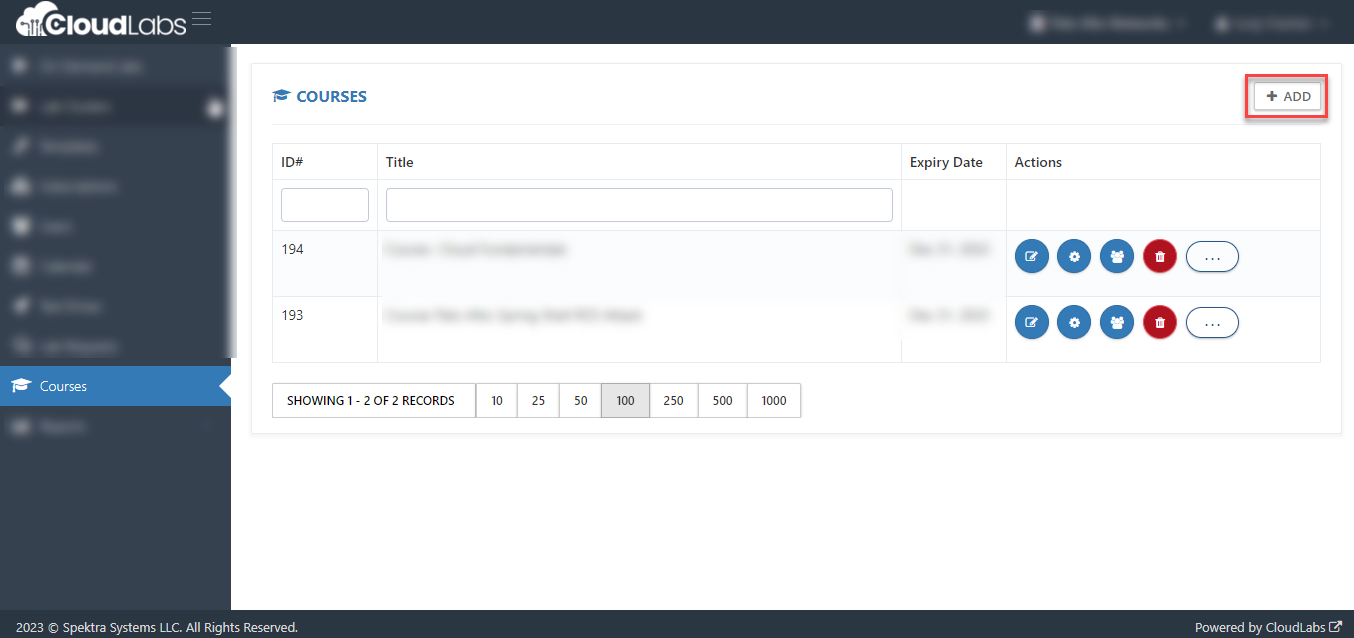
On the right side, you will see the add option to create a course, as shown in the screenshot below:
Please fill in the respective columns as per the requirements and click on Submit, as shown in the screenshot below:
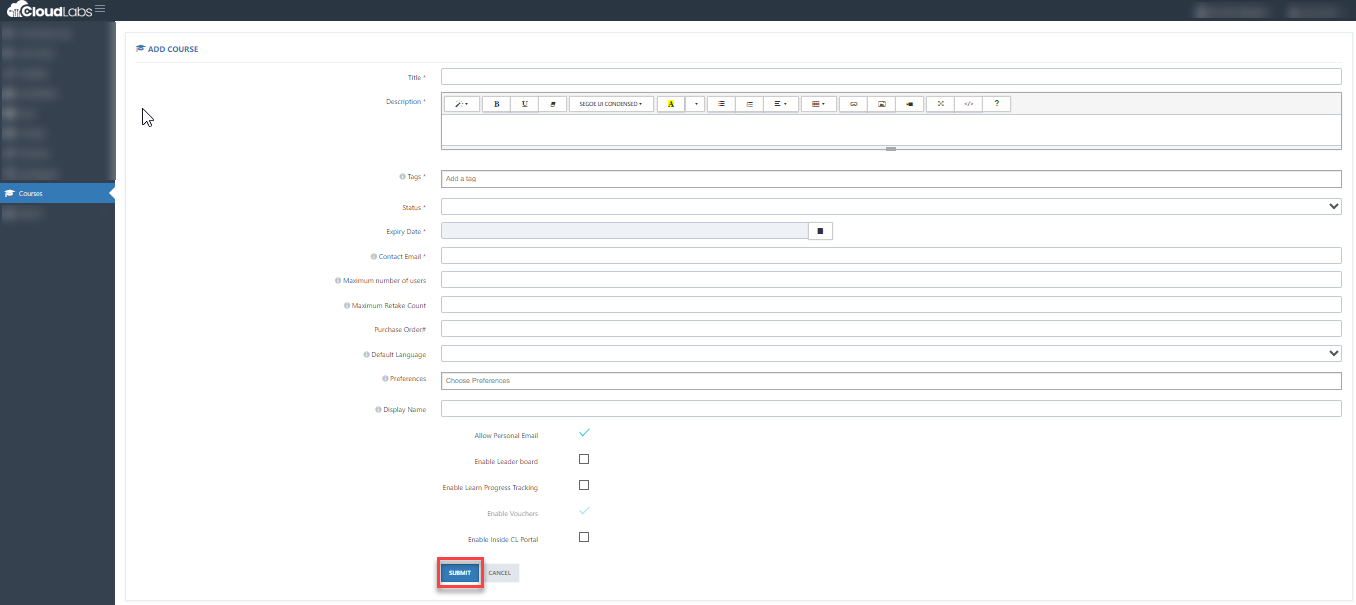
Title: Name of the course.
Description: Course description that provides an overview to the user before starting the course.
Tags: Assign one or more tags to the course.
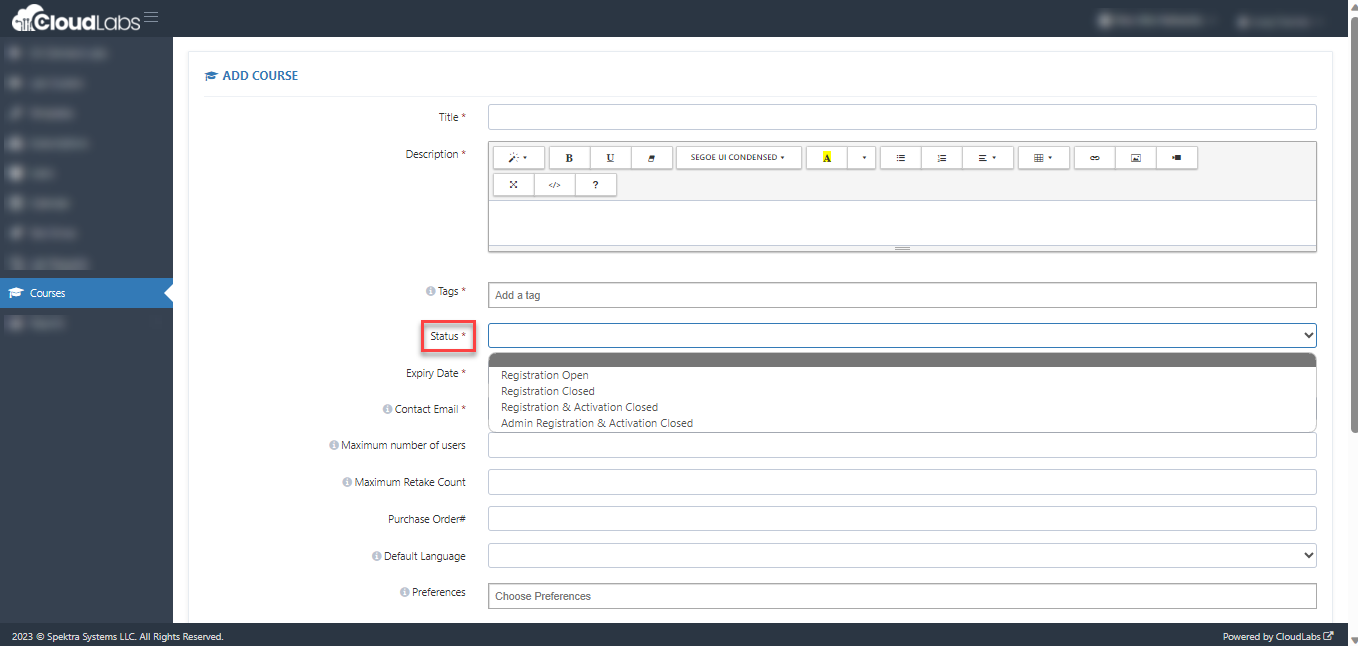
Status: Describes the status of the course, select the status from the following as per your requirement.
Registration Open: The course is active, and users can register for the course.
Registration Closed: The course is no longer available, and users won’t be able to register.
Registration & Activation Closed: Users cannot register for the course and cannot activate the course.
Admin Registration & Activation Closed: Admins and users can neither register nor activate the course.
Expiry Date: The end date of the course. Users will not be able to enroll after this date.
Contact Email: Point of contact of the course owner in case a user faces any issues during the course.
Maximum number of users: The maximum number of users who can register for the course. This is not a mandatory field; if not provided, there will be no limit to the number of users.
Maximum Retake Count: The maximum number of times a user can retake the course with the same email address if he or she does not have any active deployment. This is not a mandatory field; if it is not provided, users can only take the course once.
Display Name: This name will be displayed on the course page.
Allow Personal Email: Enable this option if you want to allow users to register with their personal email address.
Enable Leaderboard: Enable learners to engage in friendly competition based on their voucher group.
Enable Learn Progress Tracking: If you're distributing learning modules from MS Learn, enable this to track completion checks.
Enable Voucher: Use a voucher to distribute the course.
Enable Inside CL Portal: Must be enabled
Custom Portal: If you've got a dedicated learner portal deployed for your organization, you can choose that here. By choosing a custom portal, this course will be available in the catalog in the portal. (example.cloudlabs.ai). If you plan to distribute via portal.cloudlabs.ai you do not have to select this.
Allowed Email Domains: Domains that are allowed to register for the courses.
Fetch the CLID of the required ODLs you want to include in the course.
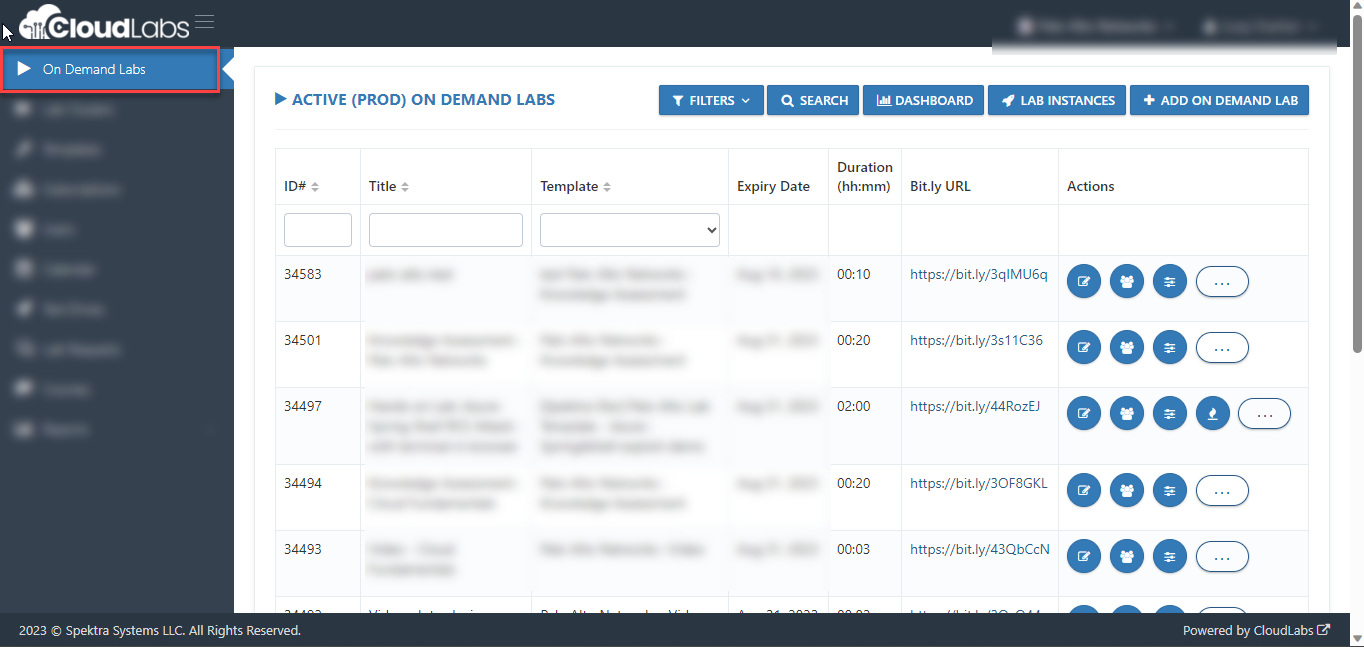
Navigate to the On-demand lab section.
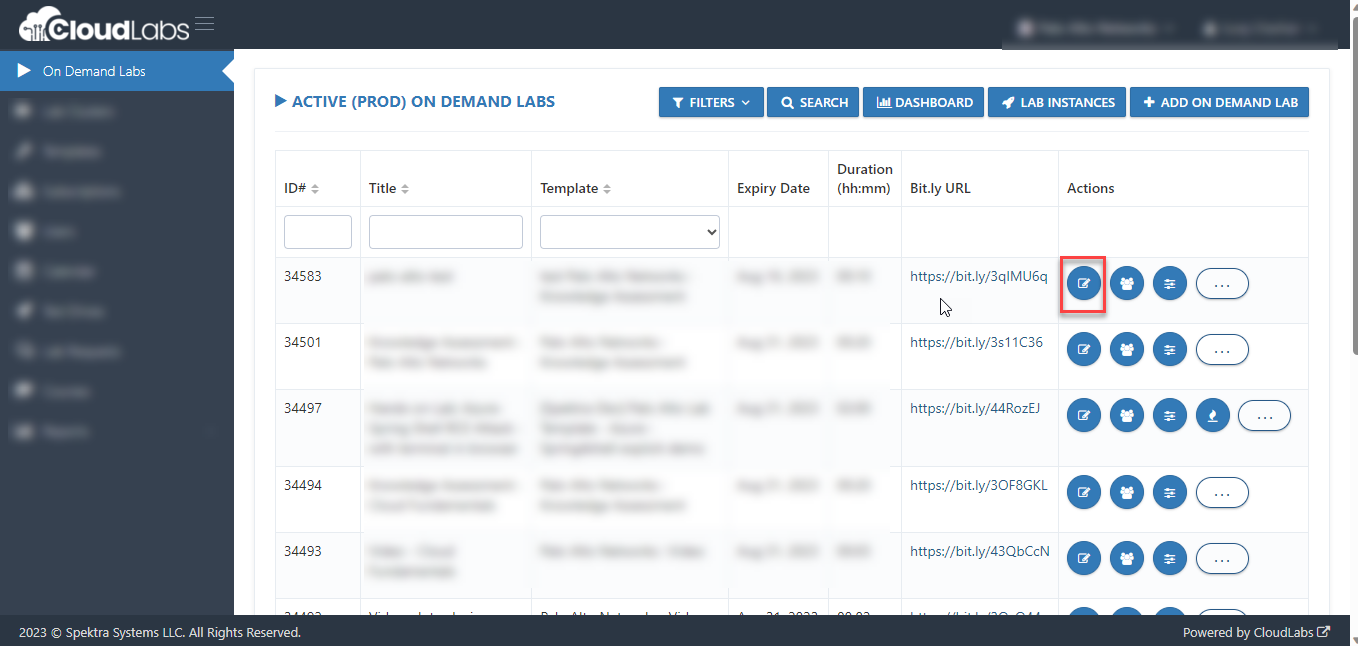
Click on the Edit option of the corresponding On-demand lab.
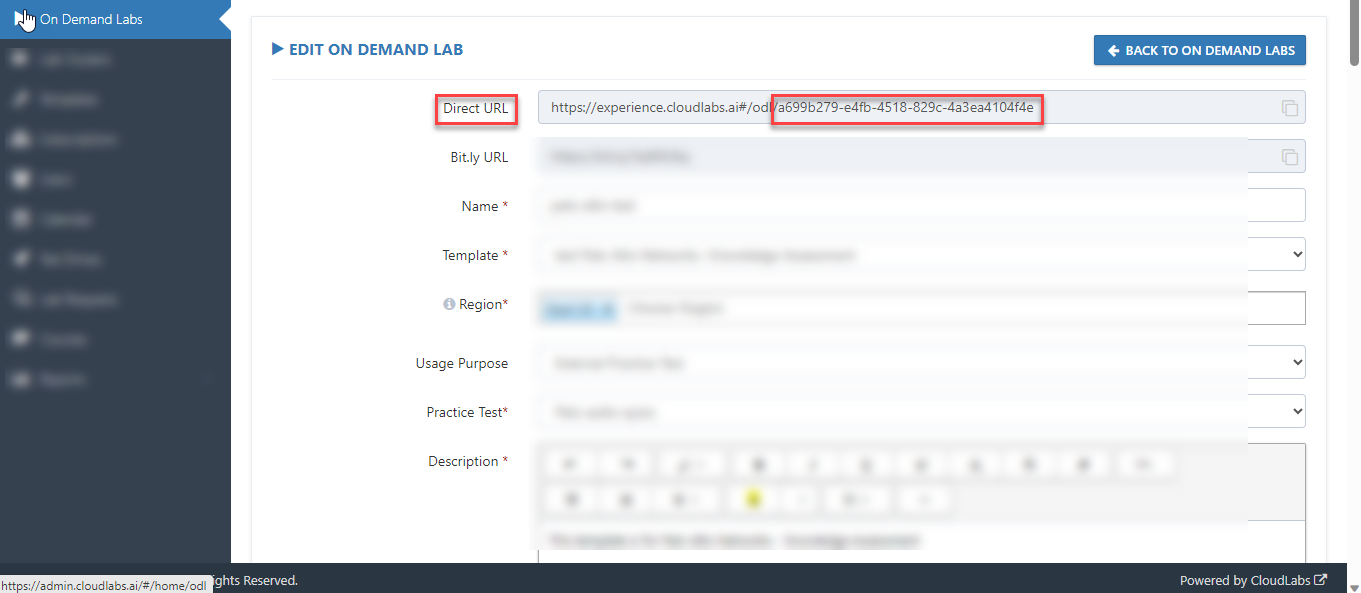
Copy the alpha numeric code from the registration URL and save the CLID; this will be used in the future.
Next, we'll need to create a configuration for your course in JSON format. Here is the format for each type of learning resource and a sample course format for your reference.
Add Labs:
{
    "uid": "enter-a-uid-for-this-component",  // You can create an ID to uniquely identify this component in course
    "type": "lab",
    "title": null,
    "url": null,
    "icon_url": "https://cloudlabsai.blob.core.windows.net/icons/hands_on_lab.svg",
    "duration_in_minutes": 0,
    "number_of_children": 0,
    "clid": "your ODL CLID",  // Change this with CLID of your lab ODL.
    "description": null

}
Add Assessments:
{
    "uid": "enter-a-uid-for-this-component",
    "type": "practicetest", // use knowledgeassessment or practicetest here.
    "title": null,
    "description": null,
    "url": null,
    "icon_url": "https://cloudlabsai.blob.core.windows.net/icons/practice_test.svg",
    "duration_in_minutes": 0,
    "clid": "your ODL CLID",
    "couponUniqueName": null,
    "modules": null,
    "unlockrules": null

}
Add Video:
 {
   "uid": "lecture1",
   "type": "lecture",
   "title": "Your title",
   "url": "",
   "icon_url": "https://experienceazure.blob.core.windows.net/logo-images/videologo.png",
   "duration_in_minutes": 2,
   "number_of_children": 0,
   "clid": "your ODL CLID",
   "description": null
}
Each component includes various configuration options, as explained below.
uid - Unique id for the component in the course. You can enter any UID as per your choice to uniquely identify this component in the course.
type - Type of course part, whether learning path, lab, lecture, or practice test.
title - If you need a custom title for this component, otherwise the ODL title is taken by default.
url - URL can encompass various types of information that offer users valuable insights into the course.
icon url – This is the logo of the lecture’s favicon image.
duration in minutes - Expected time to complete this.
number of children - If you've got sub-components, you can update this here.
clid – The on-demand lab (ODL) ID with which you want to associate the course.
description – Provide a small description to the user on how to launch or go through the course.
You can create various sections and package various learning components into different sections. Here's an example of course configuration.
{
    "course": {
        "uid": "YourCourseUID",
        "type": "cert",
        "title": "Your Course Title",
        "subtitle": "Your Course Description ",
        "url": "https://www.example.com/", //Home page URL
        "icon_url": "https://learn.microsoft.com/en-us/media/learn/certification/badges/microsoft-certified-associate-badge.svg", // Icon to use for course
        "learningPath": [ // Starting Section
            {
                "uid": "YourSectionUID",
                "type": "learningPath",
                "title": "Your Section Title",
                "description": "Your section Description",
                "url": "https://example.com/", // Refrence URL for section
                "icon_url": "https://learn.microsoft.com/en-us/training/achievements/generic-badge.svg",
                "duration_in_minutes": 180,
                "clid": null,
                "couponUniqueName": null,
                "modules": [
                    {
                        "uid": "yourvideocomponentuid",
                        "type": "lecture",
                        "title": "ae0581a4-7e6a-46cf-a35b-896058513be8",
                        "url": "",
                        "icon_url": "https://experienceazure.blob.core.windows.net/logo-images/videologo.png",
                        "duration_in_minutes": 2,
                        "number_of_children": 0,
                        "clid": "your ODL CLID",
                        "description": null
                    },
                    {
                        "uid": "yourlabcomponentuid",
                        "type": "lab",
                        "title": null,
                        "url": null,
                        "icon_url": "https://cloudlabsai.blob.core.windows.net/icons/hands_on_lab.svg",
                        "duration_in_minutes": 0,
                        "number_of_children": 0,
                        "clid": "your ODL CLID",
                        "description": "lorem lupsum"
                    },
                    {
                        "uid": "yourlabcomponentuid",
                        "type": "lab",
                        "title": null,
                        "url": null,
                        "icon_url": "https://cloudlabsai.blob.core.windows.net/icons/hands_on_lab.svg",
                        "duration_in_minutes": 0,
                        "number_of_children": 0,
                        "clid": "your ODL CLID",
                        "description": "lorem lupsum"
                    },
                    {
                        "uid": "yourlabcomponentuid",
                        "type": "knowledgeassessment",
                        "title": null,
                        "url": null,
                        "icon_url": "https://cloudlabsai.blob.core.windows.net/icons/knowledge_assessment.svg",
                        "duration_in_minutes": 0,
                        "number_of_children": 0,
                        "clid": "your ODL CLID",
                        "description": "lorem lupsum"
                    }
                ]
            }
        ]
    }
}
Once you have the JSON ready, you can update this in the course config.
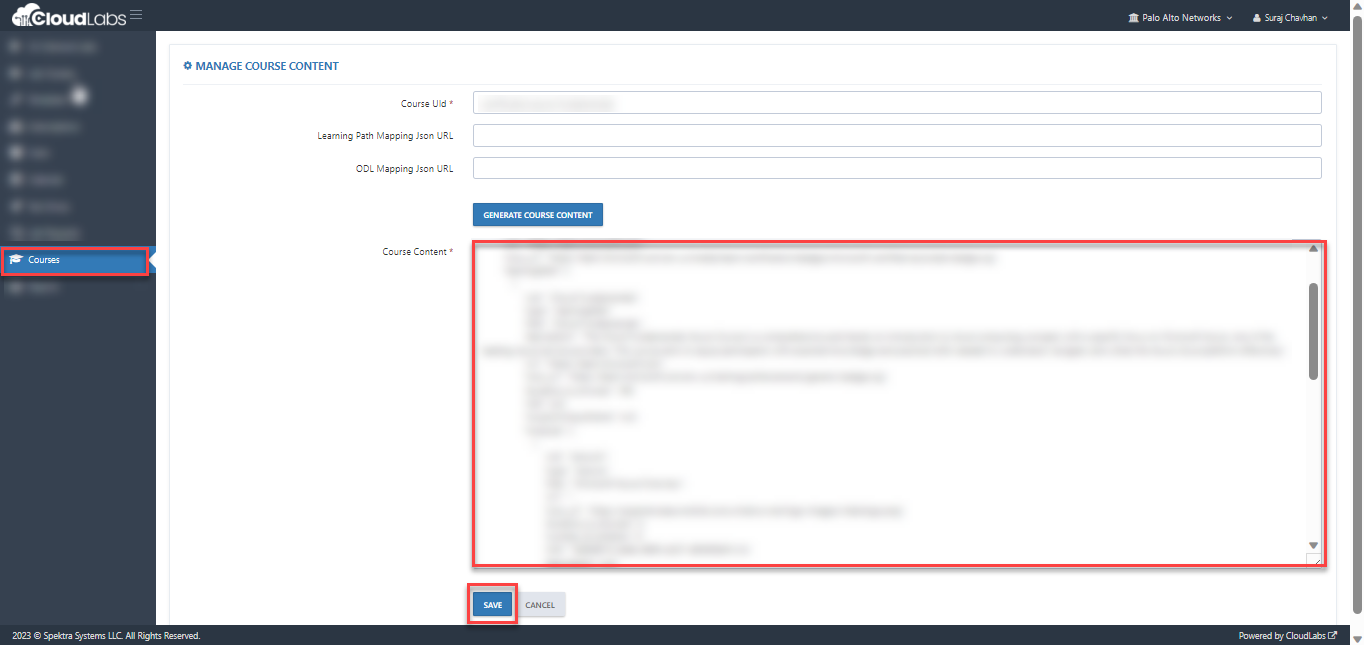
Click on the Courses from the left pane, and then click on Manage Course Content under actions corresponding to the course as shown in the screenshot.
Clicking on the settings icon will open the course content.
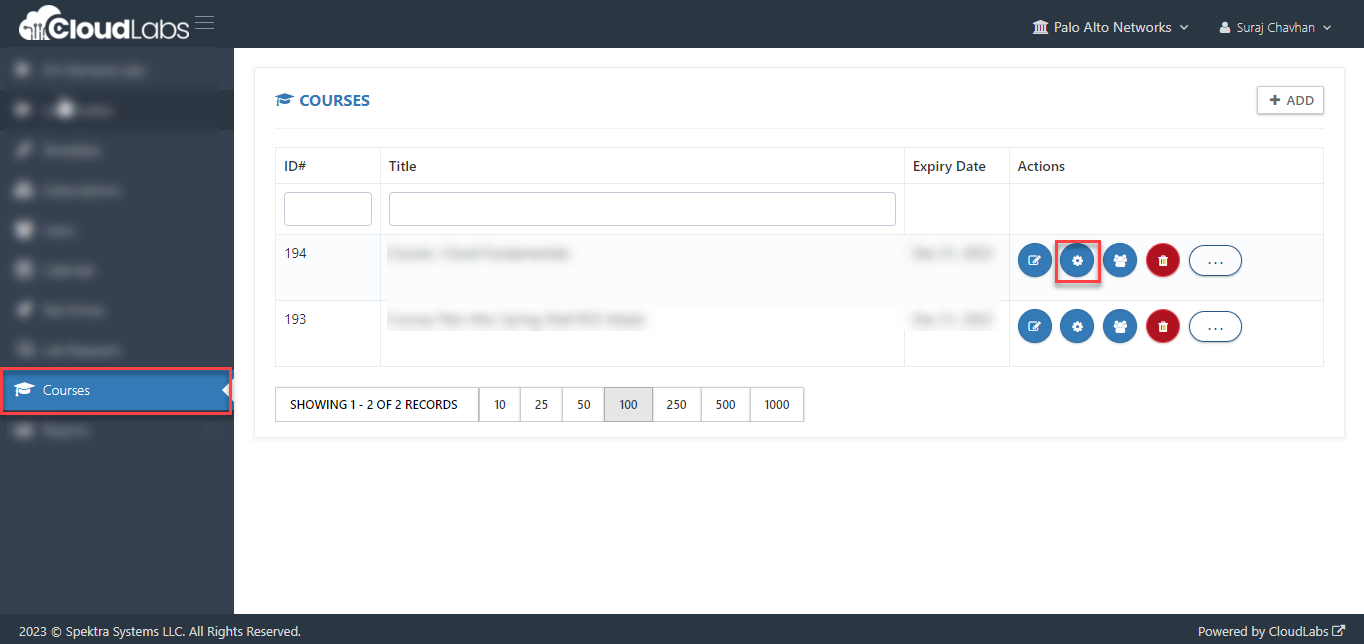
Enter the course configuration prepared earlier.
Distribute Course with Voucher
You can generate vouchers for your course and distribute them with the voucher, you can do this by following the steps below.
Go to the Courses section, as shown in the screenshot below, and click on more options for your course.

Click on Add Voucher and enter the following information.
Name: A unique name for you to identify this voucher group.
Count: Required number of vouchers
Expiry Date: Expiry date for vouchers.
Validity Algorithm: You can set course validity to align with the expiration date of the voucher or a specific date.
Whitelist Domains/Emails: If you want these vouchers to be restricted to certain email domains, you can specify that.
Customer: Just a reference for you to track voucher purposes.
Purchase Order: Just a reference for you to track the voucher purpose or PO for your internal finance.
Group Name: Enter an alphanumeric value; vouchers that are a part of the same group will be considered for the Leaderboard.
Partner ID: Just a reference, for you to track voucher purposes.
Once vouchers are generated, you can download and distribute them to the learners.
Best Practices for Adding Courses
Course Content should be in JSON format.
Each learning component in the course might have a different type, such as Video, Document, Lab, and practice test/knowledge assessment, ensure to declare the type in the JSON file of the course content.
CLID for the learning component can be obtained from the ODL settings.
If you are distributing the course with vouchers, then make sure that the expiry date for vouchers is set accordingly to the ODL and course expiry date.
If you want these vouchers to be restricted to certain email domains, you can specify that under the Whitelist Domains/Emails.