Overview
This article provides instructions for accessing your lab VMs in the CloudLabs portal and outlines the available lab-related options.
Access Labs
Sign Up or Sign In: Visit the CloudLabs portal and sign in using one of the available Single Sign-On (SSO) options: Microsoft account, Google, or LinkedIn account. Alternatively, you can create a new account by entering some basic details.

Once logged in, navigate to the My Virtual Machine section to view all the VM Labs assigned to you.
.png)
Lab Details
Each block in the My Virtual Machine section represents an individual lab with the following information:
Lab Name: The name assigned by the lab creator.
Operating System: Represented by an icon indicating the operating system of the lab VM.
VM Uptime Quota: Displayed as a progress bar showing both assigned and consumed quota hours. If no progress bar is visible, then the lab is restricted to scheduled hours only.
Lab Expiry Date: Indicates when the lab will be deleted, resulting in the loss of all associated data.
VM State: The power state indicates the current status of the VM instance.
CloudLabs Direct Web Connect: This provides the functionality to directly access the VM using RDP/SSH over the web.
.png)
Lab Actions
This section explains the different ways you can interact with the lab.
Launch Lab: Before using the lab, you must launch it. This action is a one-time process that deploys a VM Lab instance and assigns it to you. This process takes around 5 minutes to complete. Please note that launching is only possible if the lab admin has enabled lab access.
.png)
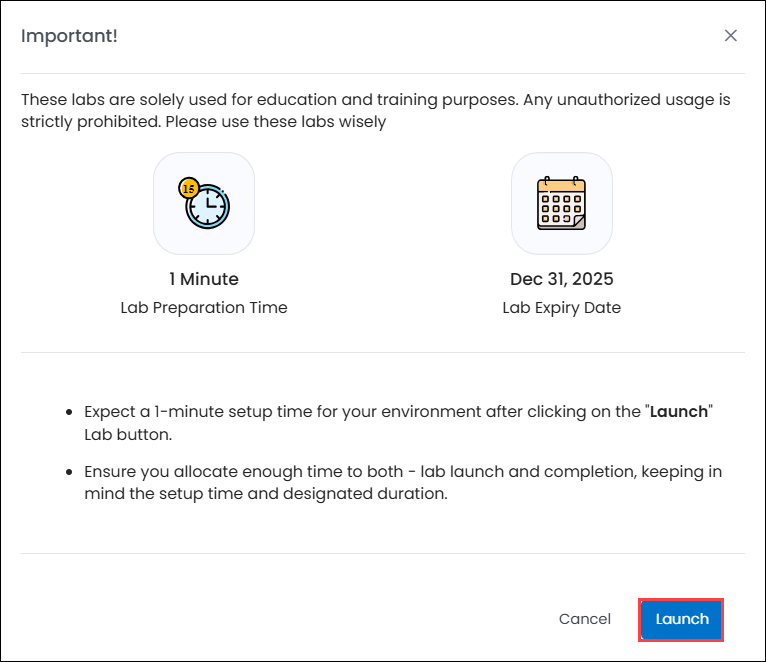
After clicking on Launch read the message displayed in the pop-up carefully, and then click Launch again to confirm.
Start/Stop VM: These options are available if lab access is enabled. To manage costs effectively, you can stop the VM when it is not in use.
.png)
Connect to VM: Click the “Connect” button to access your VM once it is running. If Direct Web Connect is enabled, you will be able to access your VM directly using a web browser. Otherwise, connection details for RDP or SSH will be displayed, which you can use to establish a connection to the VM Lab instance.
.png)
Connect VM using a Remote Desktop Connection
For Windows Users:
If you want to launch the VM using a remote desktop connection from your personal/work/local computer/laptop (Windows OS), you can follow these steps:
Select More options (1) and choose Show Connection Information (2) to get the details required to connect to the VM.
.png)
The required information will be displayed, containing the DNS Name, Username, and Password required for connecting to the VM.
.png)
Click on the Start (1) button on your local desktop/laptop and search for Remote Desktop Connection (2). Next, select Remote Desktop Connection (3) from the search result.
.png "image(165).png")
Paste the Lab VM DNS Name (1) copied from the Remote Desktop Information page in the Computer field, and then click on Connect (2).
.png "image(166).png")
Click on More Choices.
.png "image(167).png")
Now, click on Use a different account.
.png "image(168).png")
Now, enter the Username (1) and Password (2) that you have copied from the Remote Desktop Information page, and click on the OK (3) button. Please add a dot followed by a back-slash “.\” before the admin username.
.png "image(169).png")
Next, click on the Yes button to accept the certificate and add trusted certificates.
.png "image(170).png")
You are now connected.
.png "vm(1).png")
Alternatively, you can also download the RDP file directly. To download the RDP file and connect to the VM, follow the given steps:
On the My Virtual Machine page, select More Options (1) and choose Download Connection File (2) to download the required RDP file. Save it in a desired location where you can access it.
.png)
Double-click the RDP file and select Connect.

Follow from step (1.d) onwards from the previous demonstration to connect to the VM.
For Mac users:
If you want to launch the VM using a remote desktop connection from your personal/work/local computer/laptop (Windows OS), you can follow these steps:
On the My Virtual Machine page, select More Options (1) and choose Show Connection Information (2) to get the details required to connect to the VM.
.png)
The required information will be displayed, containing the DNS Name, User Name and Password required for connecting to the VM.
.png")
If you don't already have it installed, you must first download the Microsoft Remote Desktop application from the Mac App Store in order to begin using Microsoft Remote Desktop.
.png "image(172).png")
Open the Microsoft Remote Desktop application.
.png "image(173).png")
Click the "+" (1) icon, and then select Add PC (2).
.png "image(174).png")
.png "image(175).png")
For PC Name (1), enter the DNS Name of the Virtual Machine, and then click Add (2). You can leave the remaining settings as defaults.
.png "image(176).png")
To initiate the connection, click on the three dots (…) (1) available on the bottom right of the VM name, and then click on Connect (2).
.png "image(177).png")
Enter Username (1) and Password (2), and then click on Continue (3).
.png "image(178).png")
Click on Show Certificate (optional).
.png "image(179).png")
Click on Always Trust to prevent seeing this warning again for the PC specified (optional).
.png "image(180).png")
Click on Continue.
.png "image(181).png")
You are now connected.

Connect to VM using SSH (Secure Shell)
If you want to connect to the VM from your personal/work/local machine, you can follow these steps to connect using SSH:
Select More options (1) and choose Show Connection Information (2) to get the details required to connect to the VM.
The required information will be displayed, containing the DNS Name, User Name, and Password required for connecting to the VM.
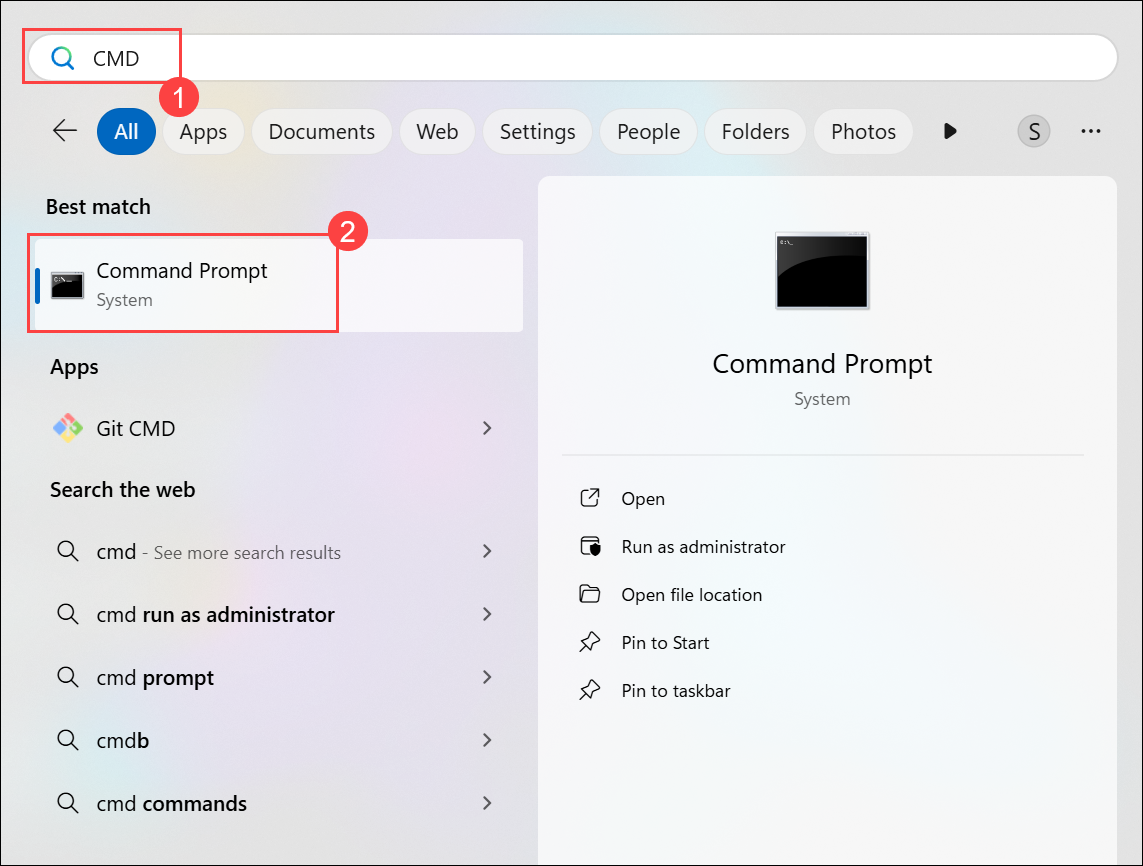
On your local desktop/laptop and search for CMD or Command Prompt (1). Next, select Command Prompt (2) from the search results.
Once the Command Prompt opens, enter the following command:
ssh <username>@<DNS-name>Replace <username> and <DNS-name> (1) with the values copied from the Connection Information page of the Lab VM
When prompted with Are you sure you want to continue connecting (yes/no/[fingerprint])?
type yes (2) and press Enter.Next, when prompted for a password (3), enter the password copied from the Connection Information page and press Enter.
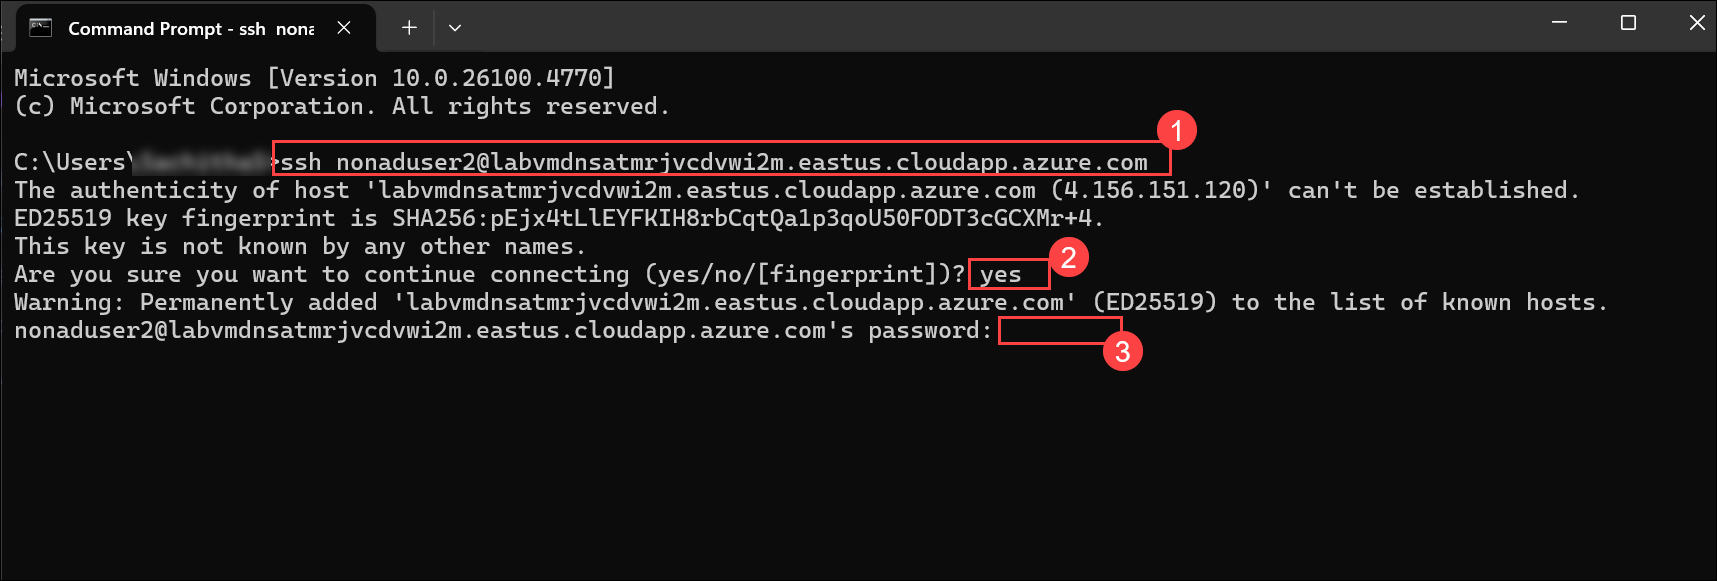
Note: As you type the password, the field will remain blank (you won’t see any characters on the screen). This is normal behavior for security reasons.
After successful authentication, you will be connected to the VM via SSH.
.png)
Note :
If you require RDP connection for a Linux VM, you will have to install the necessary RDP components within the VM using an SSH connection. Once configured, you can connect to the VM using an RDP client or download the RDP connection file for easy access.