This feature is designed to enable Amazon CloudFront to serve your S3-hosted template JSON file via a secure HTTPS URL. It is a smart and secure way to allow external access (such as from Postman or a web app) without exposing the entire S3 bucket publicly.
Steps to Set Up a File in AWS
Creating a Private S3 Bucket
Amazon S3 acts as the origin where static files (e.g., HTML, images, CSS) are stored. The S3 bucket is configured to deny direct public access to maintain data privacy.
Navigate to the S3 console and click Create bucket.
Provide a globally unique Bucket name (1).
Scroll down and ensure that Block all public access is enabled by default (2).
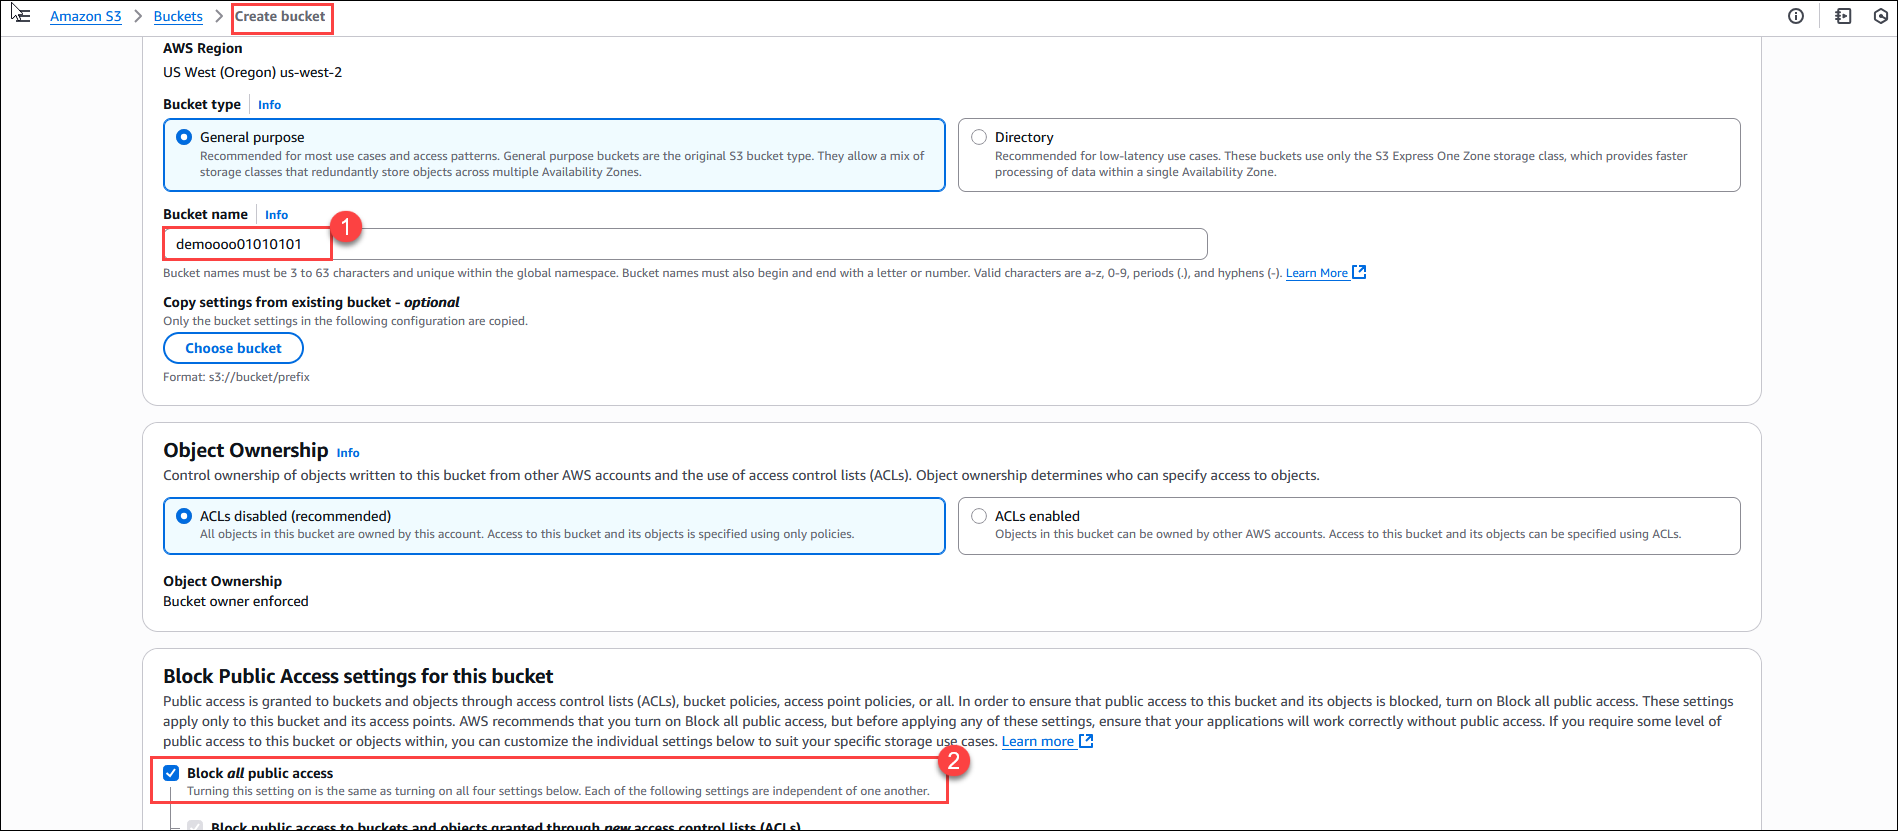
Click Create bucket.

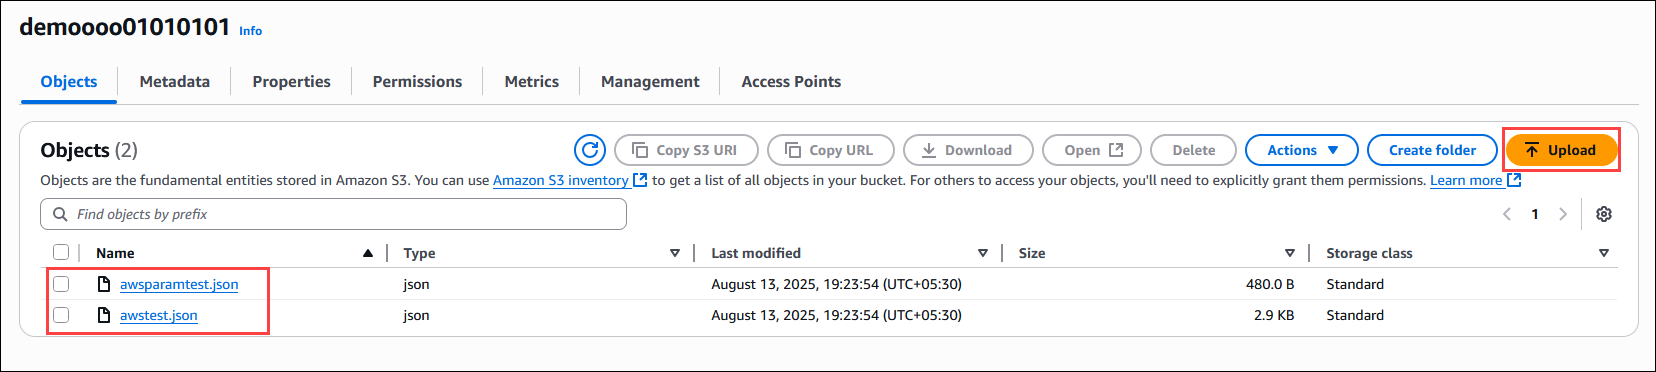
Upload sample content (e.g., index.html, images, etc.) to the bucket.
Creating a CloudFront Distribution with Origin Access Control (OAC)
Navigate to the CloudFront console and click Create distribution.
.png)
Then provide the following:
Name: Provide any name.
.png)
Specify origin: Select Amazon S3 (1). Under S3 origin, Browse (2) for the S3 bucket created earlier and select it.
.png)
Finally, click Create distribution to deploy the setup.
.png)
Note: The deployment might take time. Wait for it to finish deploying; this may take a few minutes.
Once the distribution is created, the generated bucket policy provided by CloudFront will be automatically applied to your S3 bucket. This ensures that only CloudFront (via OAC) can access the contents of the private bucket.
Accessing Content Securely via the CloudFront Domain
Access the content using the CloudFront domain name (e.g.,
https://d1yxf87yqje2uk.cloudfront.net/awsparamtest.json).The content is now securely served through CloudFront and cannot be accessed directly from S3.
.png)
.png)
Paste the copied URL from CloudFront “/” along with the file name, which is uploaded to the S3 bucket, and connect to CloudFront Distribution
.png)
.png)
Example: https://d1yxf87yqje2uk.cloudfront.net/awsparamtest.json
Restrict access to requests with a specific header
Navigate to the CloudFront service in the AWS Management Console, click Functions (1) in the left panel, then click Create function (2).
.png)
Name your function something like RestrictByReferer. Click on the Create function.
.png)
Once the function is created, scroll down to the Function code section. Paste the code below and click Save changes.
Function code: Paste the following JavaScript code into the function editor:Note: For const allowedValue and headers, please reach out to the CloudLabs team. They will provide the value and headers, which you can then use inside the function.
 function handler(event) {
     const request = event.request;
     const headers = request.headers;
      const allowedValue = "";
     if (headers[''] && headers[''].value === allowedValue) {
         return request;
     }
     return {
         statusCode: 403,
         statusDescription: 'FORBIDDEN',
         headers: {
             'content-type': { value: 'application/json' },
             'cache-control': { value: 'no-store' }
         },
         body: JSON.stringify({
             message: 'FORBIDDEN',
             details: 'Only specific Referer allowed.'
         })
     };
 }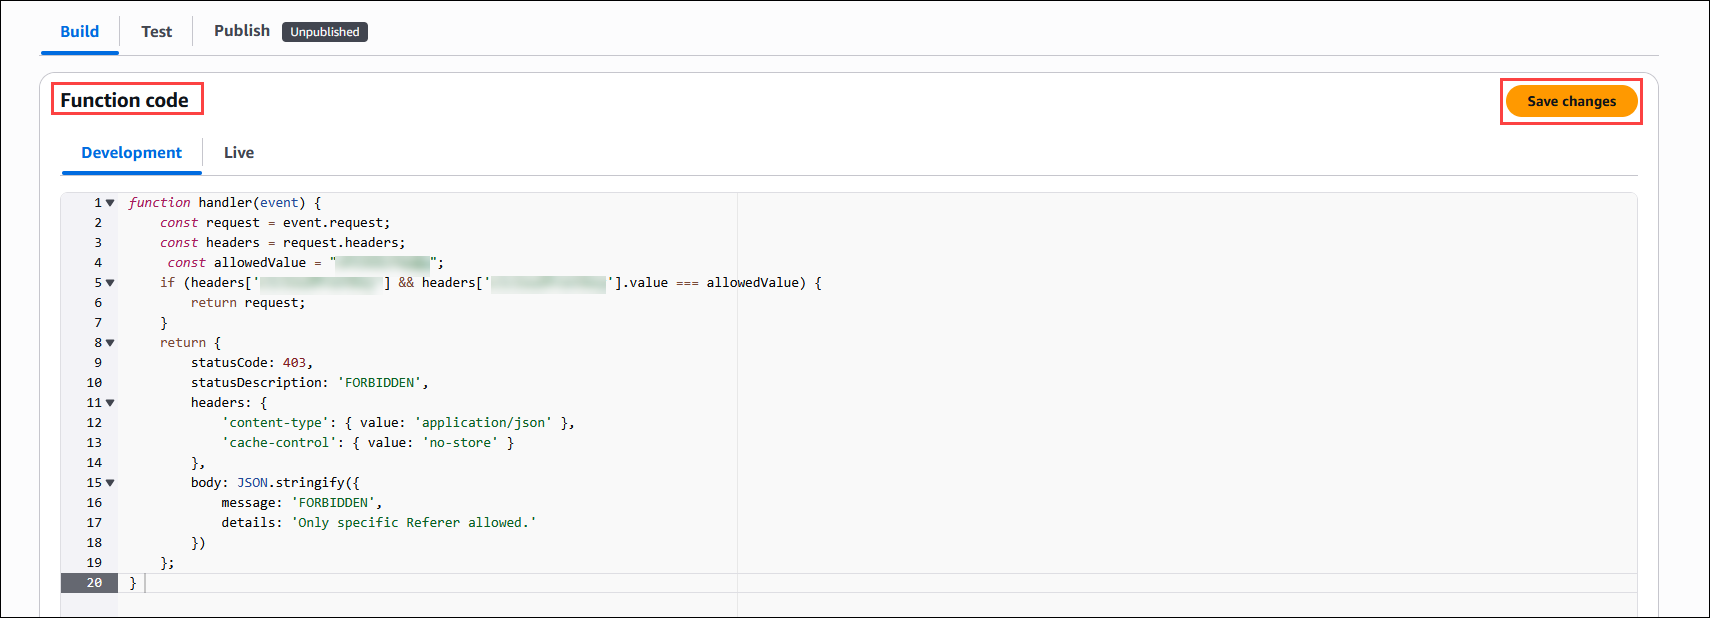
Publish the Function:
After saving the code, select the Publish section.
Click the Publish function to activate the function version for use.
.png)
Associate the Function with a CloudFront Distribution:
Go to your CloudFront distribution.
Select the distribution (1) and click the Behaviors (2) tab.
Choose the default (3) behavior and click Edit (4).
.png)
Scroll down to Function associations, select CloudFront Functions as the function type, and choose your function (RestrictByReferer) from the dropdown.
Click on Save changes.
.png)