CloudLabs unique design of the hands-on lab environments provides fast learning, easy-to-use, interactive, and effective learning experience. Here we will explore some of the most important details and features within the lab environment that helps in seamless technology training.
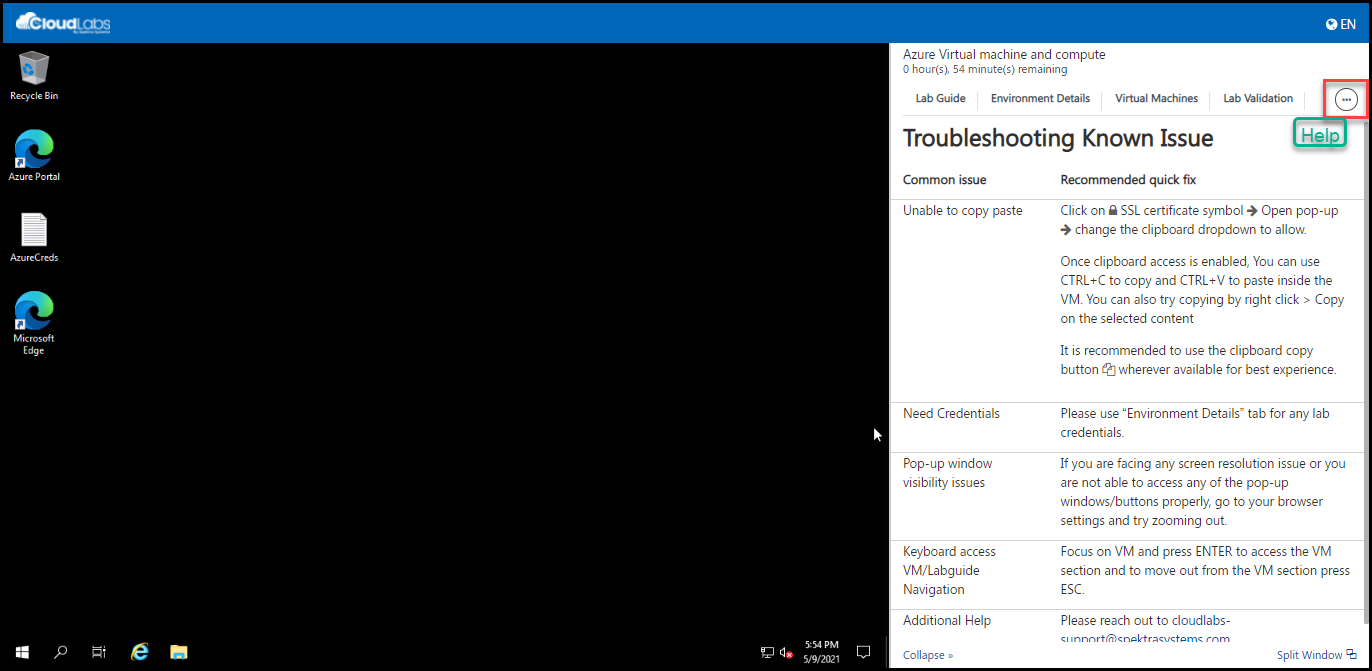
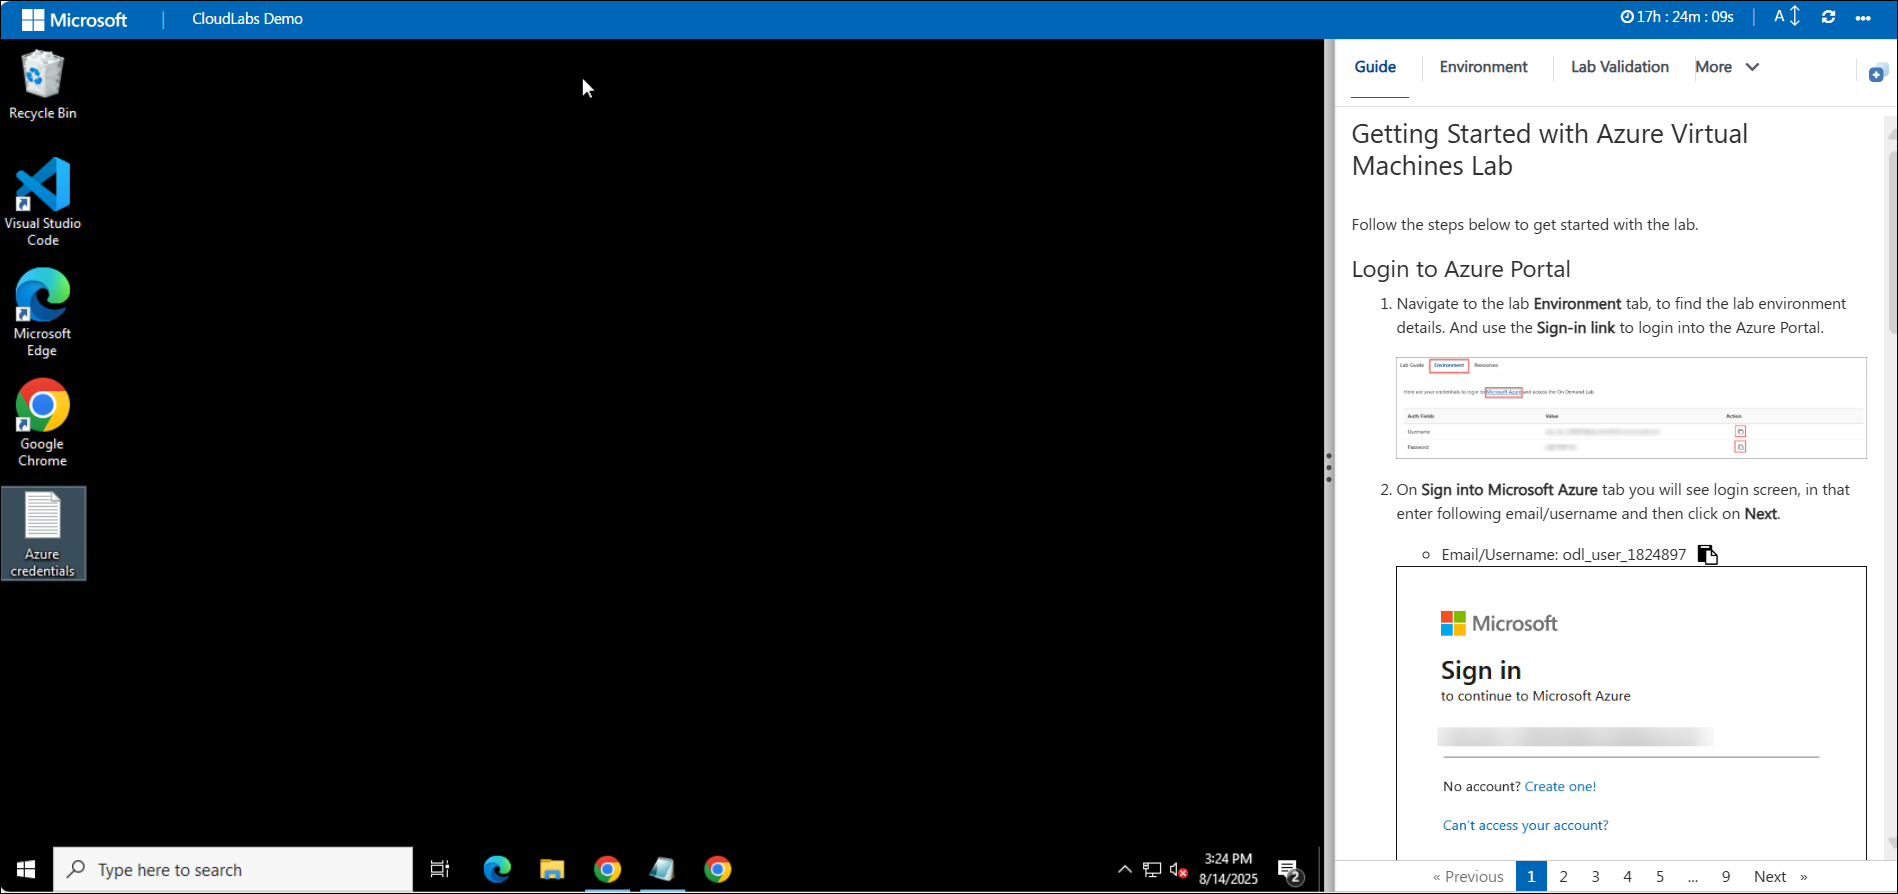
Once you Launch the lab environment, you will see a screen like the below screenshot. On the left side, you will get the virtual machine (JumpVM) and on the right side, you will get the Lab Guide and other important details.
Next, we will be exploring each section in detail.
Lab Guide tab
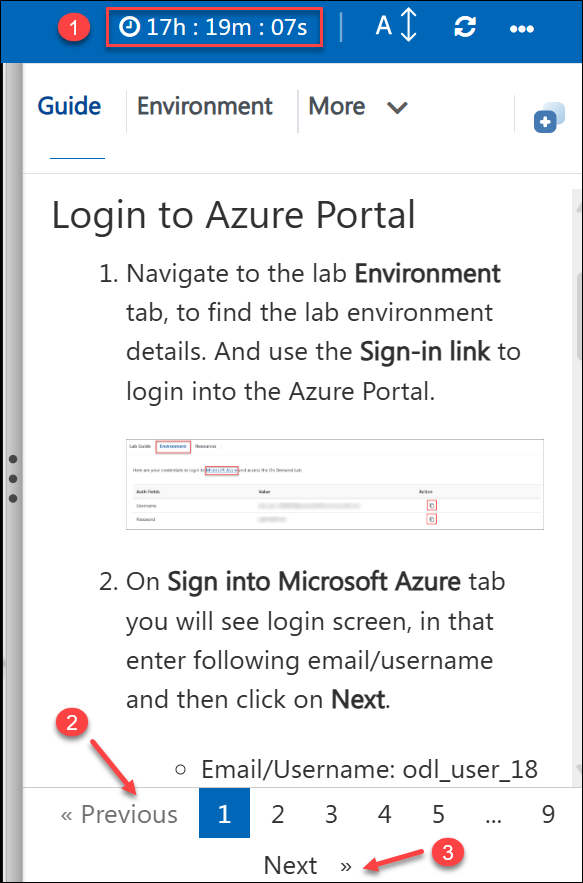
This section contains various information related to the lab, typically containing multiple pages of information. The first thing you will notice in this section is the duration (1) of the lab. Keep track of duration as the lab will be inactive and auto-deleted after the timer runs out. You can skip through the Lab guide information using the Previous (2) and Next (3) buttons or directly navigate to the desired page by clicking on the page number.
Environment Details tab
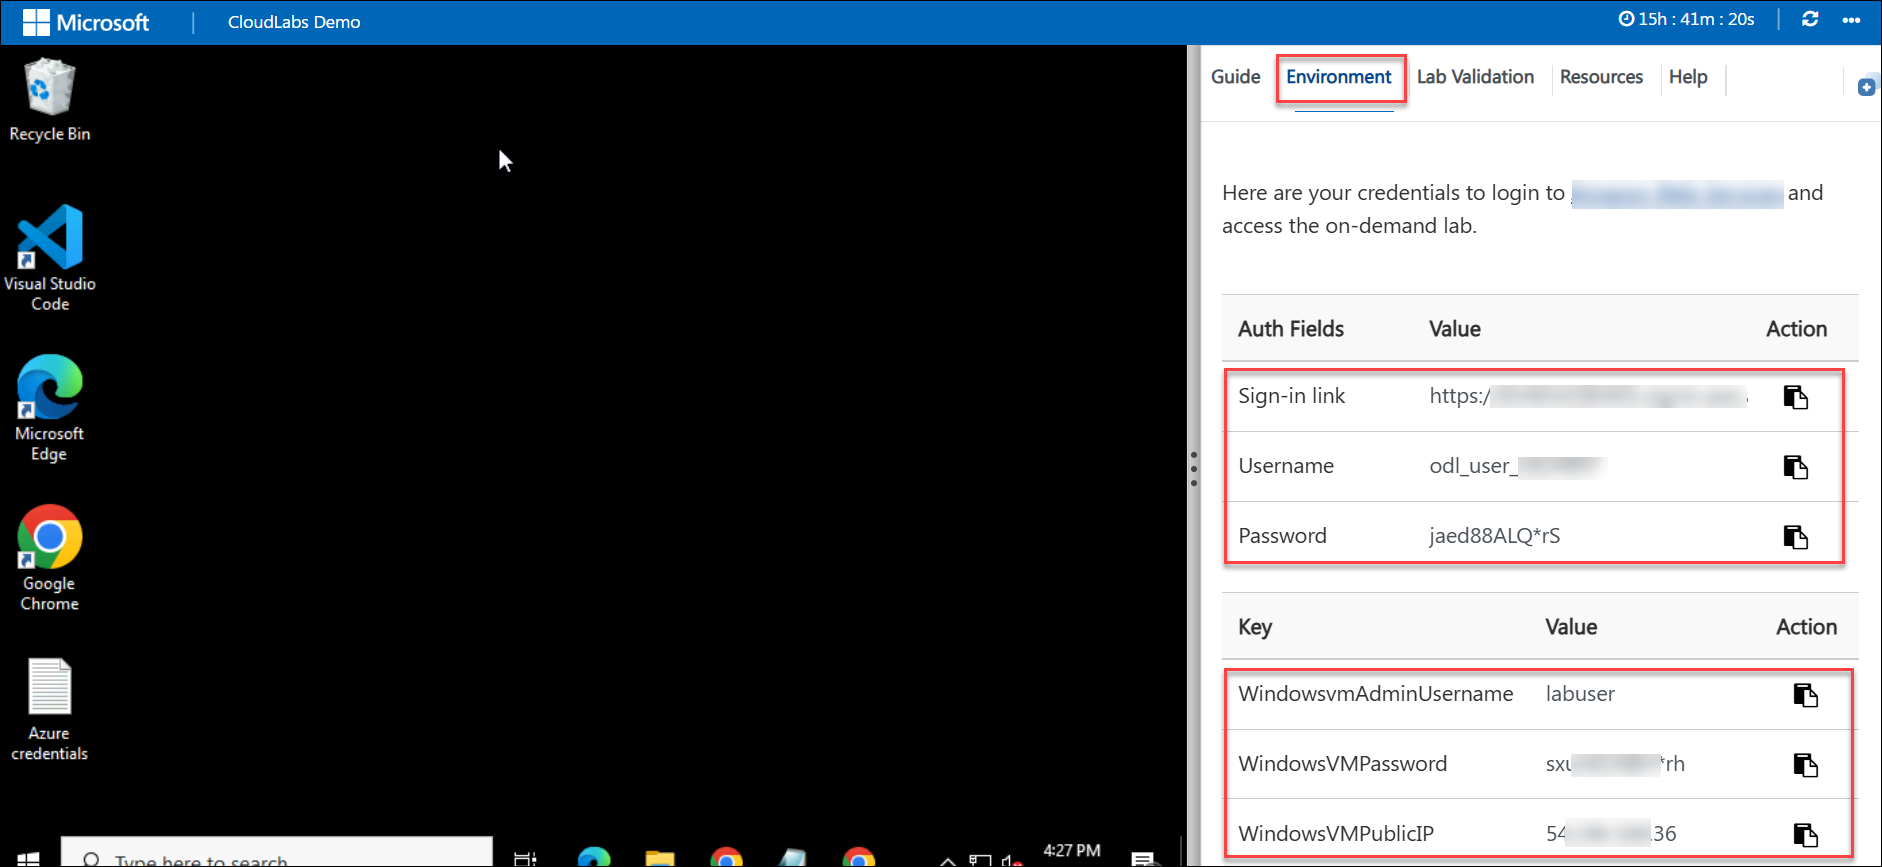
Next to the Lab Guide is the Environment Details tab, under this you will have details of Azure login credentials, Lab VM credentials, and any other relevant information.
Resources Tab
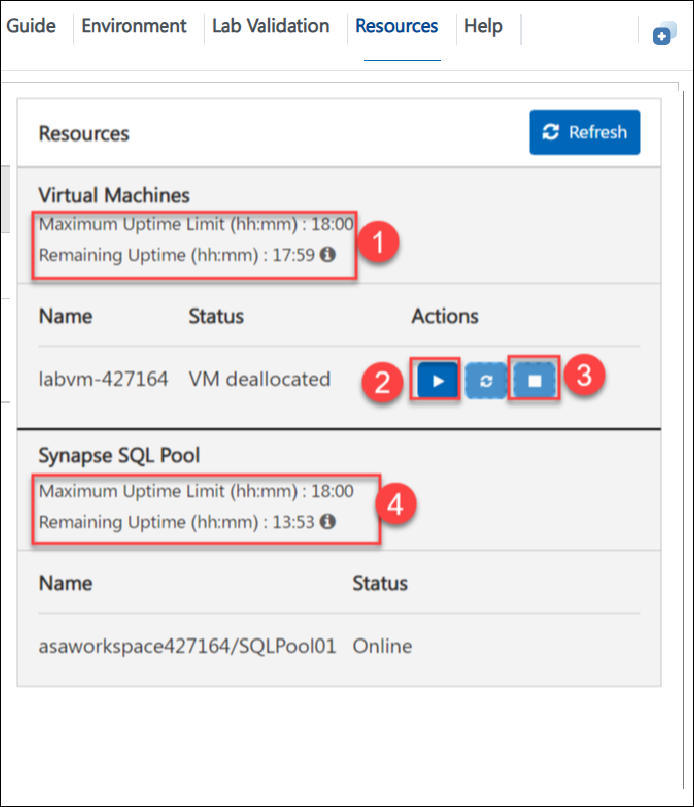
Under the Resources tab, you can manage various resource operations. On this screen, you can see the Environment Uptime limit (1). You can also Start (2) or Stop (3) the VM as per requirement. Also, you will be able to view the Synapse SQL Pool Uptime limit and status under this tab.
Important: Auto polling is done every 15 minutes for both VM and Synapse pool. Also, please stop the VM whenever it is not in use to keep cloud costs under control.
Check Virtual Machines Status
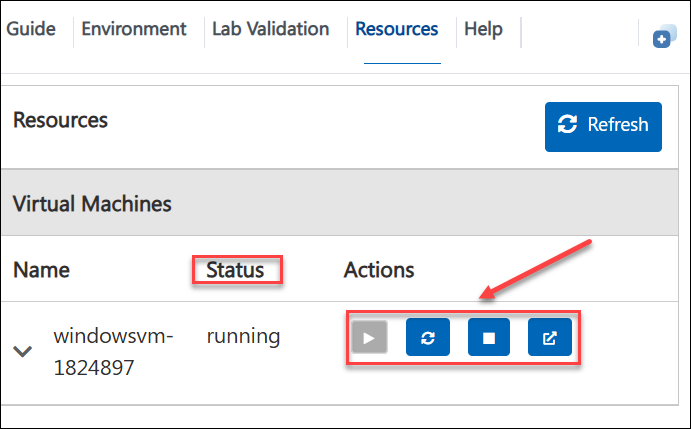
Sometimes due to technical issues, the virtual machine might get disconnected or stop responding. You can verify the status of the virtual machine under the Virtual Machines Tab. You should see VM running as the Status. If not, you can also choose to start it by clicking on the start button.
Additional Information
While using the lab environment, there are a few key components that you need to be aware of. It is a good idea for learners to identify the information because it will enhance learning. Let's go over these sections one by one.
Understand the duration
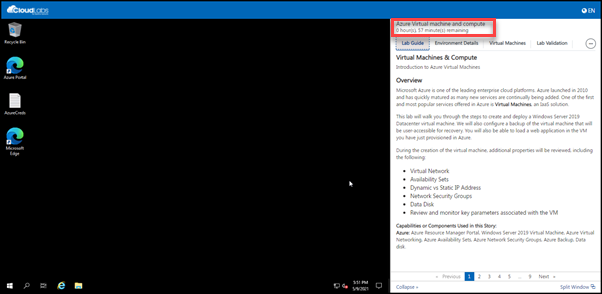
Every Lab environment has a specified timer that indicates the duration of the session. It is very crucial for learners to keep track of the duration because once the timer runs out, the lab environment will be auto-deleted.
Toggle the Full-screen view
To toggle between full-screen and windowed mode click on the ellipsis icon (1) and click on Toggle full-screen view (2).
.png)
Lab Validation tab
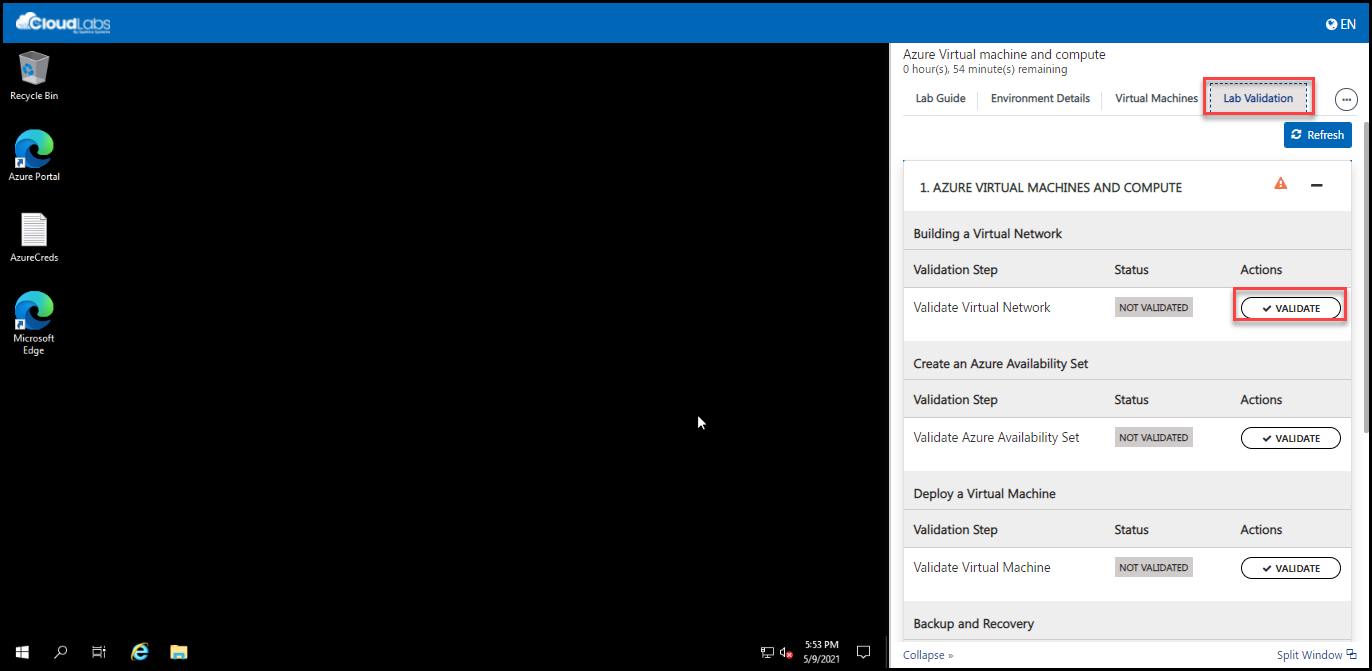
You can use the Lab validation tab to validate the steps in the Lab Guide. Lab Validation is only available for specific courses.
Help Section
Learners can access the Help section by clicking on the ellipsis icon (three dots). The Help section covers some of the most common issues and the troubleshooting steps that can be performed by the learner. It is recommended to go through the Help section before contacting the instructor or CloudLabs Support team for help, as it will save valuable time.
